
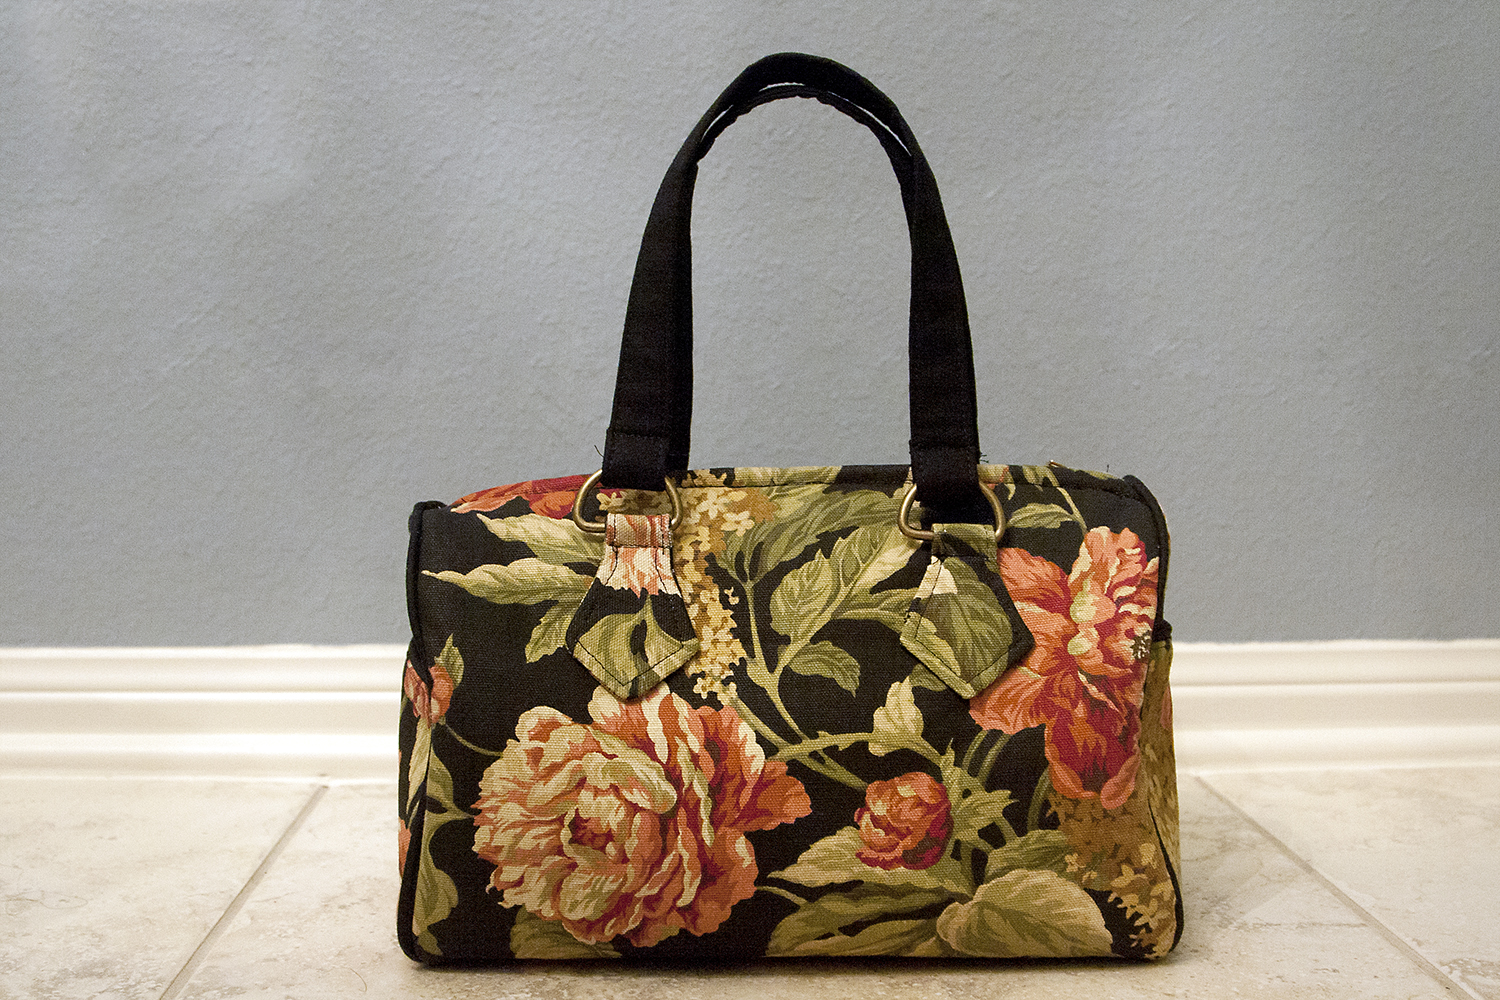
I made this bag a couple weeks ago as part of Emma’s Mary Poppins costume, and I should start by saying that I really like it! The exterior is a home decor weight cotton from Joann in a nice “old lady carpet bag” print, and the lining and handles are black Kona cotton. The pattern is the Blanche Barrel Bag by Swoon Patterns, and it turned out exactly as I’d hoped.
Making it, however, was kind of a pain. From the start, I omitted the cross-body strap, the connectors for that strap, and the internal zipper pocket since I didn’t need them for costume purposes. (I kept the slip pockets on each end because I thought they were a nice touch!)
Even with those simplifications, making this bag was more complicated than I anticipated. This may be partly due to the fact that I also chose the smallest of the three different size options offered, which likely made the sewing a bit more challenging than it might be on the larger bags.
But bottom line? Bag-making is ALWAYS more challenging than I think it will be. I just tend to forget that fact until I’m knee-deep in bag construction!
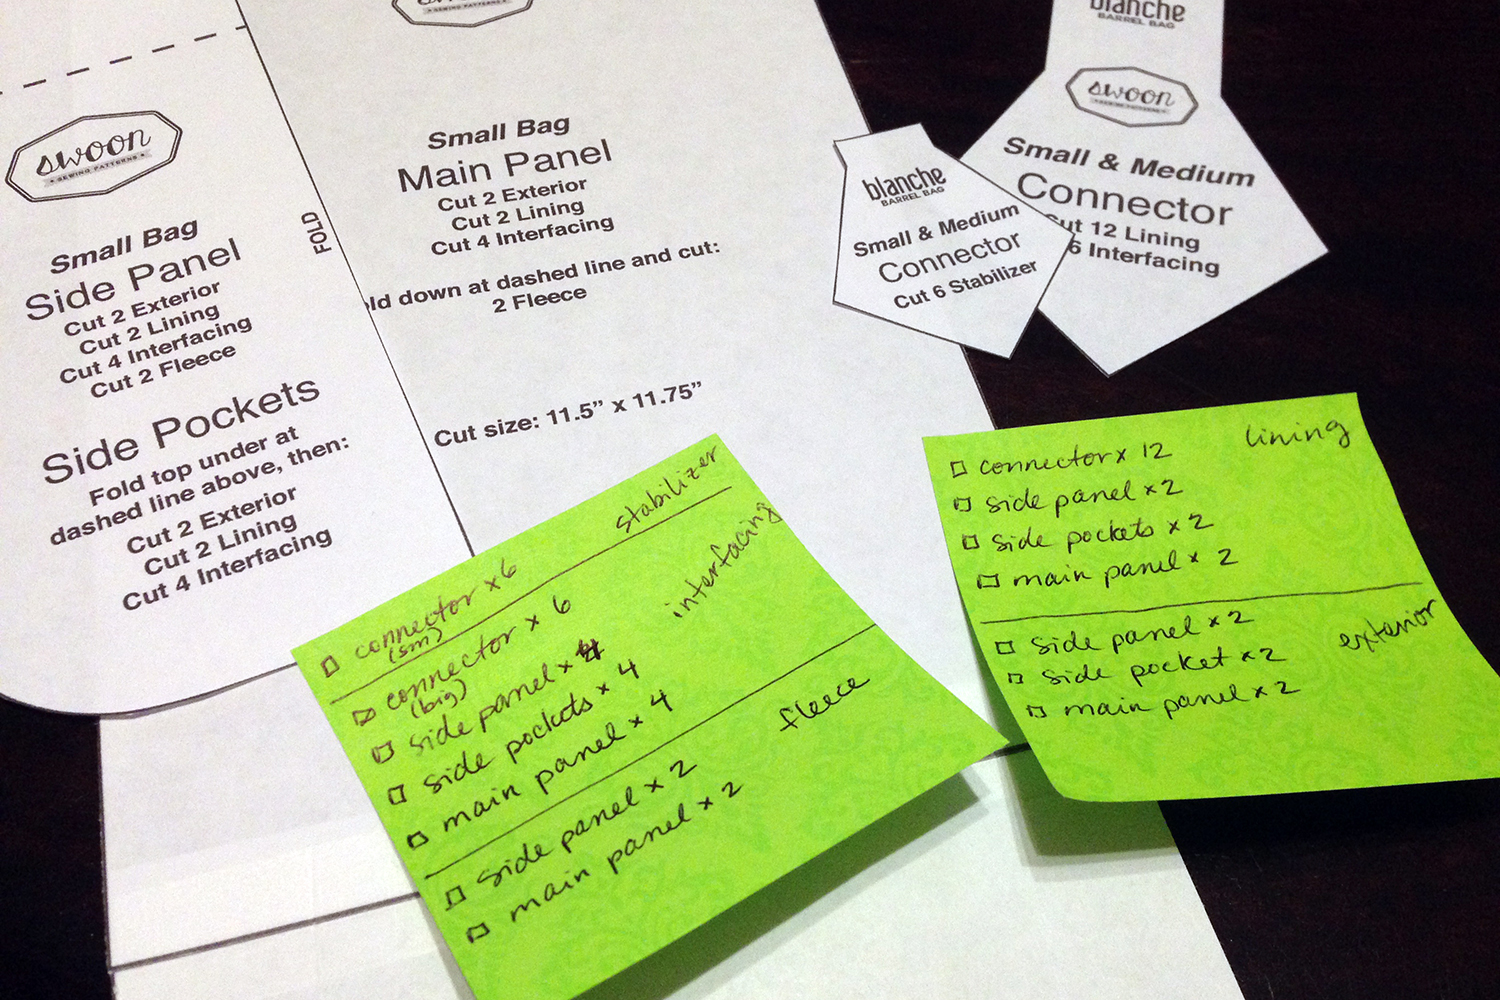
Cutting out all of the pieces was time consuming — there were identical pieces to cut from the exterior fabric, then the interior fabric, then the interfacing. And this bag had 3 different types of interfacing — thick, thin, and fleece. It took me over an hour just to cut and fuse everything together! (I inevitably get impatient by all this cutting and ironing, and yet again remind myself that for many projects, actual sewing is only a small part of the overall process.)
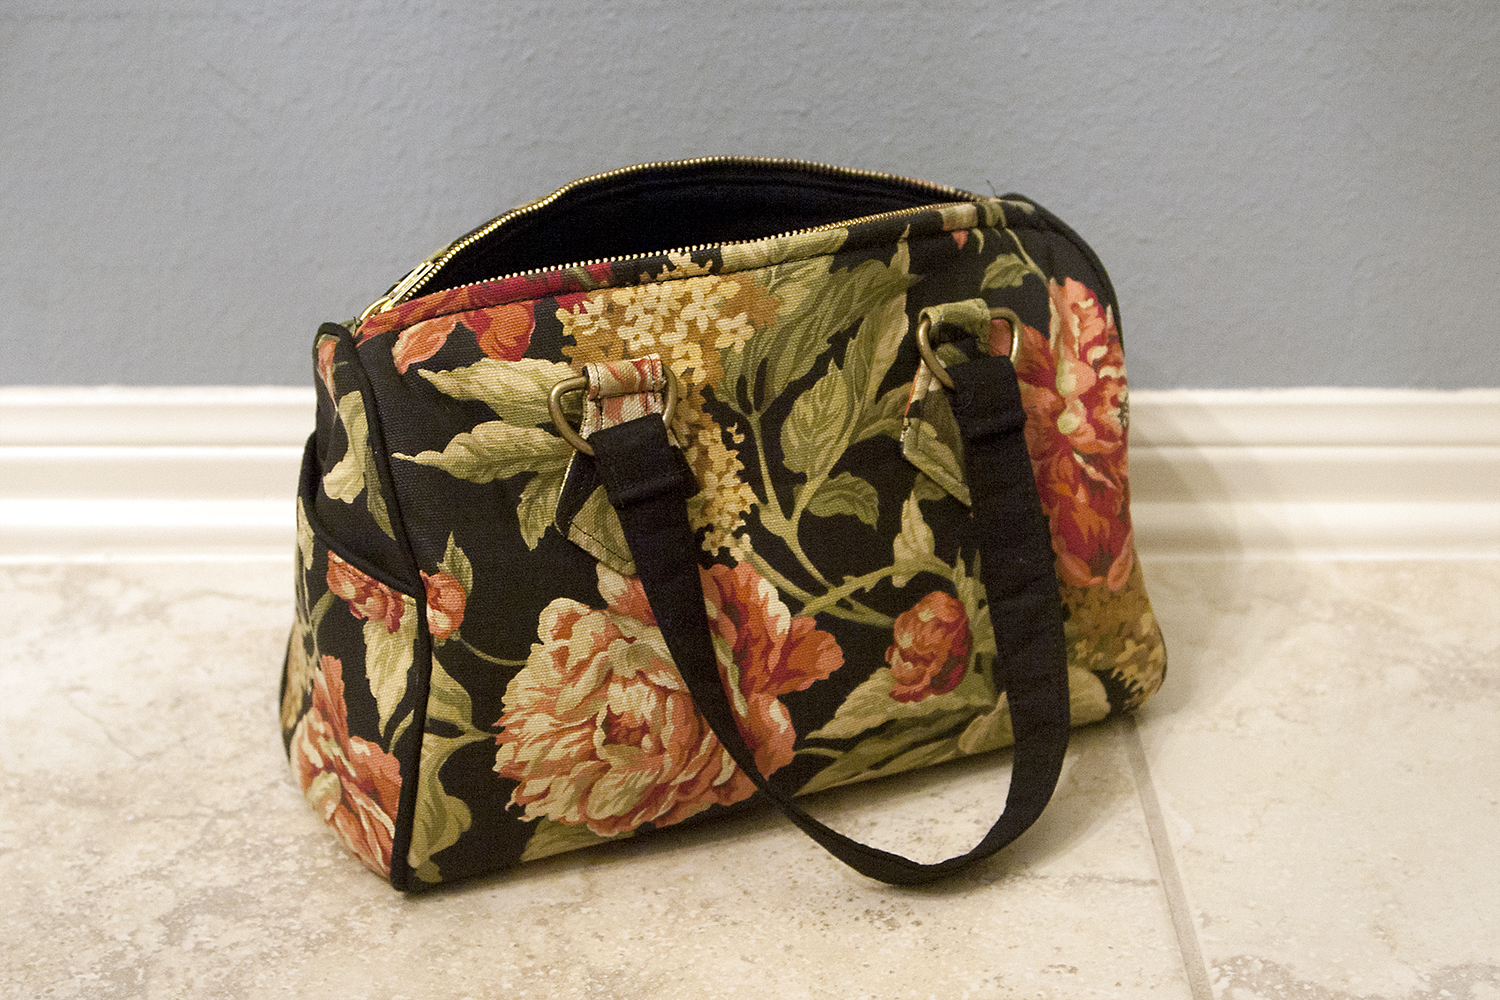
There were a few things about this bag that were different than other bags I’ve made. The zipper installation and lining insertion were both done in ways I’d never seen before, and both included bits of sewing that were somewhat “in the blind” — as in, I was sewing a bit more by feel than because I could actually see what I needed to see. It’s hard to explain in words, but it was odd and confusing to be doing things so differently when I couldn’t figure out why.
The handle connectors were rather difficult as well, since constructing them involves turning some very small, stiff pieces right-side-out.
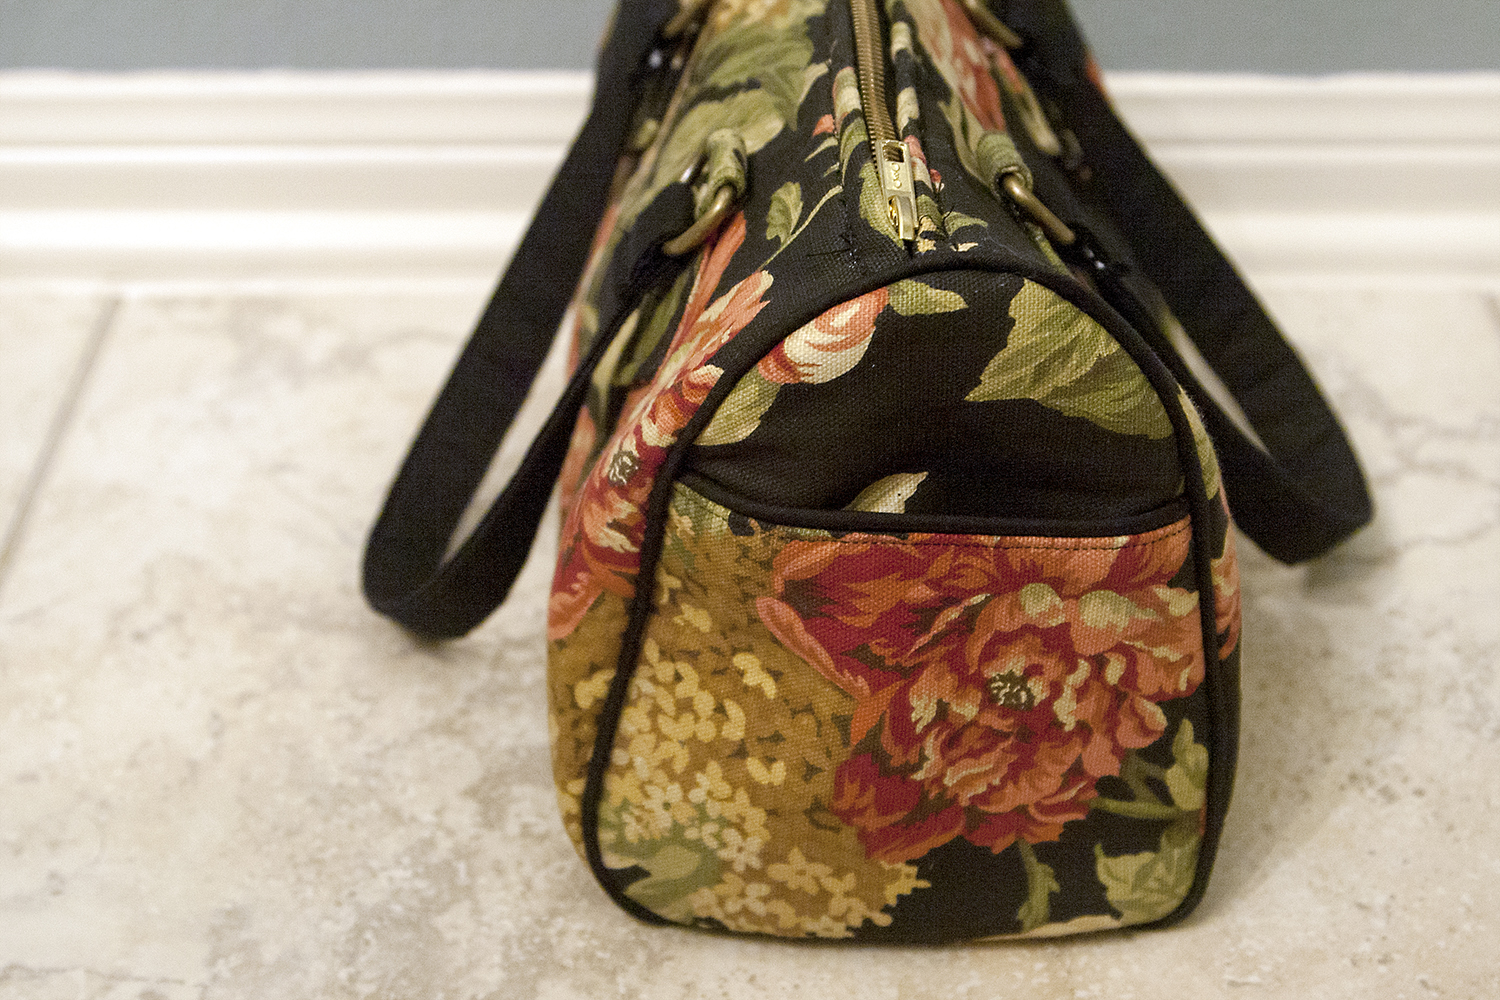
Finally, this was my first time using piping and I’m happy to report that the piping installation went swimmingly. I was so excited when I turned my bag exterior right-side-out after sewing one end on and found my piping was perfectly sandwiched between the body of the bag and the end! (The pattern includes instructions on making piping, but thankfully I just needed plain black and was able to find pre-made piping at Joann’s. That saved me a lot of time.)
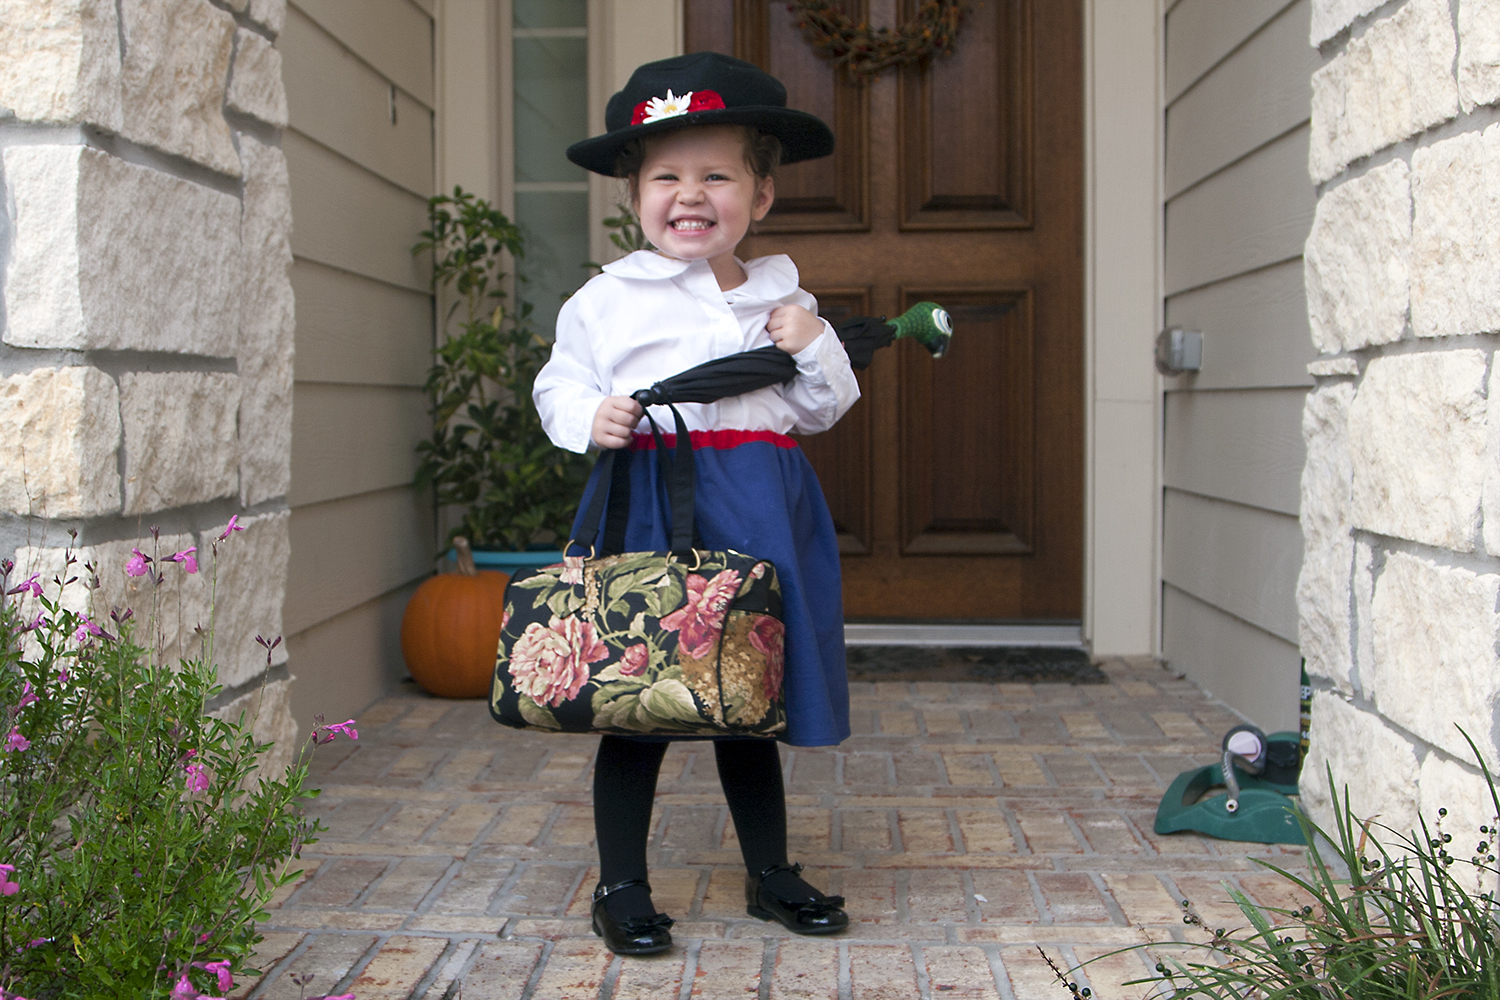
In the end, despite some confusion and finagling several layers of fabric through my sewing machine, I ended up with a great little bag that Emma can continue to play with even though Halloween is over! And now that I’ve got the kinks worked out, I may give this pattern another go in the largest size (about 14″ long, as opposed to the ~10.5″ length of this one) and different fabrics.


Well done! I don’t think I’m quite ready to tackle zippers and bags yet. I’m a little in awe.
Lovely! Can you imagine what you would pay for that in a retail store!?