Enjoy these tips? Get another freebie when you join my email newsletter!
Hello, and welcome to my stop on the 2019 Back to School Blog Hop! I always loved going back to school when I was young, and these days I still love sharing the excitement of the season with my girls. (I’ve got a 2nd grader already — how did that happen?!)
As part of this blog hop, Mel Beach shared a great post a few days ago about how she uses school glue in her quilting work. Today I want to get a little more detailed about how I use glue to baste seams and binding to make my sewing more accurate than ever.
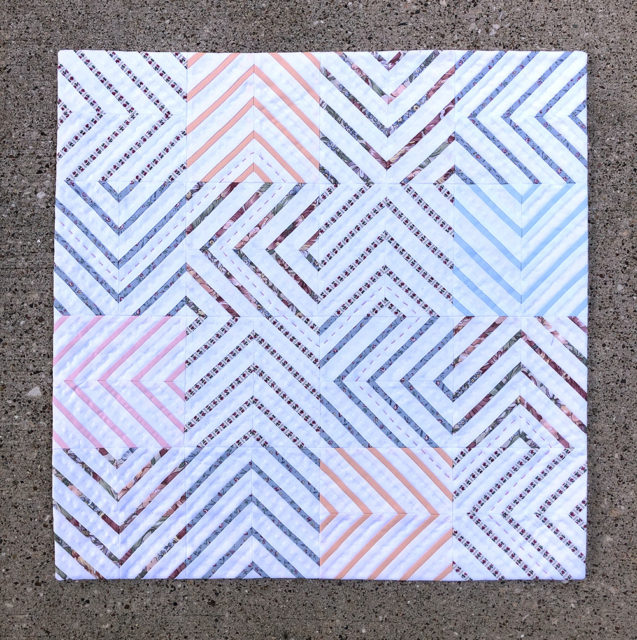
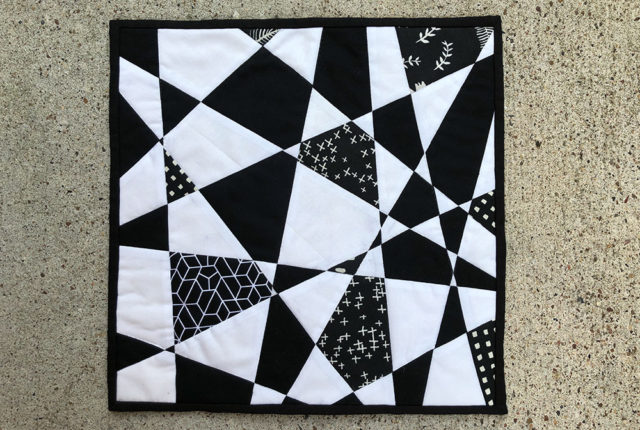
Both of the mini quilts shown above are recent finishes where I needed a lot of precision piecing in order to maintain the strong lines and shapes in the overall designs…and glue basting was my BFF!
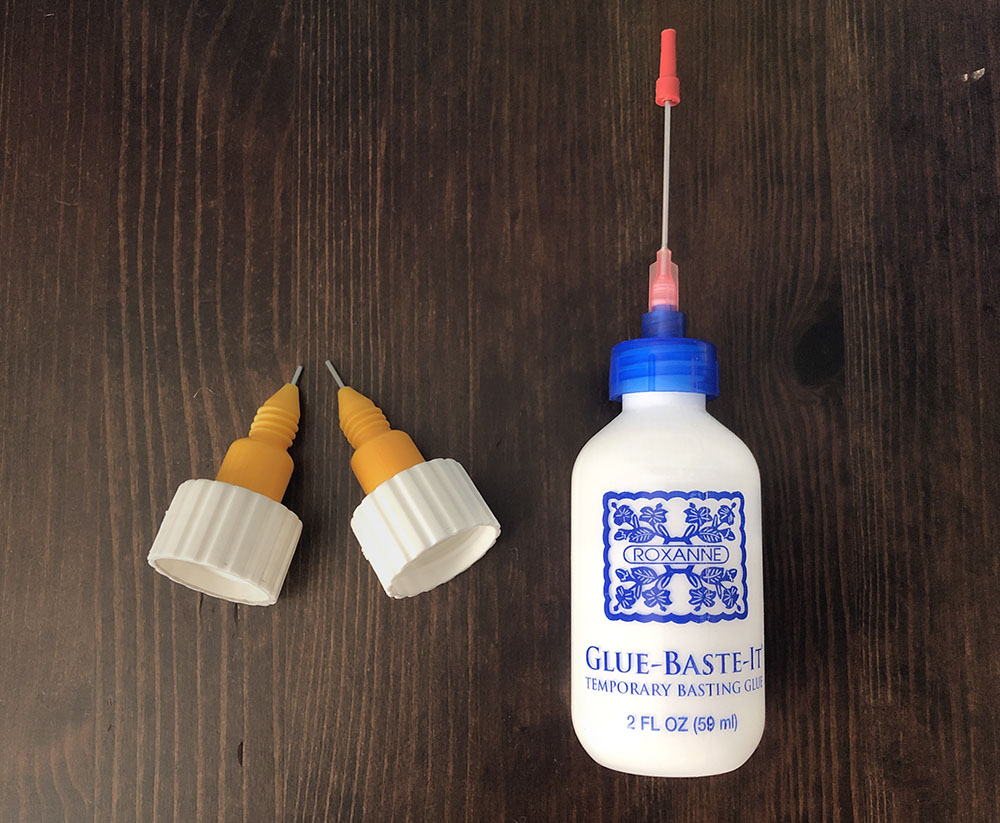
First, let’s talk about what kind of glue to use. For my early attempts at glue basting, I used Elmer’s glue with a fine tip like the ones pictured at left in the image below. It worked, but it was tough to get a consistent flow of glue, and I had to squeeze the bottle really hard to get the glue out. Maybe the glue was too thick for the nozzle? After a couple quilts, I grew tired of fighting with the process and figured it wasn’t for me…
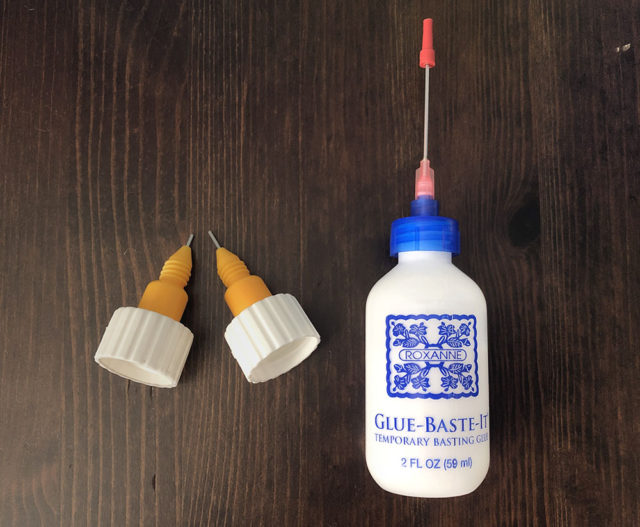
…until I discovered Roxanne Glue-Baste-It. Now this is not a sponsored post, but this little blue and white bottle was a total game changer for me. While it is more expensive than Elmer’s, the glue flows like a dream with minimal pressure on the bottle, and the long tip makes it easy to apply the glue exactly where I want it. I clean the nozzle at the end of each sewing session with the plastic tag that’s included in the package, and have never had an issue with clogging. Needless to say, I highly recommend this product!
Next up, let’s talk briefly about technique. Glue is glue, and everyone knows how it works…but here are 3 few key points to keep in mind:
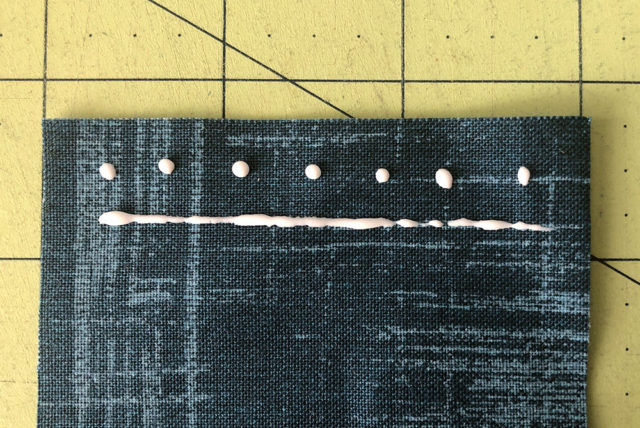
- You can apply glue in dots, or in thin lines. I’ve shown both above, and there are pros and cons to each method. When I’m joining pieces and want to make sure my points line up exactly, I tend to use just a few dots to keep my pieces from shifting. But for something like securing binding for machine sewing, I use thin lines to make sure it is glued down all the way along the length of the quilt.
- Press with a hot, DRY iron to temporarily set the glue. Since the glue is water soluble, any steam from your iron will just make it start to dissolve! So NO STEAM OR WATER allowed until you’re ready to press seams open and/or wash the finished quilt.
- With glue basted seams, it is easier to press the seam to the side. However, if you prefer to press seams open — and sometimes it’s definitely necessary — I recommend using a spray bottle of water to spritz the finished seam to loosen the glue. You can then use your finger or a stiletto to gently separate the seam allowances and press them open. (If you know you will be pressing seams open, I definitely recommend applying glue as dots instead of lines!)
Now on to the fun part! There are two primary ways I use glue basting in my quilting process. The first is during the piecing process, where I use glue to baste tricky seams. While you could use glue to baste any seam, I find it particularly useful when joining foundation paper pieced sections together.
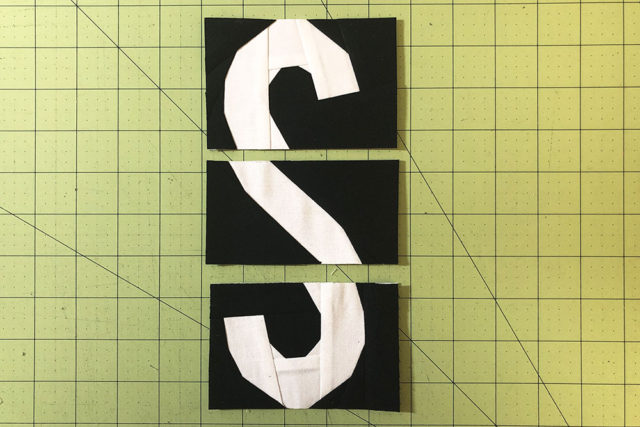
Earlier this week I made a paper pieced S that will become part of my guild’s QuiltCon charity quilt this year. (This letter is part of this excellent paper pieced alphabet pattern by Diane Bohn.) I had to join together the 3 sections you see above, and it was important to match each point between sections to maintain the flow of the letter!
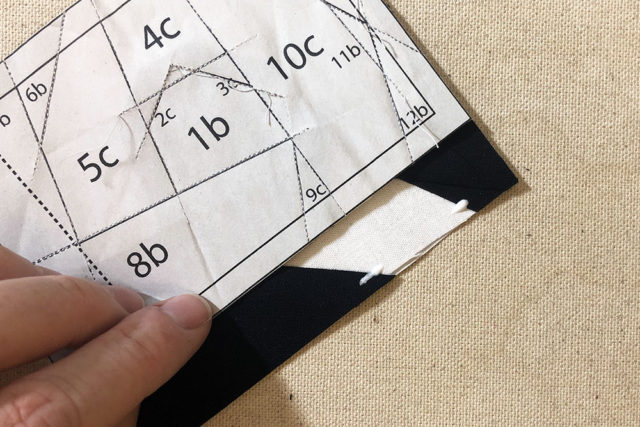
Glue has absolutely become my go-to tool for this kind of piecing. I simply put a dot or short line of glue where the intersections need to line up, and carefully place my sections right sides together. After setting the glue with my iron, it’s easy to double check the alignment by holding the seam allowance with one hand and spreading the pieces gently apart with the other hand to peek inside. Once I’ve confirmed it’s right, I’m ready to sew the seam! (And if it’s not right, the glue can easily be pulled apart for another try.)
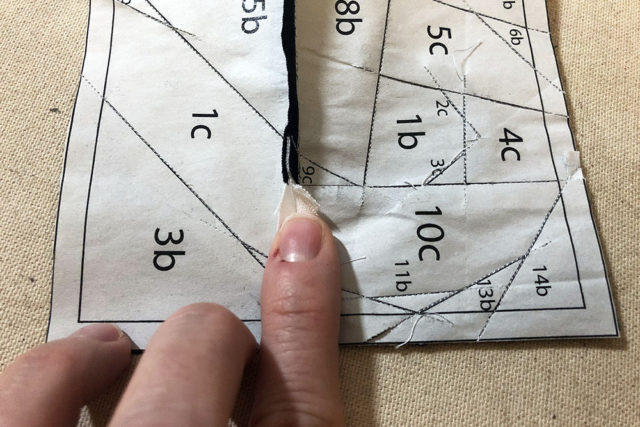
For sections like this, I like to press my seams open. After spritzing the seam with water, I can usually push the glued portion apart with my finger as you see above. If you used a lot of glue, you might have to use your fingers to gently pull the seam apart, but it really doesn’t take much.
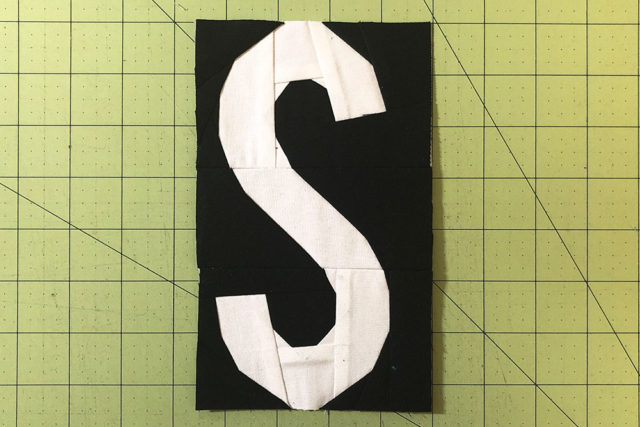
Voila! A perfect S!
I reach for my bottle of glue again whenever I’ve got a quilt ready for binding by machine. (I hand stitch binding sometimes, but as most of you probably already know, sometimes you just really want to use your machine to save time and effort!) After trying just about every machine binding tutorial under the sun, I finally incorporated glue into my process and haven’t looked back.
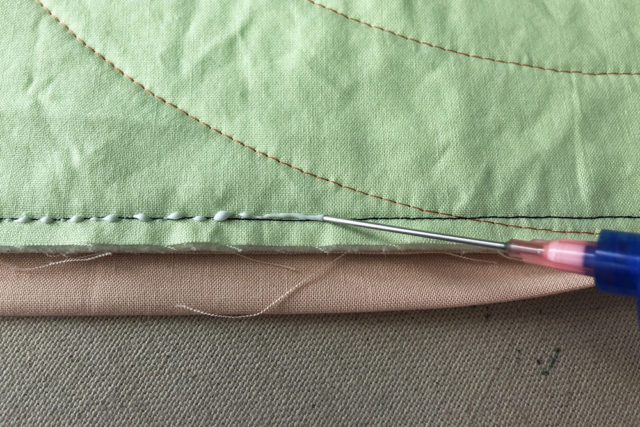
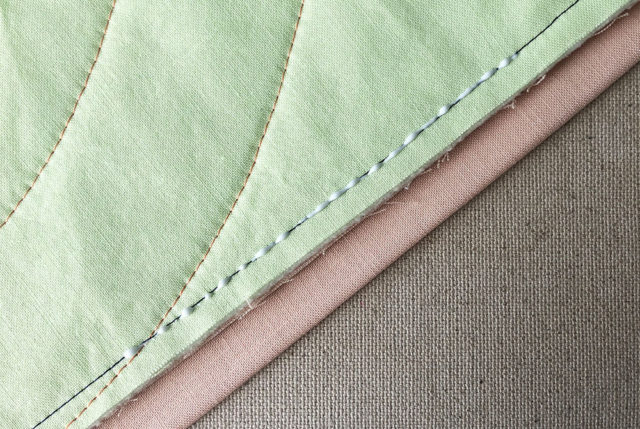
After attaching the binding to the front of the quilt, I use a thin line of glue to secure the binding on the back, making sure that the binding covers the line of stitching visible from where I stitched it to the quilt top. As you can see, I actually use that line of stitching as a perfect marker for where my glue needs to go!
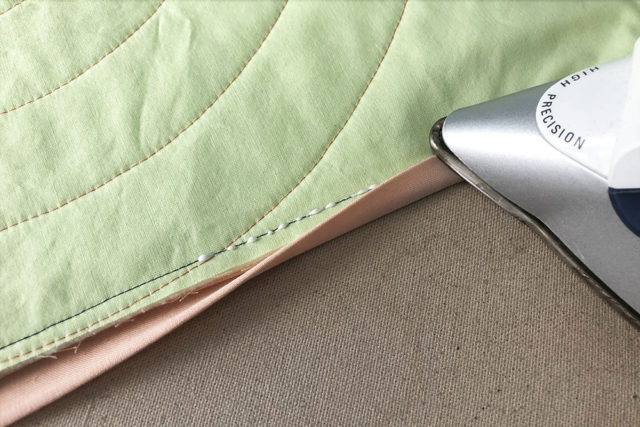
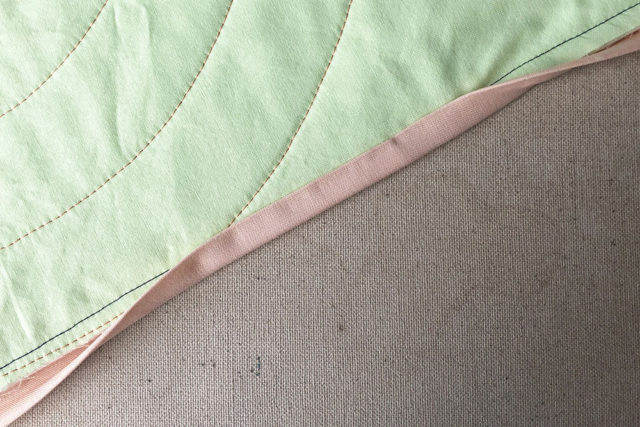
Working in sections of 8-10″ at a time, I apply glue and then fold the binding over and use my hot, dry iron to set everything in place. It holds very well!
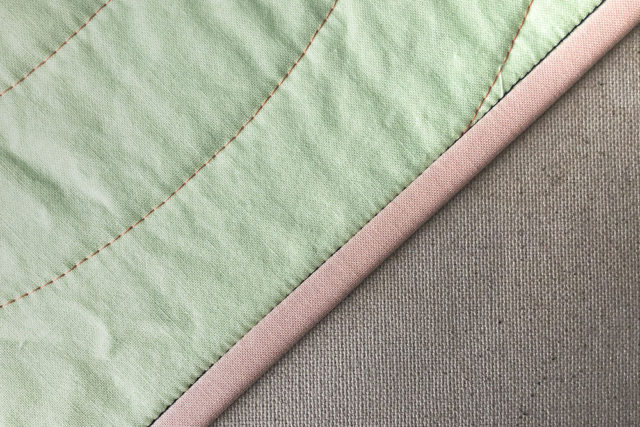
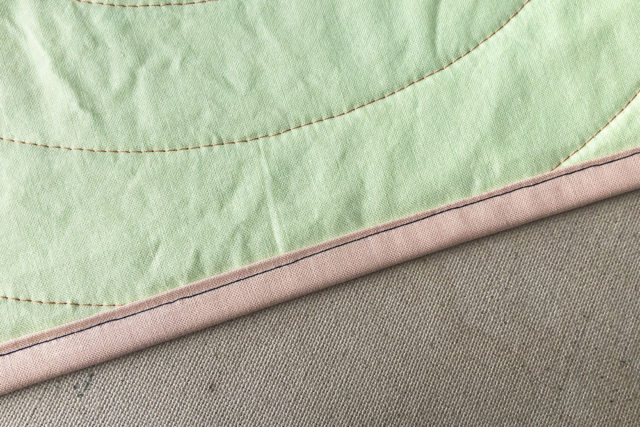
Once I’ve glue basted the binding around the entire perimeter of the quilt, I’m able to stitch in the ditch from the front. If you use a thread that blends with the quilt top or binding fabric, you can barely see the stitches! And because the glue is holding my binding securely in place on the back, I never have to worry about missing a spot and having a section of binding left unsecured.
I hope this has encouraged you to give glue basting a try. It really is magical stuff!
Thanks to Sam Hunter for hosting this year’s Back to School Blog Hop. Make sure to visit all these other amazing quilters for a ton of great tips and techniques. I’ve already picked up a couple new tricks myself!
Day 1 – September 1 – Sam Hunter: Sewing Long Seams Without Stretching – huntersdesignstudio.com
Day 2 – September 2 – Susan Arnold – Joining Binding the Easy Way – quiltfabrication.com
Day 3 – September 3 – Angie Wilson – Fussy cutting tips and techniques – www.gnomeangel.com
Day 4 – September 4 – Andi Stanfield – No-Mark HST: Let your machine be your guide – truebluequilts.com/blog/
Day 5 – September 5 – Bobbie Gentili – Say YES to Y-seams – geekybobbin.com
Day 6 – September 6 – Mel Beach – 5 Reasons to Say Woo Hoo! to School Glue – pieceloveandhappiness.blogspot.com
Day 7 – September 7 – Laura Piland – 7 Ways to Use a Laser on Your Sewing Machine – www.sliceofpiquilts.com
Day 8 – September 8 – Suzy Webster – How to solve loops in free motion quilting – www.websterquilt.com
Day 9 – September 9 – Tara Miller – Accurate Stitch-and-Flip Corners – quiltdistrict.com
Day 10 – September 10 – Latifah Saafir – Accurate Seams Using Masking Tape! – latifahsaafirstudios.com
Day 11 – September 11 – Sarah Ruiz – The Magic of Glue Basting – saroy.net
Day 12 – September 12 – Jen Shaffer – Ways to stop your ruler from slipping while cutting – patternsbyjen.blogspot.com
Day 13 – September 13 – Cheryl Sleboda – Basics of ruching (a vintage fabric manipulation technique) – muppin.com
Day 14 – September 14 – Raylee Bielenberg – Choosing quilting designs for your quilt – www.sunflowerstitcheries.com
Day 15 – September 15 – Jen Strauser – Accurate and Attractive Machine binding – dizzyquilter.com
Day 16 – September 16 – Jane Davidson – Matching points for all types of intersections – quiltjane.com
Day 17 – September 17 – Teresa Coates – Starch and starch alternatives – teresacoates.com
Day 18 – September 18 – Jen Frost – Benefits of spray basting – faithandfabricdesign.com
Day 19 – September 19 – Sandra Starley – Getting started with Hand Quilting – utahquiltappraiser.blogspot.com
Day 20 – September 20 – Karen Platt – Drunkard’s Path Made Easy – karenplatt.co.uk/blog/
Day 21 – September 21 – Kris Driessen – All Kinds of Square (in a Square) – scrapdash.com
Day 22 – September 22 – Sarah Goer – Planned Improv Piecing – sarahgoerquilts.com
Day 23 – September 23 – Kathy Bruckman – Organizing kits for on-the-go sewing – kathyskwiltsandmore.blogspot.com
Day 24 – September 24 – Cheryl Daines Brown – The Secret to Flat Quilt Tops: Borders – quilterchic.com
Day 25 – September 25 – Cherry Guidry – Pre-assembling fusible applique – cherryblossomsquilting.com
Day 26 – September 26 – Laura Chaney – Getting started with English Paper Piecing – prairiesewnstudios.com
Day 27 – September 27 – Ebony Love – Cutting Bias Strips from a Rectangle – lovebugstudios.com
Day 28 – September 28 – Tammy Silvers – Working with heavier weight threads in your machine – tamarinis.typepad.com
Day 29 – September 29 – Kathy Nutley – Create a perfect facing or frame with 90 degree angles – quiltingsbykathy.com
Day 30 – September 30 – Joanne Harris – Using Leaders and Enders – quiltsbyjoanne.blogspot.com



This is interesting. I’ve always used pins – never even occurred to me to use glue.
I didn’t use it for several years either, and was actually skeptical at first because it seemed like too much work. But I can’t argue with the results!
I’ve got some Roxanne’s basting glue, but haven’t used it yet. Need to give it a try.
Definitely try it! I hope it works as well for you as it does for me.
Hip hip hooray to more glue basting love!! Fabulous post packed with wonderful tips and gorgeous photos!
Thanks Mel! I really enjoyed your post too!
I never thought of using glue for paper piecing sections. Great idea!
I hope you try it — it works so well!