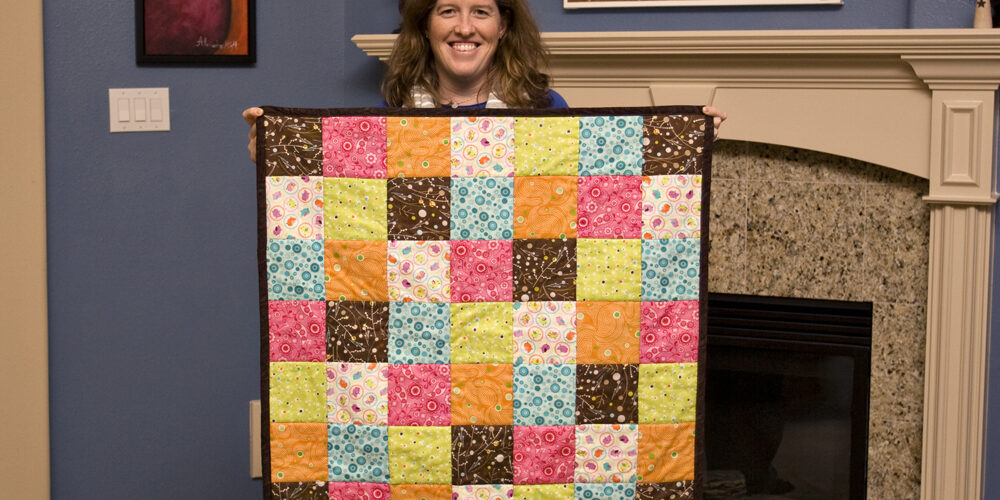
When I started learning to sew last summer, I knew I’d want to try making a quilt at some point. I finally decided to give it a go as a gift for my friend Jen’s new baby girl. Despite buying the materials during a Black Friday sale in November, I didn’t finish it until after little Isla had already made her appearance in early February. I procrastinated something awful, in large part because I was always worried that I’d screw up the next big step!

I started with 6 coordinating fat quarters of bright and colorful fabric. I actually found the one on the far left with the little birds first and thought it was cute, so I picked 5 other fabrics based on the colors of the bird print. (Jen knew she was having a girl, so there was no risk in buying pink!) I carefully cut each piece into a bunch of squares — and I’ve already forgotten what size they were. About 5 inches, I think.

I started laying out the squares on the floor to see what looked right. I knew I only had enough for a 7×7 pattern, but since I only had 6 fabrics that actually worked out pretty well — it meant that each row and column could start and end with the same color. Each row follows the same pattern, but I just shifted each one in a way that I thought looked nice. The photo above was taken after I’d sewn the block of each row together, but before I sewed the rows together to complete the front.


Making the quilt sandwich was easy enough (I used an organic cotton batting that was nice and soft, and a brown flowery fabric for the back), but then came the part that intimidated me the most: actually quilting the quilt. I decided to keep things fairly simple and “stitch in the ditch” along the boundaries of each block. Sometimes this worked really well, as you can see in the first picture, and sometimes the lines were a little off, as you can see in the second picture. The flaws aren’t too noticeable, but I hope to do better next time.
Sometimes I think I may be too much of a perfectionist when it comes to my crafty pursuits!

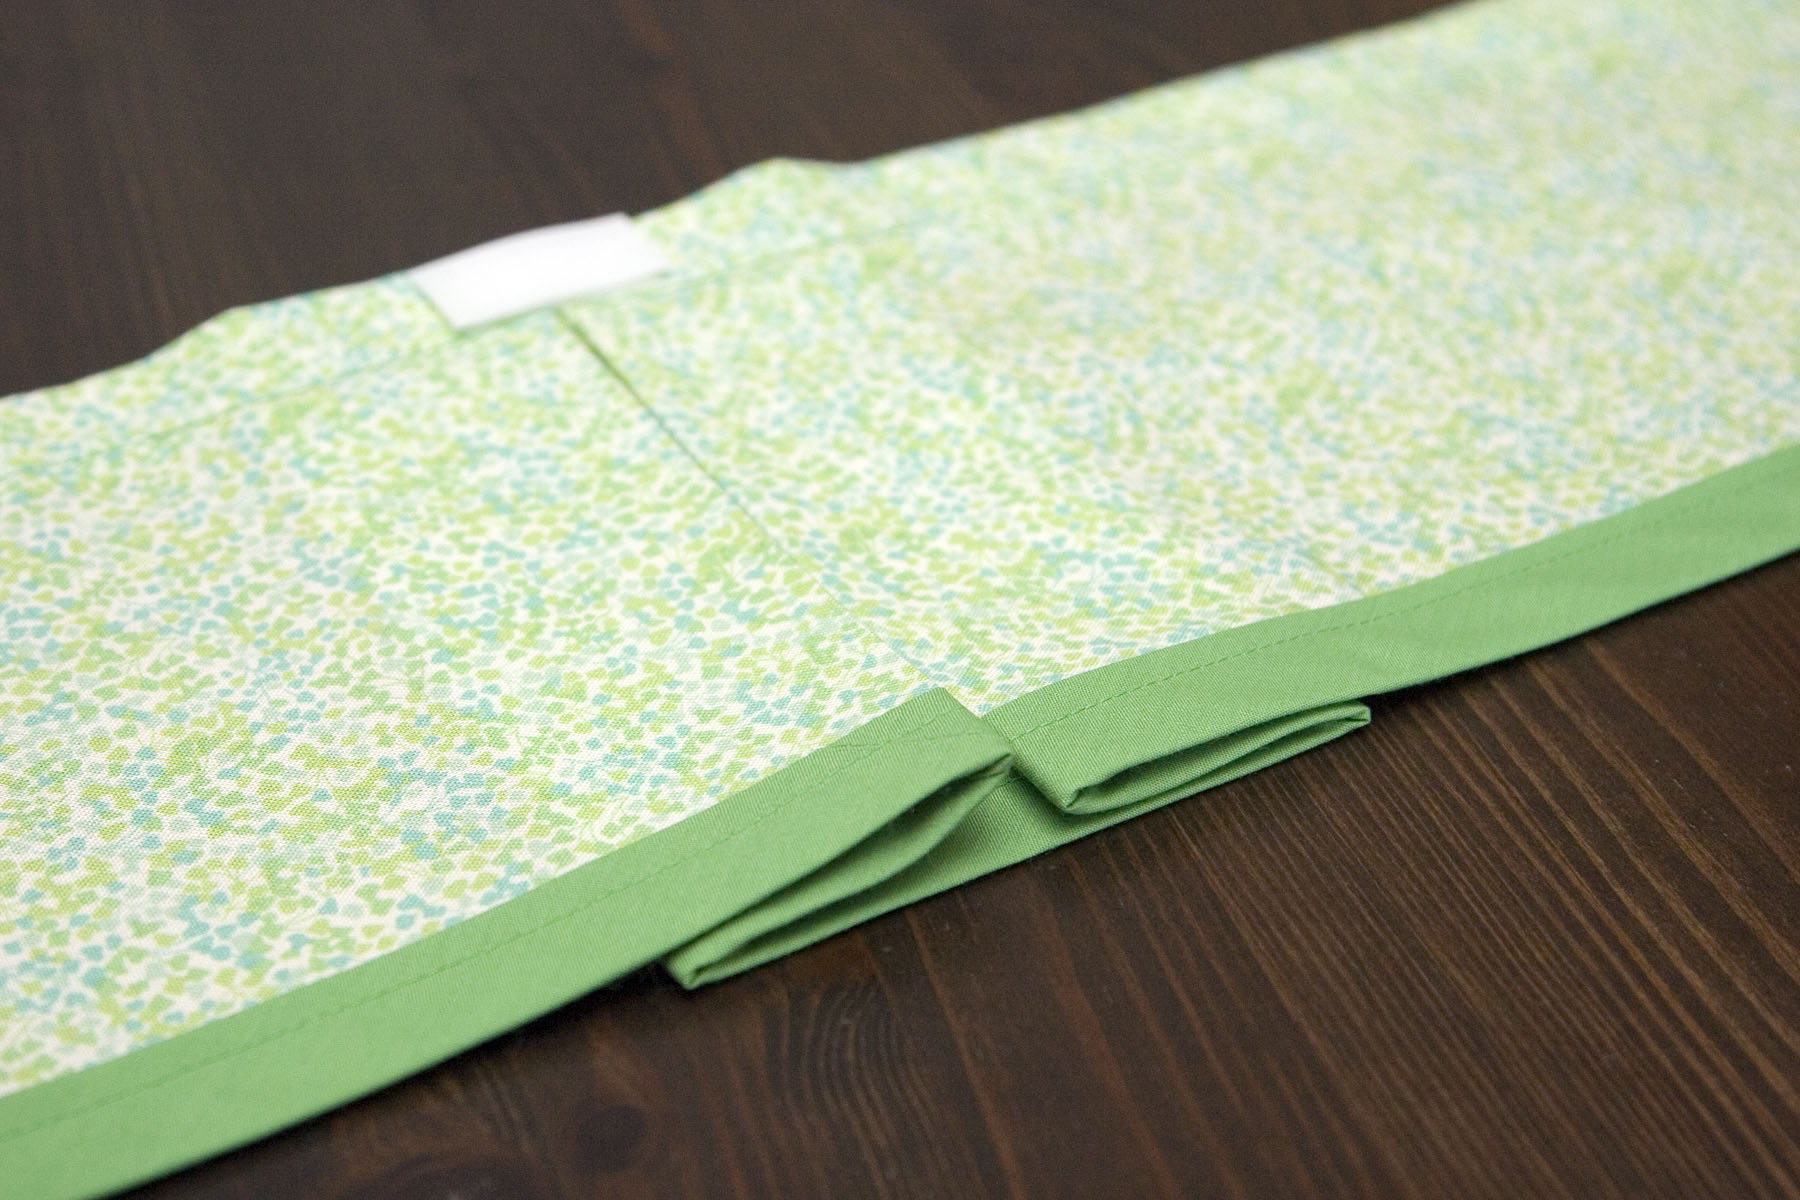
With the top, batting, and back all quilted together, the only thing left to do was add some binding. I was less intimidated by this step since I’d taken a class at Joann back in December that taught me how to 1) make bias tape and 2) attach it. I’d forgotten how to make pretty mitered corners, but a quick internet search reminded me. This step probably took longer than anything else, just because it took a while to make the bias tape/bias binding.

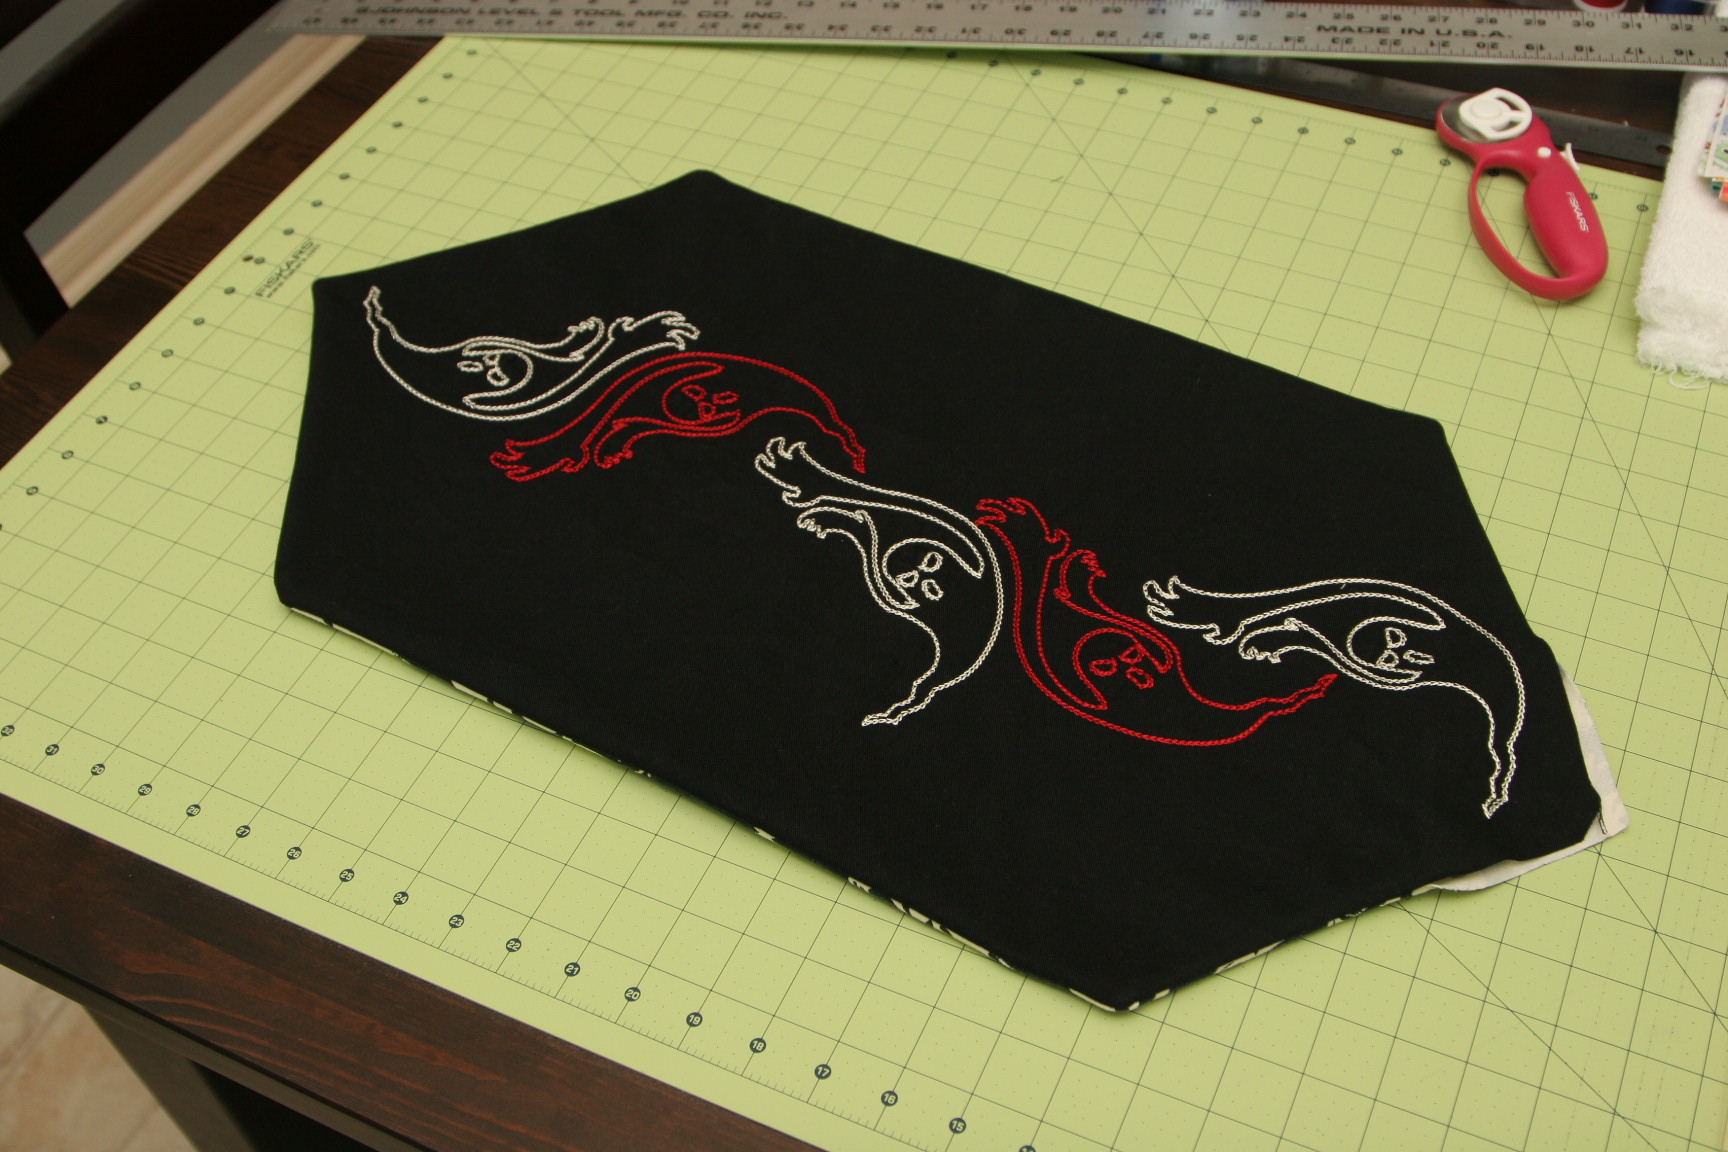
Still, the binding was probably the part of the quilt that ended up looking the wonkiest. I did it using a new walking foot that I bought for my sewing machine, which is supposed to help because it draws the fabric through the machine from the top at the same rate that it’s already being drawn through from the bottom. But I swear mine fed the fabric crooked! The lines on my binding weren’t very straight at ALL, which bummed me out. But there was only one spot that was really bad, so I covered it with a nice little label. (My aunt gave me those embroidered labels for Christmas! She ordered them online. Aren’t they cool?)

I can post about it now since Isla has received her gift, so ta da! The finished product! It ended up measuring around 3 feet square, I think, which I thought was a pretty good size for a baby.
Best of all is that I’m actually excited to try another quilt now that I’ve now made one semi-successfully.


 #saroy1sec #1secondev
I think it came out great — and fabulous for a first try! You’re way braver than me. I’ve had a quilt idea, a harlequin pattern, of jewel tone velvets in my head for a long, long time… Never been brave enough to go for it. Good for you!
Sarah, that’s beautiful! I’m really enjoying reading about your foray into sewing. Can’t wait to see what you decide to make for your own little one.
Awesome! I should show you some of Dave’s quilts sometime. He’s kind of a whiz at it. Looks like you are, too.
The quilt is awesome! I just sent you some photos of Isla & the quilt.
Very cute! I am impressed by your crafty creations.