

Just before Christmas, I finished this baby size version of my Ribbons quilt pattern!
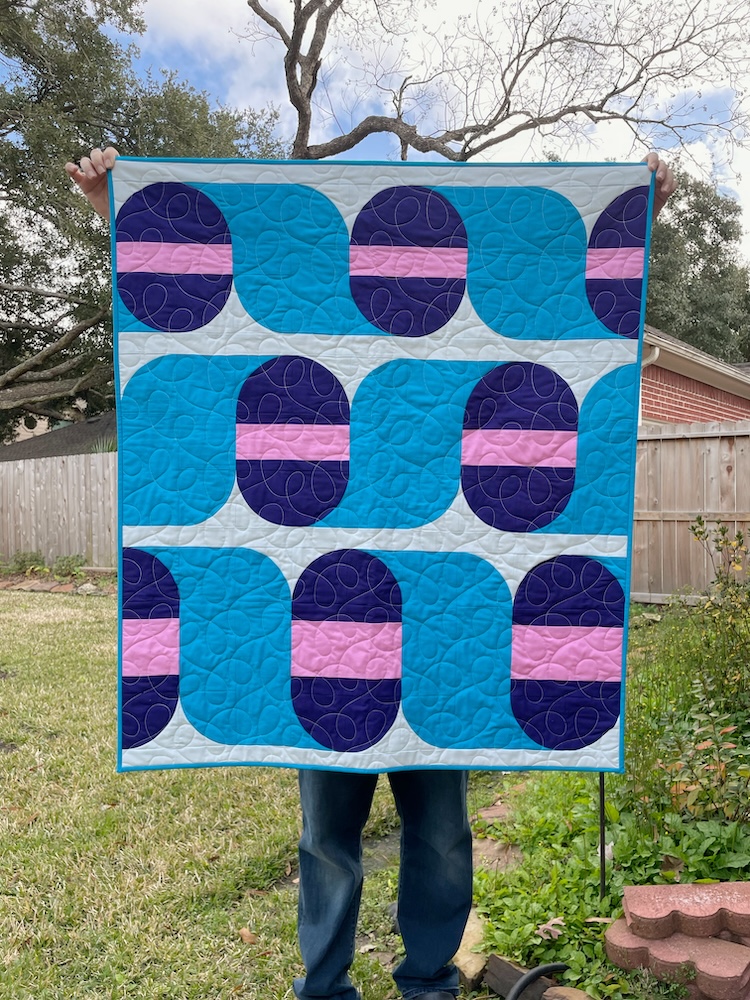
I made this top a year ago to support a workshop I did with a local guild, and it had been sitting in my “to quilt” pile ever since. My new longarm setup allows quilting from the back, and I wanted to try a using hand-guided pantograph. This seemed like the perfect quilt top for that!


Eva from Double E Quilting walked me through the pantograph process when she set up my machine back in November, but I watched a few YouTube videos to refresh my memory and purchased the Modern Twist – Unraveled pantograph from Urban Elementz. I thought the loose loops would complement my quilt top well, and it looked like a panto that would be pretty forgiving if/when I didn’t follow the lines exactly. (Happily I was right!) I got the quilt loaded onto my frame, took a deep breath, and dove in.

A few observations:
Positioning your body can be tricky when quilting from the back of the machine, and I’ve seen several different methods in the videos I watched. If you stand directly behind the machine, it’s hard to see the laser guide without craning your neck, so most people seem to stand off to the side. I first tried quilting with just my right hand on the left handle as Eva had showed me, but I felt like I didn’t have enough control.
What ended up feeling most comfortable for me was to hold the left handle with my left hand, and put my right hand on the back of the machine itself. This let me stand to the left of the machine and have a better view of the laser guide without twisting my body too much, but having both hands on the machine gave me better control than using just one hand.

I also realized fairly quickly that when it comes to paper pantographs, 100% accuracy is not the goal! It’s extremely difficult to follow the line exactly, and although I assume I might get better with practice, it’ll never be perfect. One of the tutorial videos I watched made the point that trying to be too exact will lead to uneven, wobbly lines and bobbles. What you really need to do is use the laser guide to stay “close enough” to the printed line while maintaining nice, smooth movement of the machine.
This made a lot of sense to me but I definitely needed to hear someone else say it to sink into my perfectionist brain! When viewed as a whole, wobbly or jagged quilting lines would stick out far more than slight variations in the size or positioning of my loops. Smooth machine movement = smooth quilt lines = a better end result overall.

I also hadn’t anticipated that since my paper panto only had one full pass per sheet of paper, I would have to roll the quilt after each edge-to-edge pass across my quilt. So I’d quilt a full row, then have to stop, walk around to the front of the machine, unclamp the sides, advance the quilt, baste the sides and clamp the sides again, walk back around to the back of the machine, and then repeat the process all over again. My machine has a 26″ throat and with a computer, I assume it would have easily have done 3-4 passes before I’d need to advance the quilt top.
This tedious process of quilt for 2 minutes then spend 5 minutes advancing was mildly annoying to be honest, although there’s not a lot I can do about it! Since the paper panto is a PDF file, I suspect that I can edit the file for my own personal use to include 2 full repeats, and still have it fit on the longarm table. That would cut the number of advances in half! I plan to try this very soon.
I’m excited to have this quilt done, and to have learned the basics of paper pantographs!

The stats:
- Quilt measures 36″ x 43″.
- Pattern is Ribbons by me!
- Top and binding fabrics are Kona Cotton solids.
- Backing fabric is a Sarah Jane Studios/Michael Miller print from several years ago that I had in my stash.
- Batting is Hobbs Heirloom Premium 80/20 cotton/poly.
- Pieced with Aurifil 50 wt thread in #2600 (Dove).
- Quilted on my APQS Millie with Glide thread in Linen.
- Pantograph is Modern Twist – Unraveled from Urban Elementz.

Sarah, please forgive a basic question, but what’s the advantage of quilting from the back of the machine?
Am thoroughly enjoying watching your evolution. And this quilt is adorable.
I’m quilting from the back in order to do pantographs — edge-to-edge motifs. They are printed on paper that lies on the longarm table, and I use a laser light guide on the back of the machine to essentially trace the line, which stitches the design onto the quilt. To do this from the front, I’d have to mark the entire design on the quilt, which would be pretty tedious!
I think you did a great job keeping things smooth; it looks really nice to me! I never did try using a pantograph on my APQS Millie, and your description of how you stood and kept 2 hands on the machine makes a lot of sense to me. It’s a big machine!