
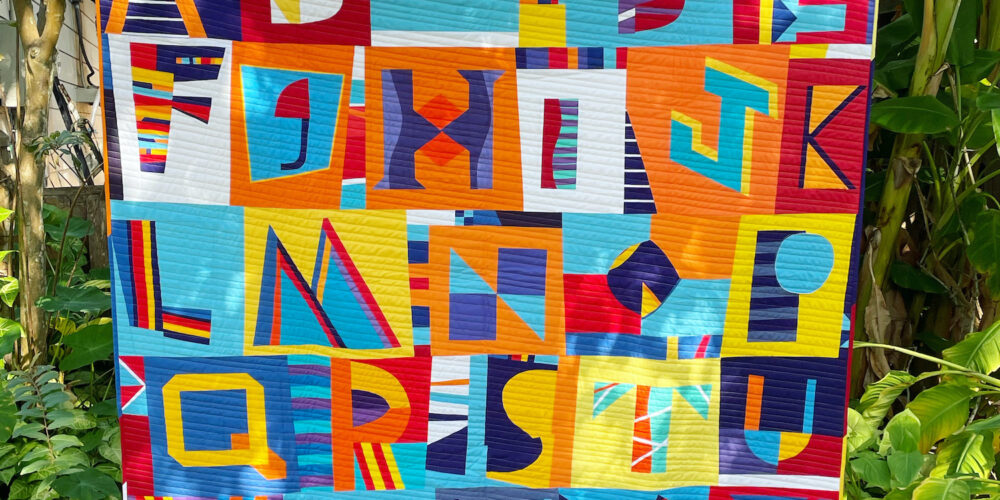
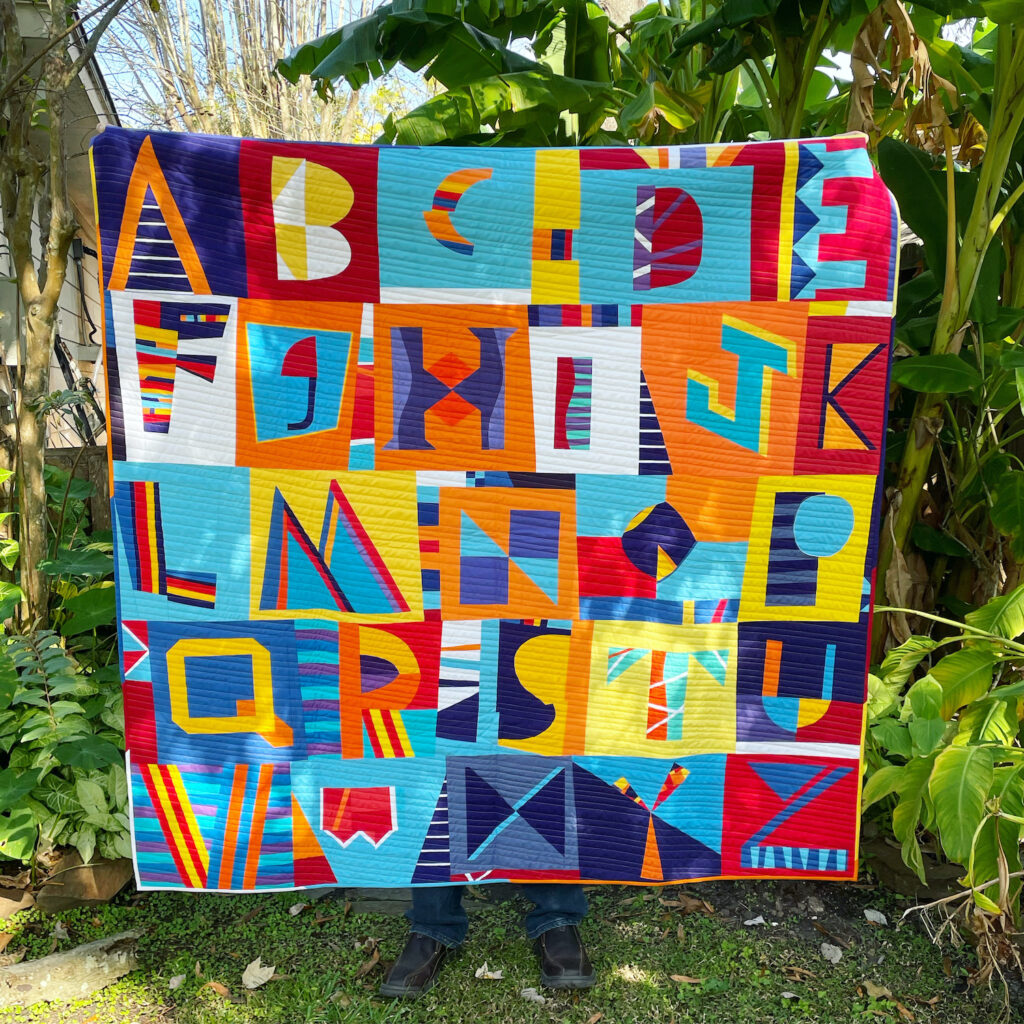
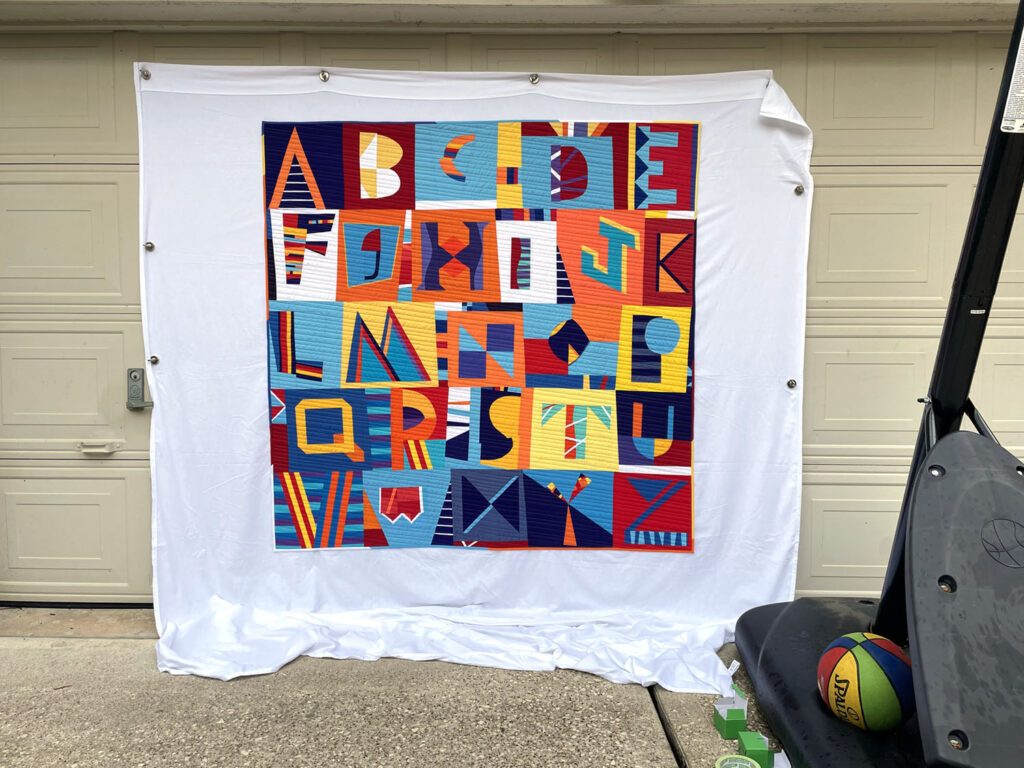
I recently completed my first-ever bee quilt! This one is called “Unscripted” — which is both a play on the name of our improv-based quilting bee (Quilts Unscripted) and an a bit of humor since the quilt is literally made of letters (aka script).
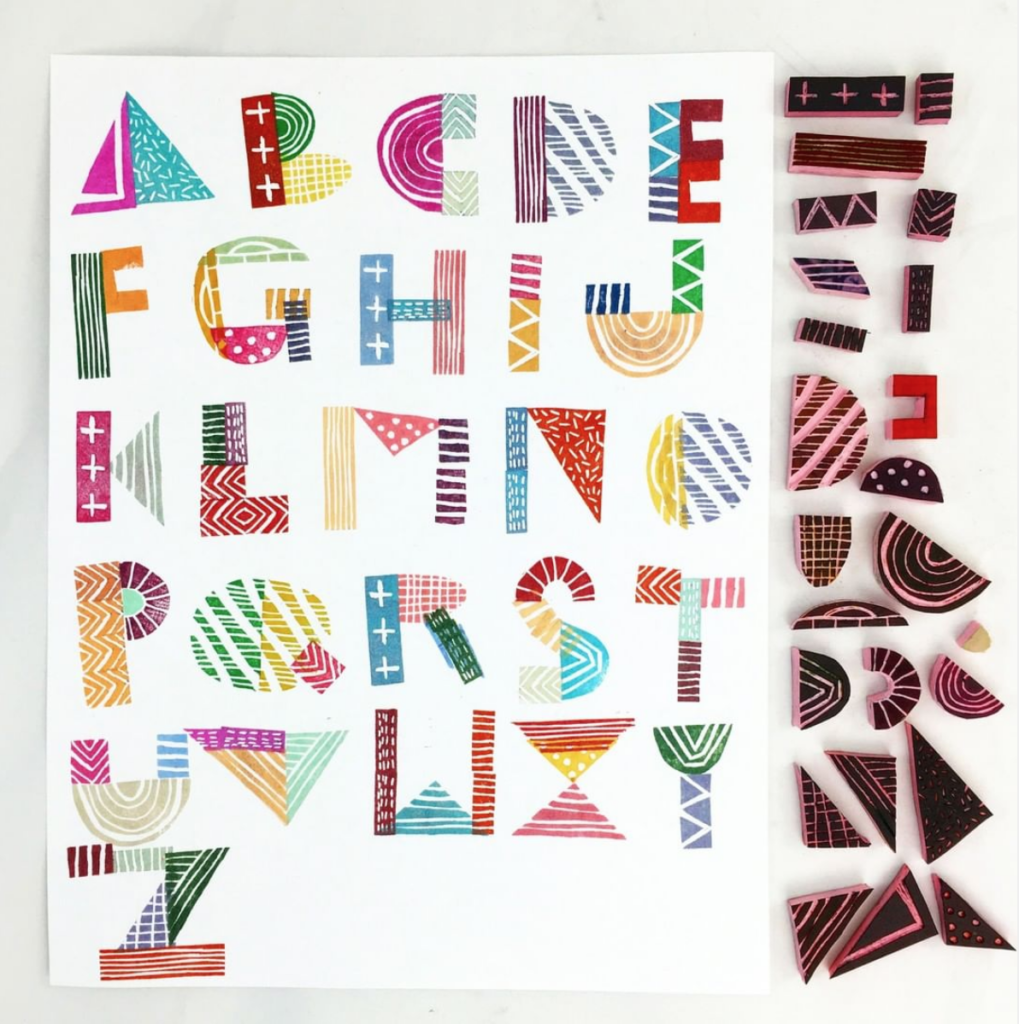
I’ve always had a soft spot for alphabet quilts, but they don’t often show up in modern quilting community. Last year I bookmarked this block print by Julie Fei-Fan Balzer with the intention of using it as quilt inspiration someday. When I had my turn as queen bee in June, I decided it was time to make that happen with the help of my fellow quilters!

I asked my bee-mates was to make improv alphabet blocks and requested a color palette of saturated red, orange, yellow, blue, purple, and white inspired by a pattern by Russfuss. I also put together a Pinterest board of wonky, modern alphabet inspiration to help get their creative juices flowing.
Twenty-five of the twenty-six alphabet letters were made by my bee-mates: E.A. Cox, Chris Davies, Sarah Goer, Emily Lang, Elizabeth Ray, Carole Lyles Shaw, Chris Simon, Loide Wasmund, and Ellyn Zinsmeister. I made the letter B, figured out the layout, added filler, and completed the quilt.
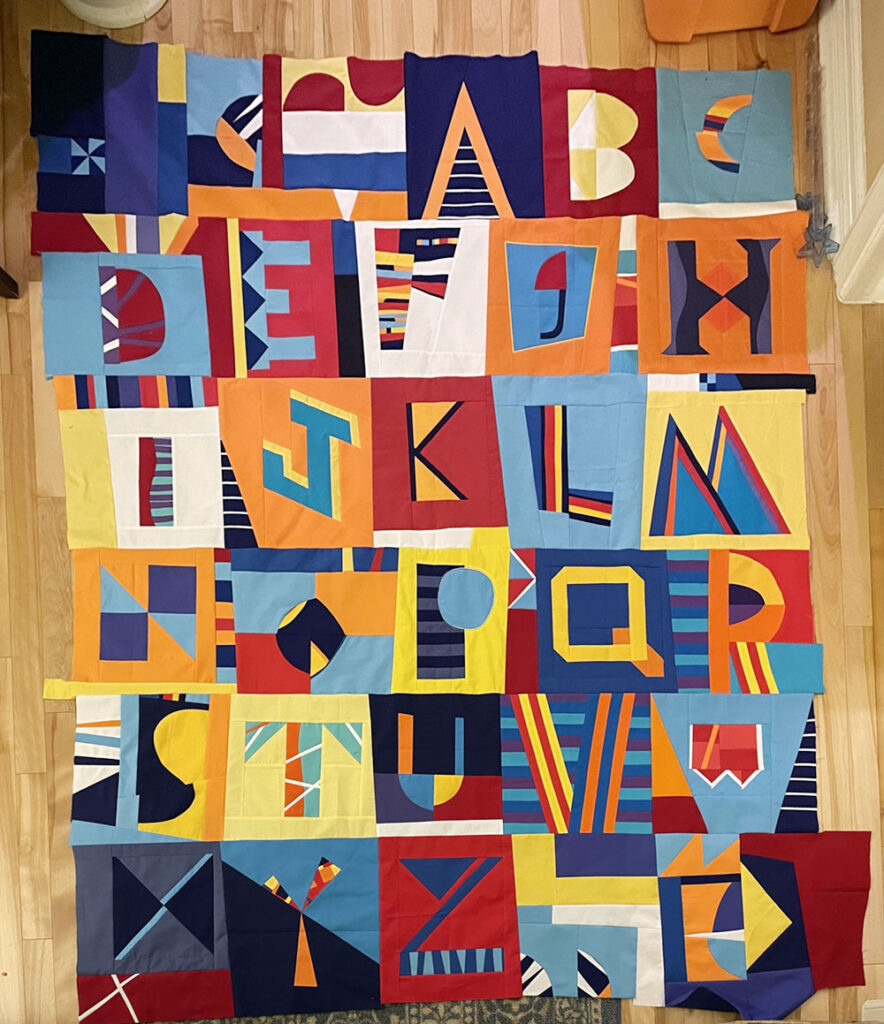
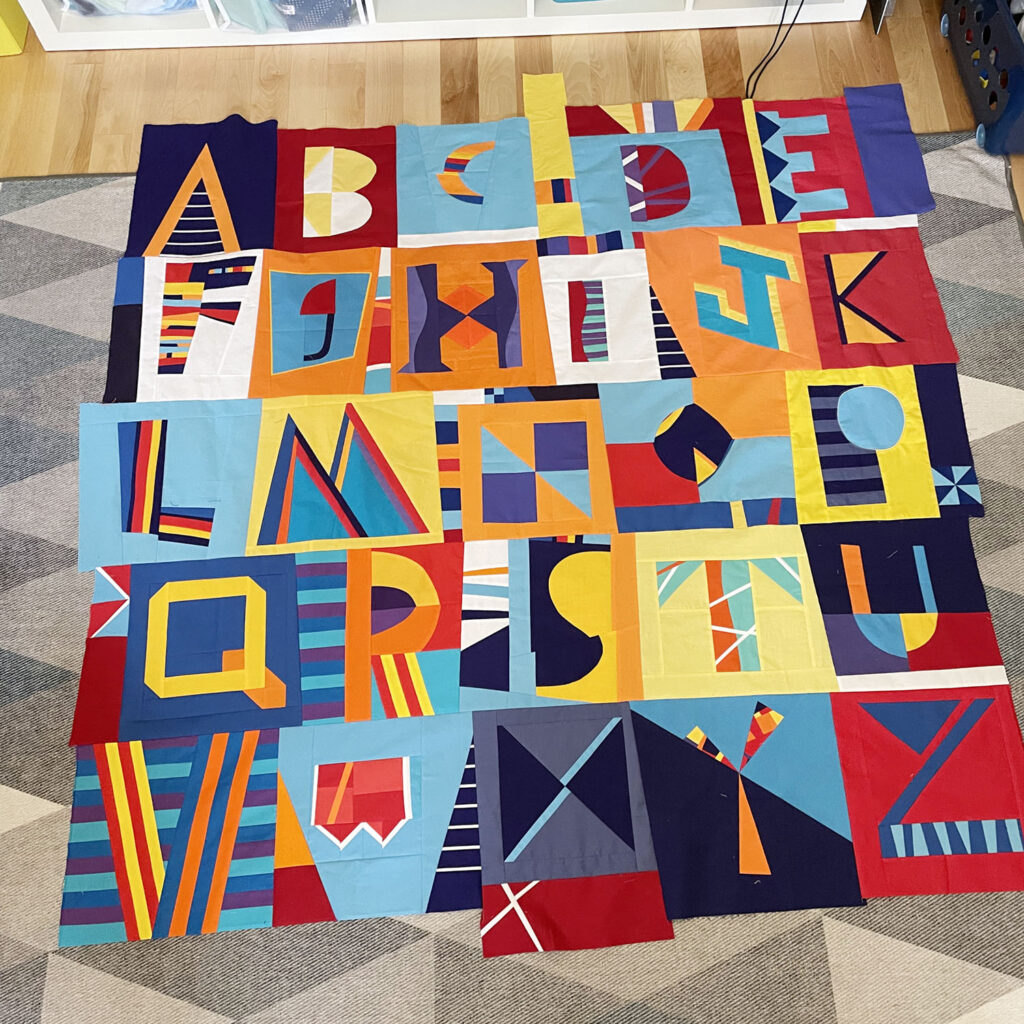
I began working on the quilt top at the beginning of October, and after a few days of work, had the quilt top pictured above. The photo is distorted — I purposefully skewed the image before bringing it into Procreate where I started to sketch quilting ideas. But as I sketched, I just wasn’t loving it. I created the improv-pieced sections that filled the space before the letter A and after the letter Z, and I liked them on their own….but once I had the top together, those sections felt clumsy and distracting. They drew attention away from the letters themselves.
So….time for another plan. I grabbed the seam ripper and got to work. I posted the photo above on Instagram with this caption: “I’ve said before that progress > perfection. But here’s an addendum: if you’re not happy with a project, do whatever you feel is needed to fix it. If it’s letting it go and moving on, I support you. But if it’s disassembling a completed quilt top, because although it’s done you are only feeling okay about it, and you want to feel more than okay? You do you. (Or in this case, I’ll do me.)”
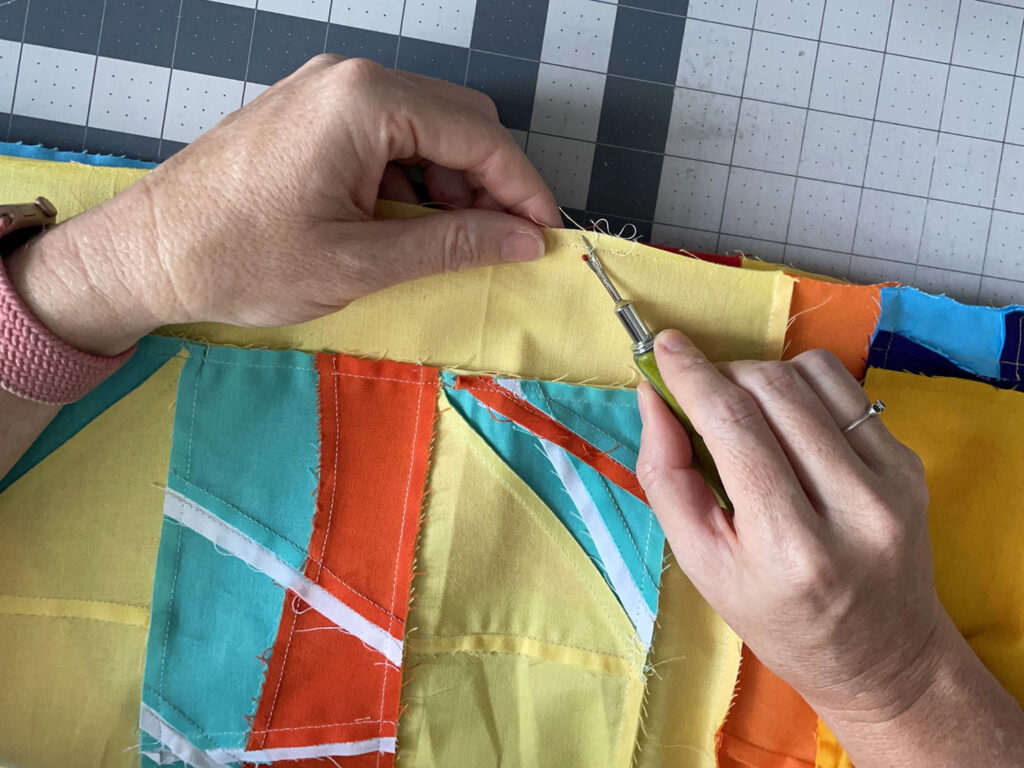
Was it frustrating to disassemble my quilt top? Yes. But I’ve learned over my decade of quilting now that if I’m not happy with the way a project is going, it’s almost ALWAYS worth it to take it apart and try again.
A couple days later, I had reassembled my blocks into a nearly square layout. (The fact that it ended up square was not planned!) Without the distracting filler at the start and end, the letters really stand out more and I was so much happier with the overall look.
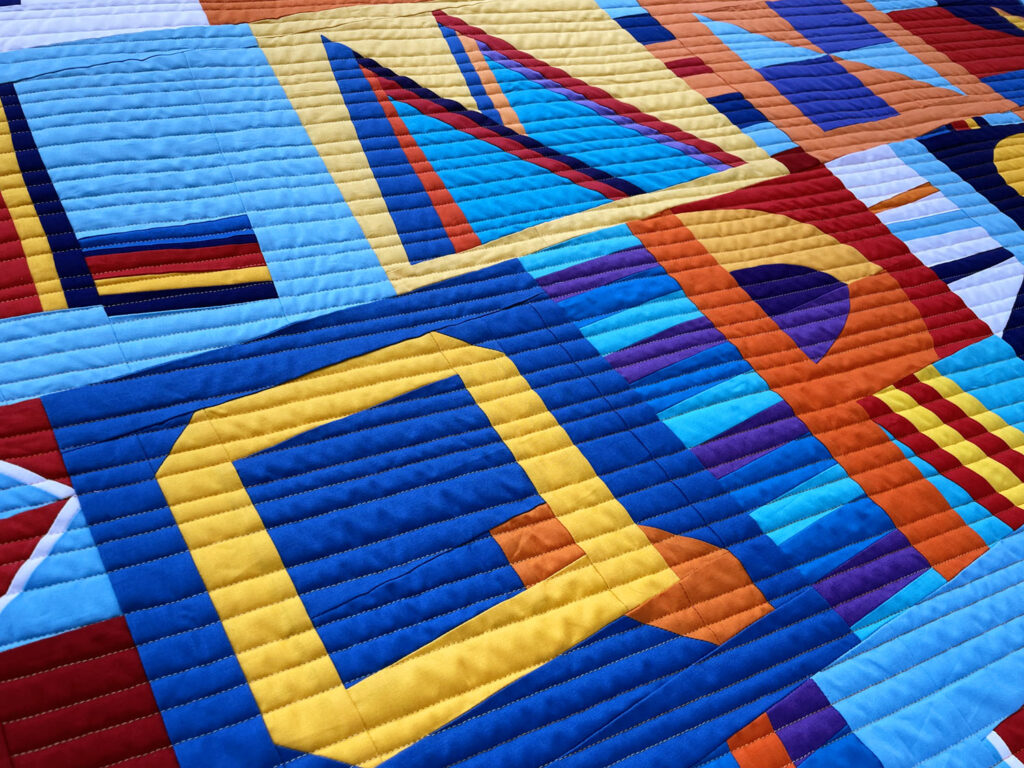
I considered quilting each block separately and using the quilting lines to echo the shapes of each letter. But after my experience with the filler blocks being a distraction, I ultimately decided that too much quilting could be a distraction as well. I quilted straight lines, randomly spaced anywhere from ~1/4″ to ~1″ apart.
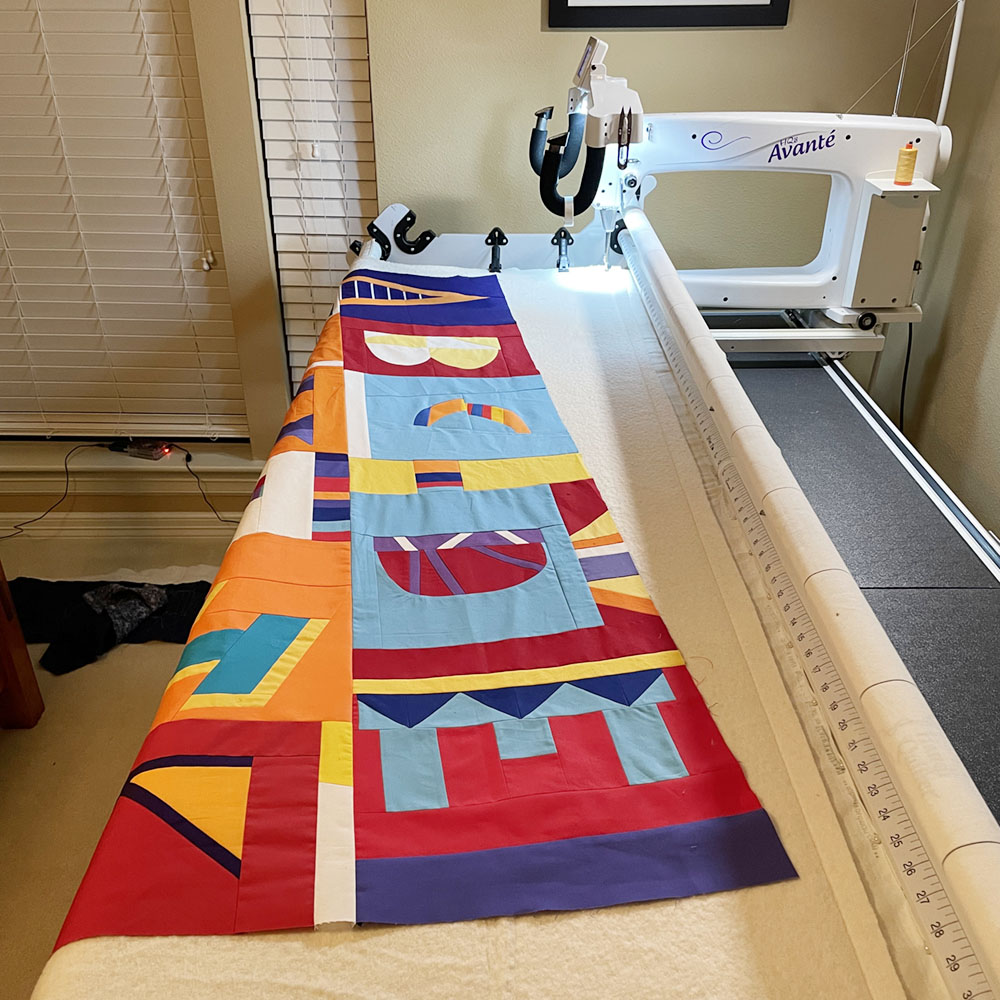
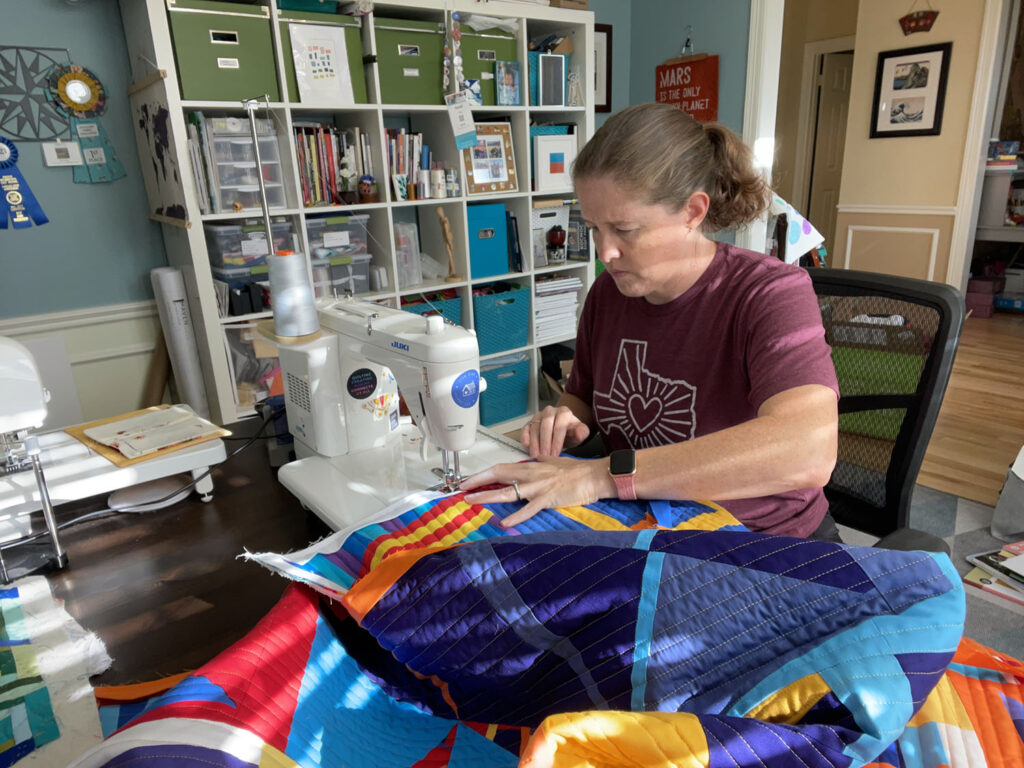
I wanted the lines to run diagonally instead of straight across, but I also wanted to do the quilting on my longarm. This required loading the quilt top at a slight angle as you can see in the photo below.
This method worked really well and once again, I changed my plan along the way. My original plan was to do the first pass, then rotate the quilt 90 degrees and do another pass to create a grid. But after doing the first pass of straight lines, I was on the fence about whether it really needed more. I asked several friends for advice, and the overwhelmingly majority was “good as is!” Decision made.
Onward to binding, then! I made a scrappy binding using the same colors already featured in the quilt top. Scrappy seemed like a good way to finish off this improv, wonky quilt!
The stats:
- Quilt measures 61″ square.
- Top fabrics are mostly Kona Cotton I think, but since I only specified solids, I know there are a few from other brands in there as well.
- Backing is Widescreen by Carolyn Friedlander.
- Binding is Kona Cotton.
- Longarm quilted on my Handiquilter Avante with Aurifil 50 wt thread in #4658 (Limoni di Monterosso).

Sarah, this is amazing! I love it 😍. One question tho, long arming it at an angle like that (love that idea), doesn’t it distort the quilt? I’d think one would have to add extra fabric around the quilt to then be able to square it up later?
Hey Marty! I didn’t use extra fabric to the quilt top itself, but I definitely used oversized backing and batting. My backing and batting were square, and loaded onto the frame the normal way before I floated the quilt top. I trimmed those excess corners once I was done.
Oh wow, the difference in the quilt tops is striking; I know seam ripping isn’t necessarily fun, but the change was definitely worth the work. And where else do we get a real life undo button?? I also really like that you loaded the quilt at a slightly wonky angle, it plays so well with the improvisational piecing.
I love the idea of thinking about seam ripping as a real life undo button! Ha!
Bravo! Love that you kept at it until it reflected your original idea.
Thanks Emily! I get frustrated when I realize I need to go in a different direction…but I also know it’s usually the right call!
Totally worth the unripping, the quilt has become much more powerful.