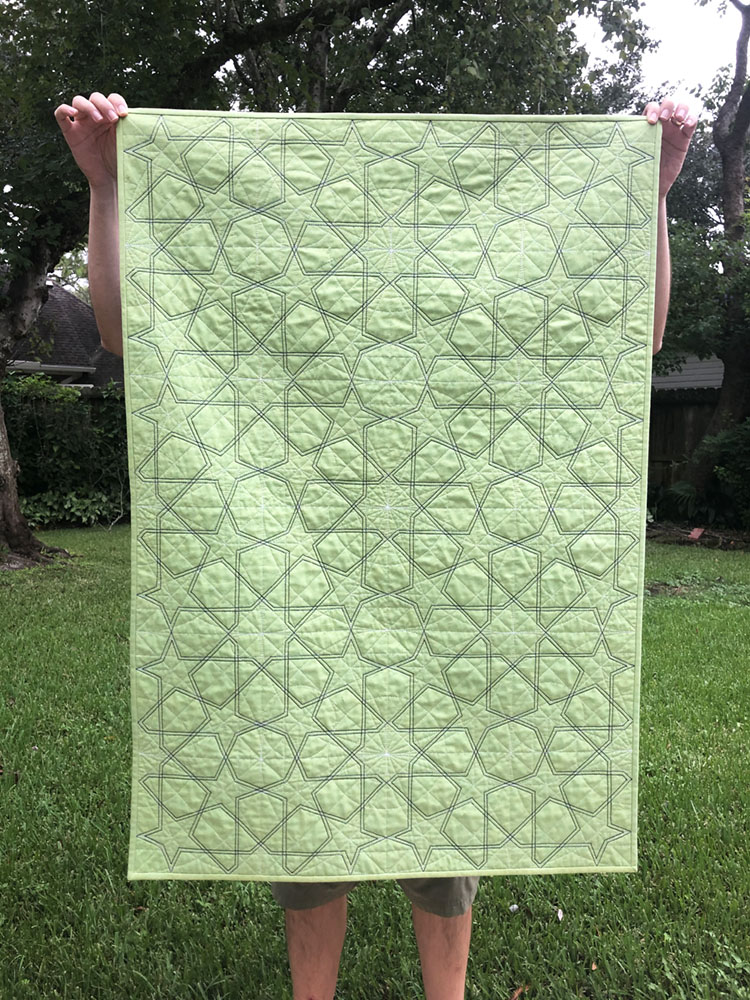
This month’s Aurifil Artisan challenge was to make a wholecloth quilt! I have never made one before and jumped on the opportunity to try something new. I chose Aurifil 100% cotton threads in white and navy blue, and was provided with this gorgeous fabric from the Artisan Cotton collection by Windham Fabrics.
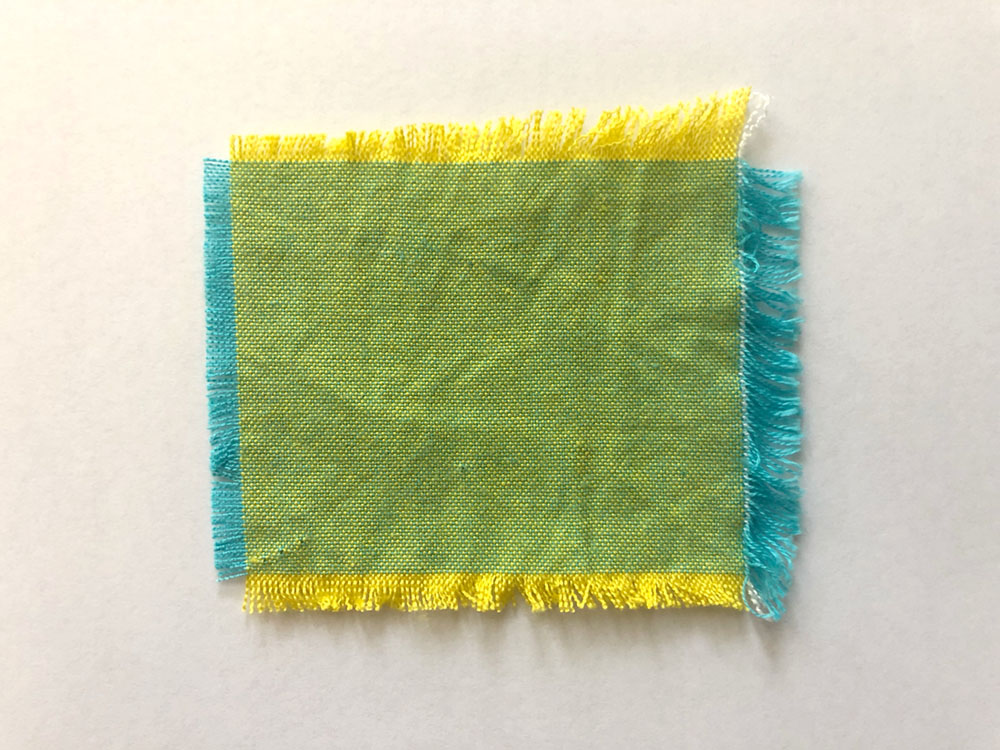
Artisan Cotton is a cross-dyed quilting cotton. From a distance, it reads as a solid but up close, it has a lot more texture thanks to the two different thread colors used in the weave. As you can see in the photo below, the warp threads (parallel to the selvage) are yellow, and the weft threads (perpendicular to the selvage) are turquoise…and together they read as a happy yellow-green!
(I did notice that this particular shade photographs quite differently depending on the lighting! The picture at the top of this post is probably the most true-to-life representation of the color.)
After considering several different ideas, I settled on using Aurifil thread to create a geometric pattern. I’ve long admired the intricate patterns in Islamic art and architecture, and even recreated one of them years ago to use in the background of Emma’s birth announcement. But I’ve never put one into a quilt…until now!
Earlier this year, I took several classes from Art of Islamic Pattern. Armed with new and improved knowledge of how to construct several patterns, I chose an 8-fold geometric rosette and dove into quilting.
(Side note: If you like quilting and Islamic patterns, you absolutely must check out Tighe Flanagan. He has made several pieced quilts based on Islamic patterns that are stunning and gorgeous!)
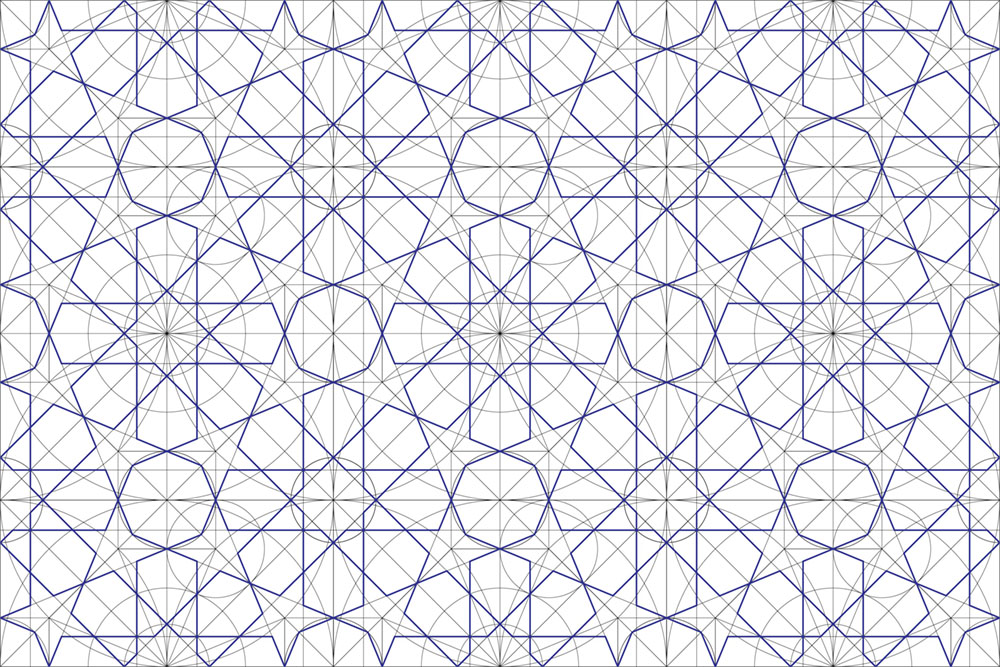
I started by creating my pattern in Illustrator, and scaled it to my desired 30″ x 45″ size. I knew from the start that I wanted to include both the 8-fold pattern and all of the underlying construction lines, so figuring out how to transfer all of the lines from my pattern to my fabric presented a challenge! Tracing them with a pen and lightbox sounded burdensome, so I searched for a different solution and discovered Sticky Fabri-Solvy.
Fabri-Solvy is usually used for embroidery, but it worked wonderfully for this quilting project. I bought 8.5″ x 11″ sheets that could be fed through my printer. Then you peel the paper backing off and the sheet adheres to the fabric like a sticker. Stitch over the lines, and when you’re done, the material dissolves in water to leave just fabric and stitches.
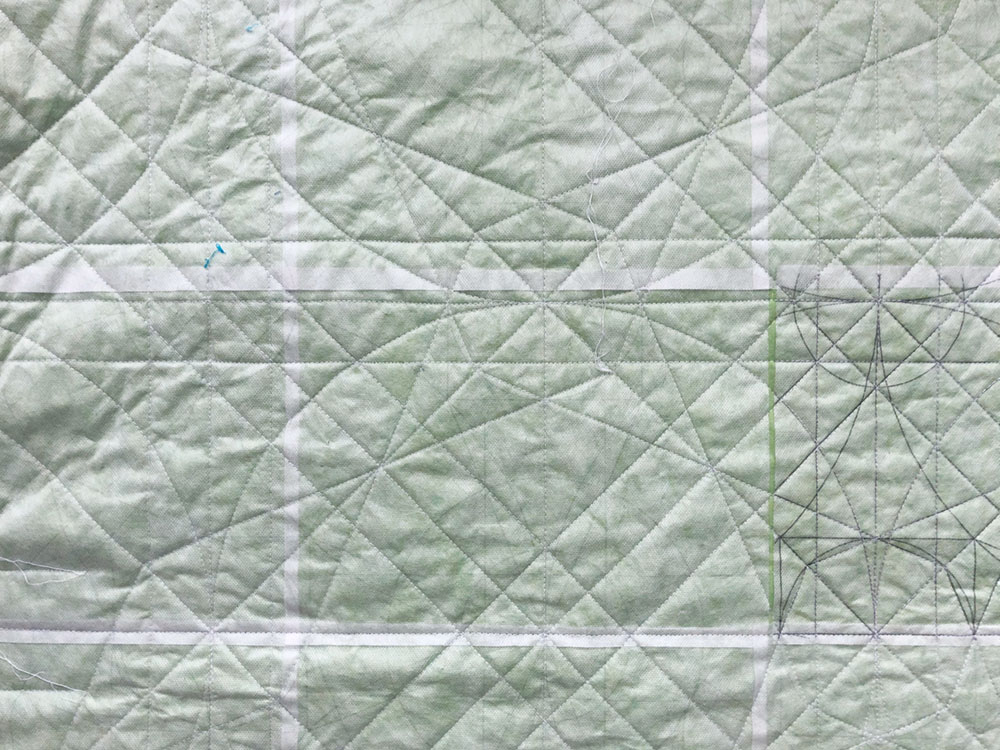
It took 18 sheets to fully cover my design, and each had to be carefully aligned with the neighboring sheets. This process was manageable for my wall hanging, but admittedly might not be a great solution for larger quilts.
(A note: Print on the Fabri-Solvy as lightly as you can! On a test piece where I’d printed with thick black lines, my laser printer toner turned my white thread slightly gray during the rinsing process. For my final quilt, I printed the sheets with very thin, light gray lines.)
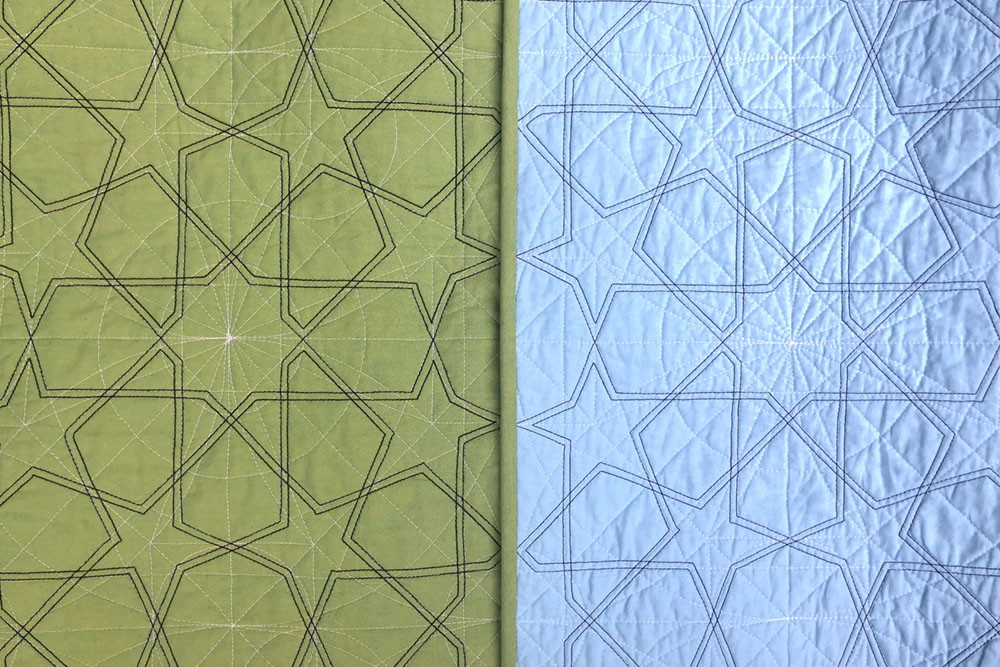
With the Fabri-Solvy sheets in place and my quilt sandwich basted, it was time to quilt! I did all of the construction lines using Aurifil 50wt thread in #2024 (white). 50 wt is my go-to for most quilting, and the thinness plus light color gave me just the effect I wanted with the yellow-green fabric — just enough contrast to show the detail and texture of the underlying pattern structure, but not enough to be distracting.
It took several days and quite a few buried threads to finish all the construction lines, but when that stitching was complete it was time for the moment of truth — washing away the Fabri-Solvy! I had tested it on a smaller scale, of course, but this was a LOT to get rid of.
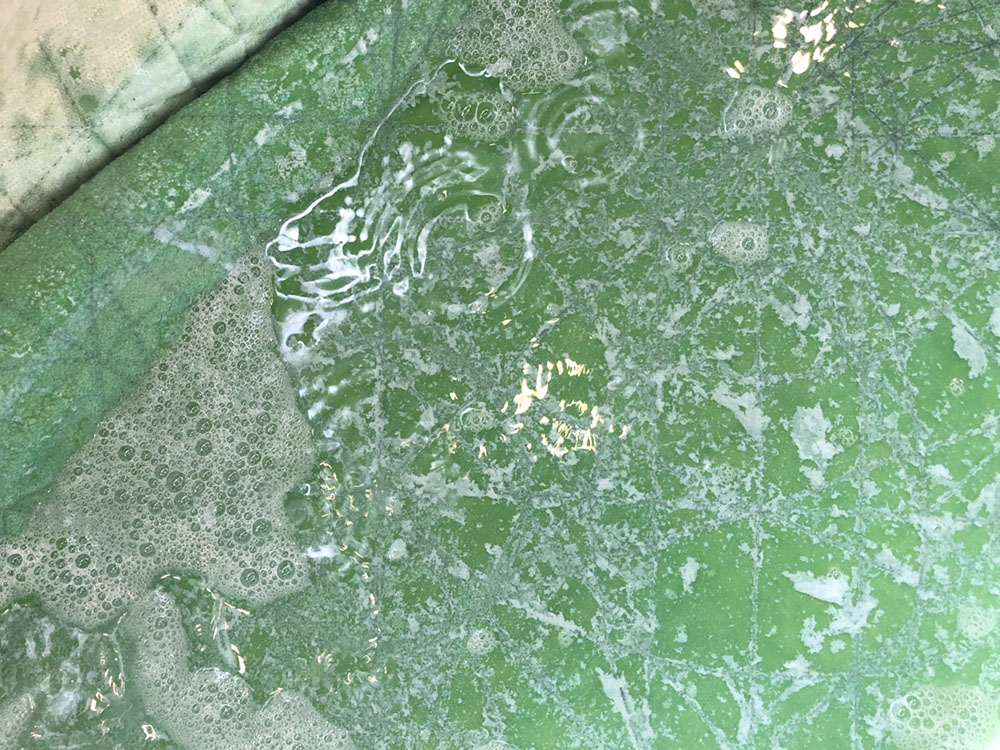
Instead of trying to rinse it off bit by bit, I went for a wholecloth soaking! I filled up our bathtub with several inches of water and dunked the whole thing. The material started to dissolve quickly, but to make sure every bit was well and truly gone, I left the quilt soaking in the bathtub for a couple hours. When I finally came back to it, I found cloudy water…and not a trace of Fabri-Solvy left on my quilt top! Hooray!
I drained the tub, squeezed out as much water as I could, and then laid the whole quilt out to air dry. It took nearly 24 hours, but by the next day it was ready for the next step.
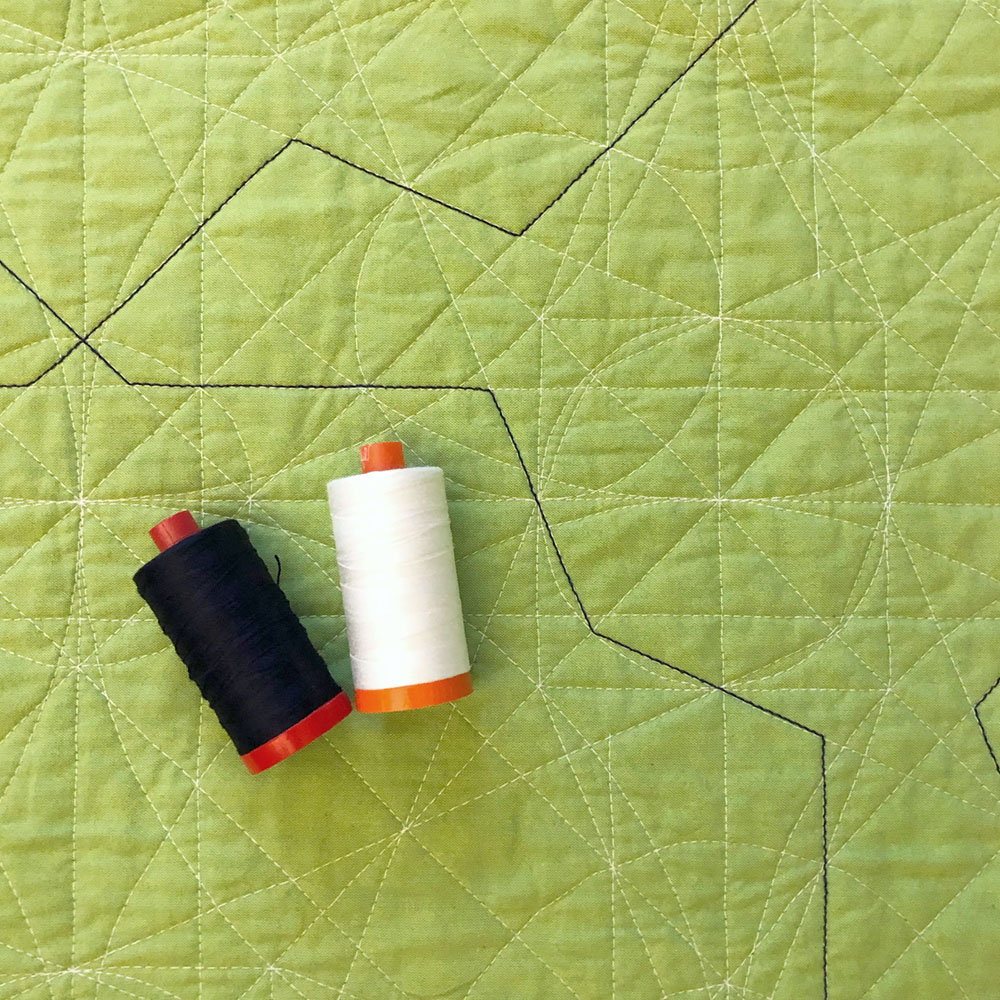
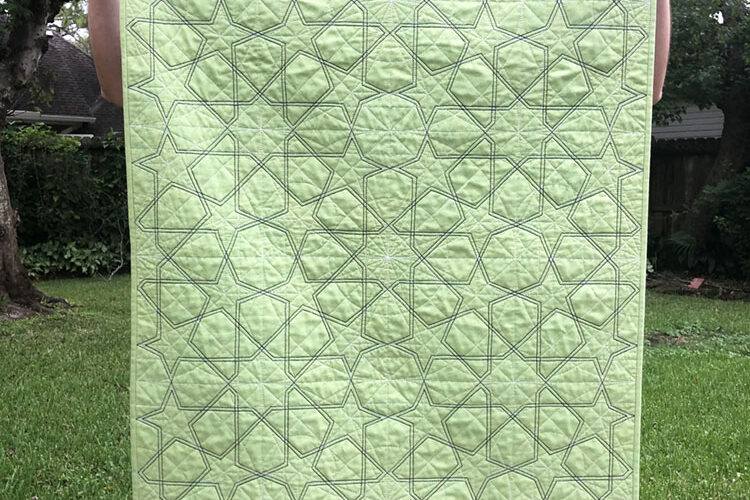
I used Aurifil 12wt thread in #2784 (dark navy) to quilt the 8-fold geometric rosette. This was quite easy since I already had all of my construction lines in place! I’ve been using thicker threads like 28wt and 12wt more often lately. I love the texture and how they make the quilting lines pop, so a wholecloth quilt is a great place to use them.
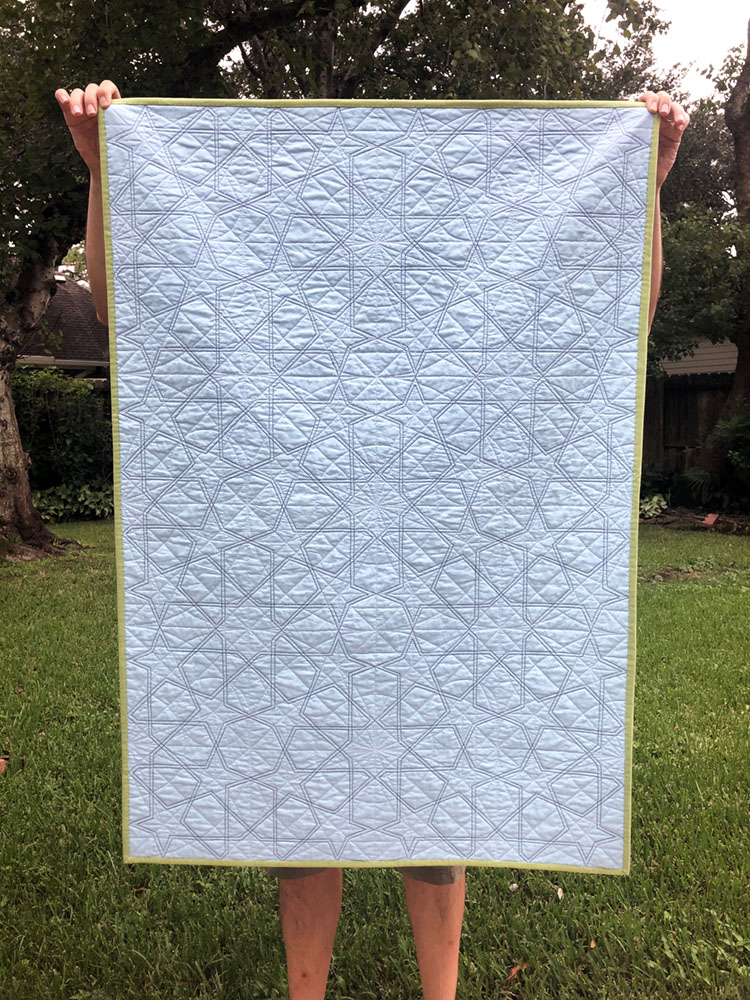
When using 12wt thread, Aurifil recommends using 40wt thread in the bobbin. I didn’t have matching navy blue 40wt thread, but I did have a navy blue cone of their Forty3. This 40wt, 3-ply thread was designed for longarms, but I’ve heard from many friends who use it and love it with their domestic machines. I gave it a try as a bobbin thread, and can happily report that it worked great there as well. I used a light blue Kona cotton on the back, and the Forty3 thread shows up so nicely that it could totally work as a double-sided quilt!
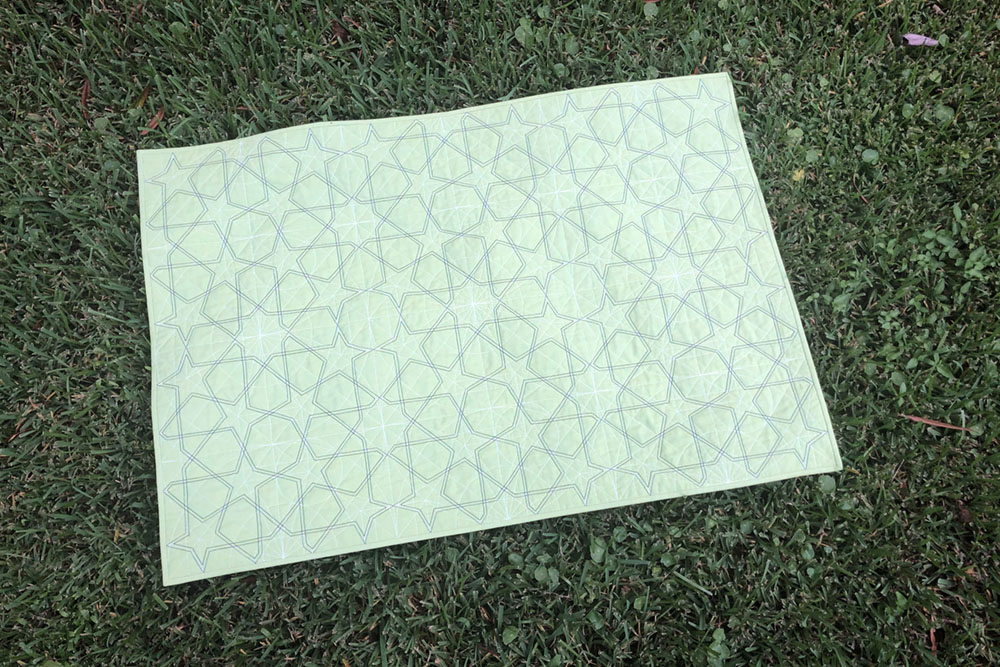
My first wholecloth quilt was a super fun project to work on, and I enjoyed learning so many new things — from using Artisan Cotton to discovering Fabri-Solvy to quilting with 12 wt thread on a larger scale than I had in the past. And I’m so happy with the result!
The stats:
- Mini quilt measures 30″ x 45″.
- Top and binding fabric is Artisan Cotton by Windham Fabrics in 40171-44 Yellow-Turquoise.
- Backing is Kona Lake.
- Machine quilted with a walking foot using Aurifil 50 wt #2024 (white) for the pattern construction lines, and 12 wt #2784 (dark navy) for the accent quilting. With the 12 wt thread, I used navy Forty3 thread in the bobbin.


 #saroy1sec #1secondev


This is spectacular!
Beautiful effect to have the lighter construction lines underneath the bold 12wt rosette! I have found with cross-weave fabrics that the direction the fabric is placed can make it look different (if the yellow runs up and down versus side to side, for example); it’s subtle and interesting.
Just amazing!
Stunning. Also, really interesting how you managed getting the pattern marked.
Wow! The secondary design with the 12wt really shines! Thank you for sharing your process. The fabric-solvy worked wonderfully! Thank you for linking to TGIFF!
Thanks for hosting Paige!
WOW!
Wow. I enjoyed seeing your quilt on Instagram and was impressed by the quilting. But this is why I love blogs – it was SO interesting to read more about your project – both with threads and the Fabri-Solvy. Thanks for sharing!
Ha, I can definitely write a lot more on a blog than in an IG caption!!
What is Fabri-Solvy made of – poly vinyl alcohol?
According to google, yes!
Beautiful! Question: how did you quilt with the thickness of 12 wt? WHat needle size?
Hey Julie! I used a 90/14 needle. Aurifil recommends either that or 100/16.
Gorgeous quilt! Thanks for sharing your process!
Thanks Sonya!