Enjoy this tutorial? Get another freebie when you join my email newsletter!
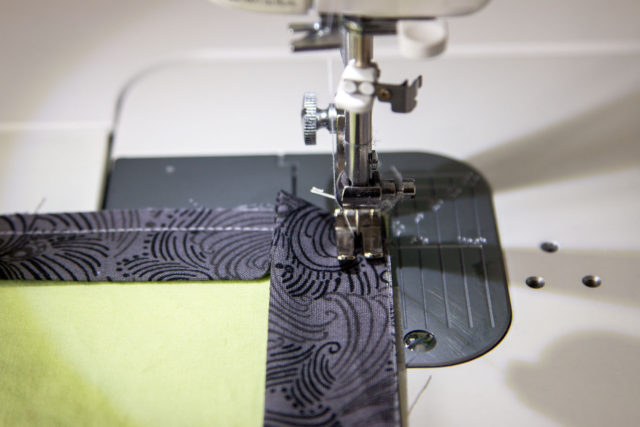
When I’m making a quilt that I know will be used and loved and washed, I always turn to machine binding. Hand-stitching the binding down on the back of the quilt may be more traditional, but binding by machine is a lot faster, and I think it’s arguably more durable too.
I’ve been quilting for 8+ years and in that time I’ve tried countless tips and tricks for binding a quilt by machine. You can start from the front and go to the back, start from the back and go to the front, vary the width of your binding strips, join them with straight seams or diagonal seams, pin or clip or glue baste, edge stitch or stitch in the ditch.
In the last year or two, I seem to have finally converged on the machine binding method that works best for me. It’s a combination of all the different things I’ve learned from others, and I finally took the time to take some pictures and write up a full tutorial.
Make the Binding
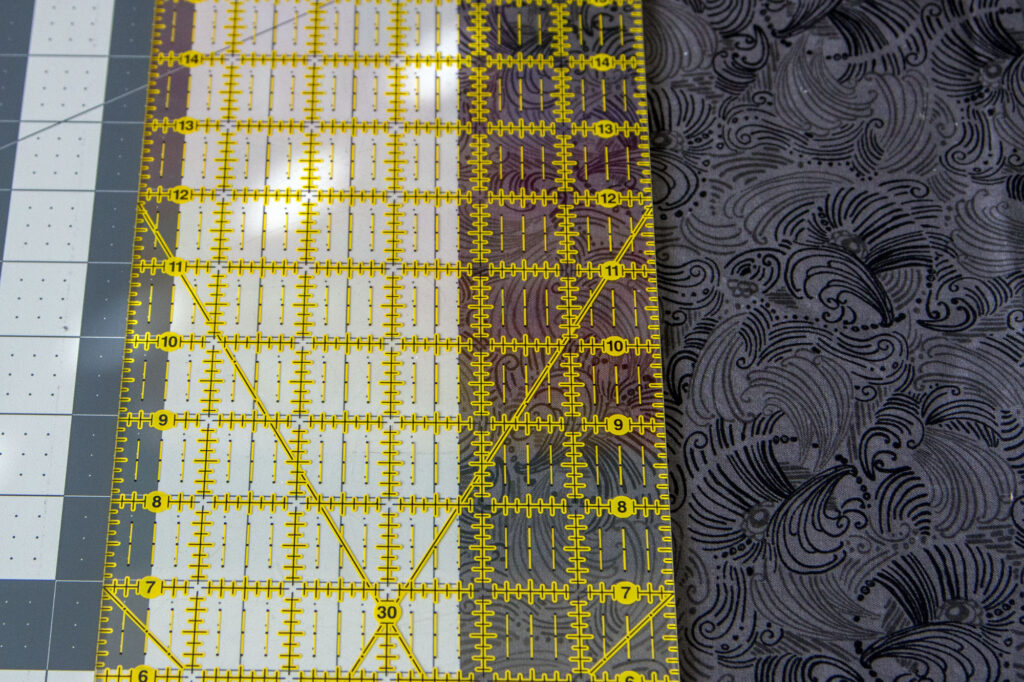
Cut 2.25″ x Width of Fabric (WOF) strips from your binding fabric. To determine how many strips to cut, first figure out the perimeter of your quilt and then add at least 20″ to account for joining the strips and turning the quilt corners.
For example, if your quilt is 45″ wide and 60″ tall, you need to cut:
45″ + 45″ + 60″ + 60″ = 210″
210″ + 20″ = 230″
You need to cut 230″ of fabric strips.
Now divide this number by the width of fabric. Most quilting fabric are 42-44″ wide, but I always assume 40″ to be safe.
For example:
230″ / 40″ = 5.75
You need to cut (6) 2.25″ x WOF strips.
Multiply the number of strips by the width to figure out how much fabric you need.
For example:
6 x 2.25″ = 13.5″
You need exactly 3/8 yard of fabric. To be safe, you may want to have 1/2 yard.
Note 1: Binding strips that are 2.5″ wide seem to be the “standard” that is most commonly used, but I prefer the finished look from a slightly skinnier strip. If you are a beginner, you may want to start with 2.5″ to give a little more wiggle room.
Note 2: If you are binding a quilt with a lot of curved edges, you may want to cut your fabric strips on the bias to make it easier to stretch/ease the fabric around the curves. But if your quilt has straight edges like most of them do, cutting the fabric from selvage to selvage is simpler and perfectly effective.
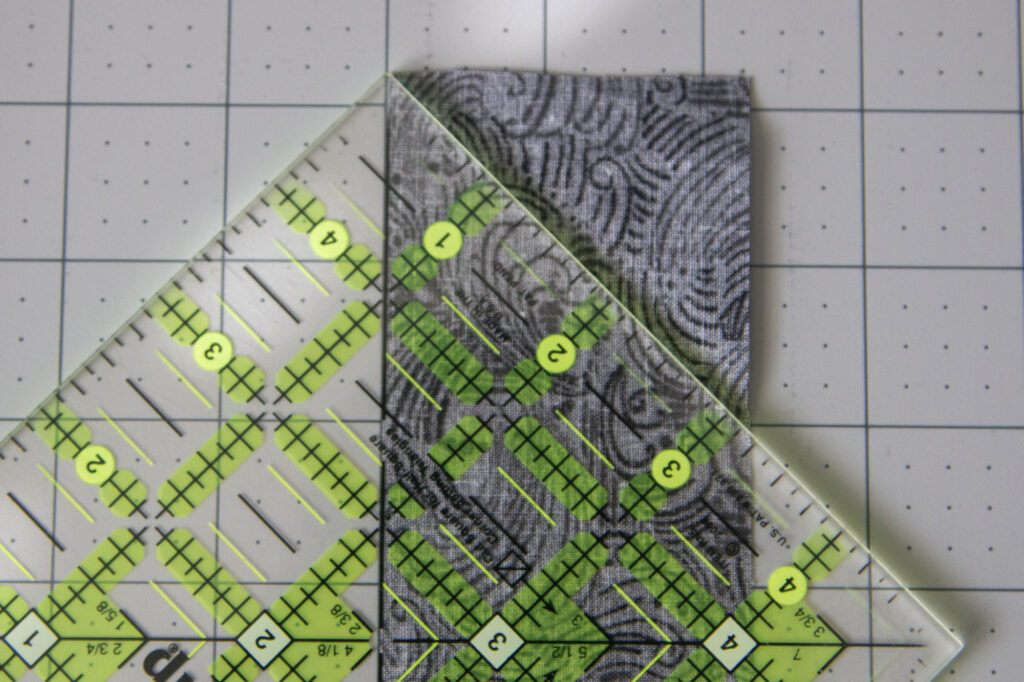
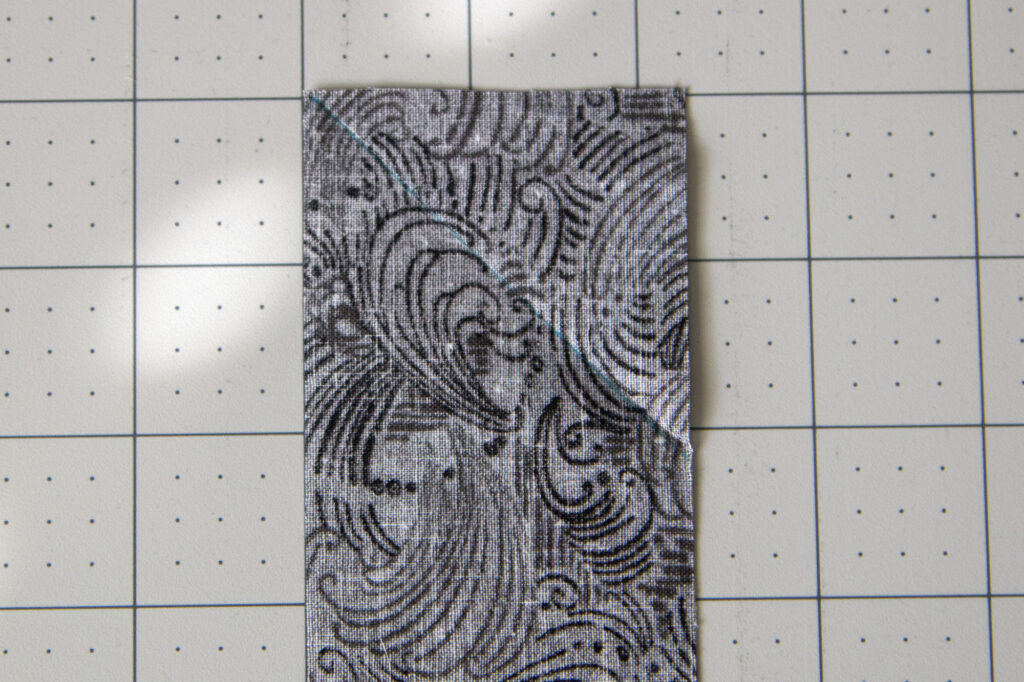
Join the strips end to end using a diagonal seam. To do this, start by marking the end of one strip with a 45-degree line as shown above. You can mark it with a fabric pen, or fold the corner down to make a crease.
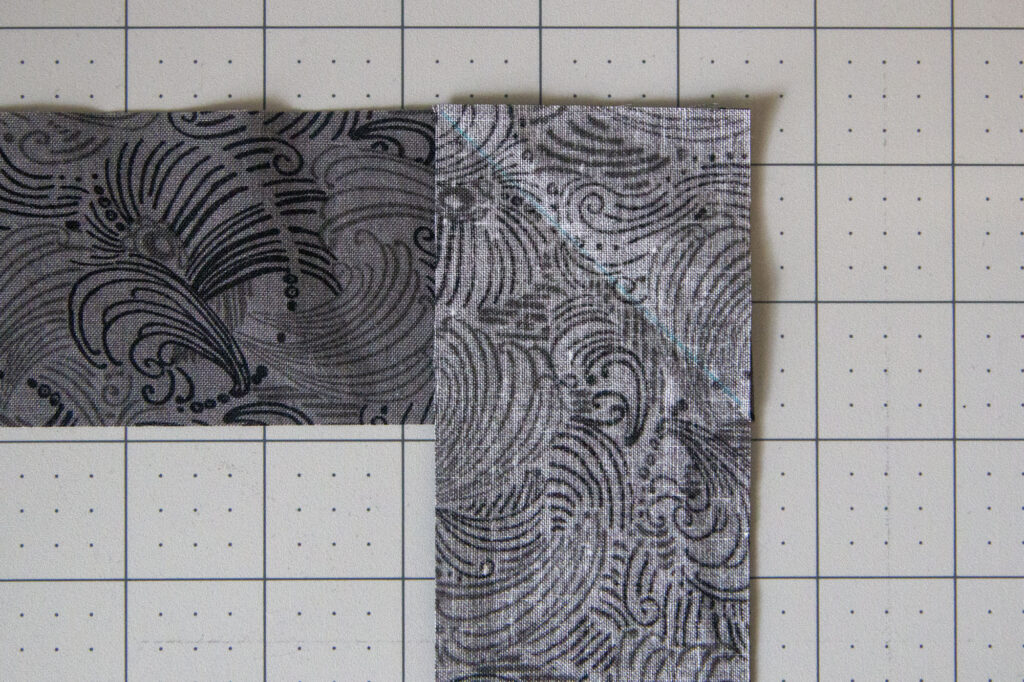
Align two strips with right sides together as shown above. The diagonal line/crease you just made will run from the corner of the top strip to the point that matches the corner of the bottom strip. Use a pin to keep the strips in place if you like.
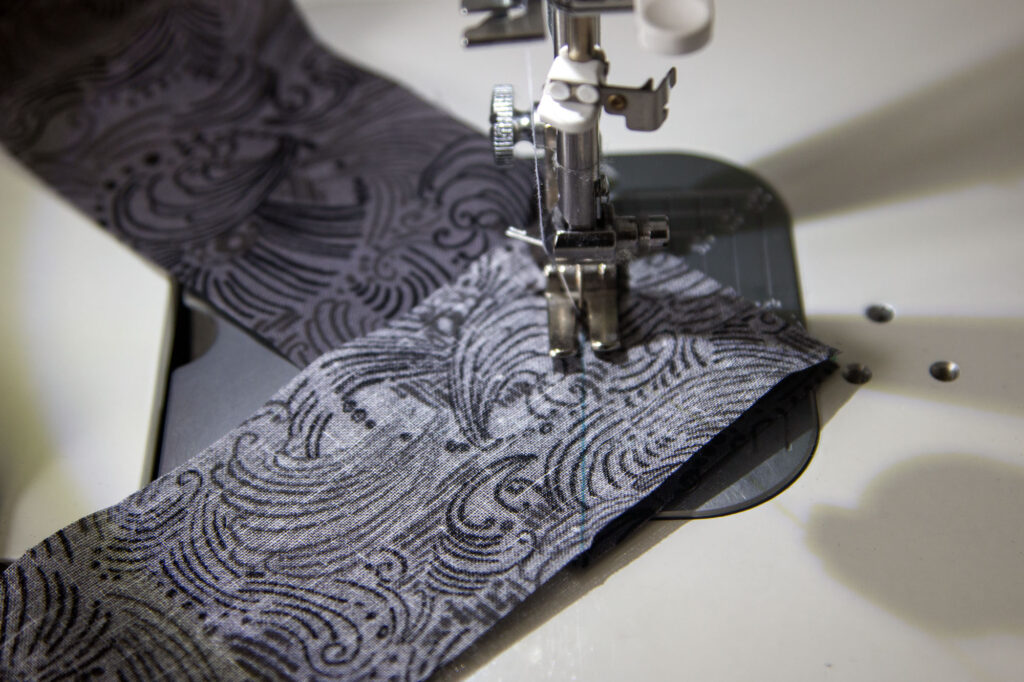
Sew along the line/crease you just made. Make sure the two binding strips stay aligned perpendicularly.
Note 3: I have made enough binding at this point that I don’t bother marking my sewing line or pinning the ends together. Instead, I simply line up my two strips as shown above, and eyeball the sewing line from corner to corner. If you don’t feel confident in your ability to eyeball it, definitely mark the line and pin the ends together! Taking the time to mark is worth it to ensure nice, clean binding.
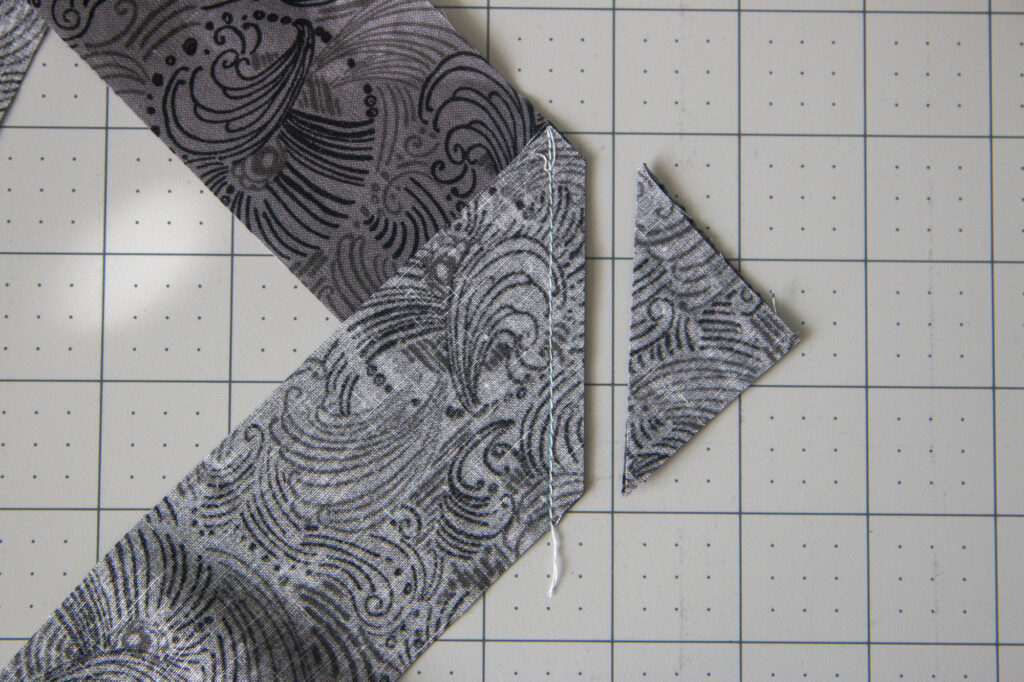
Trim 1/4″ away from the line you just stitched, and toss the tiny extra triangles. Repeat this process to join all your strips together until you have one long piece of binding.
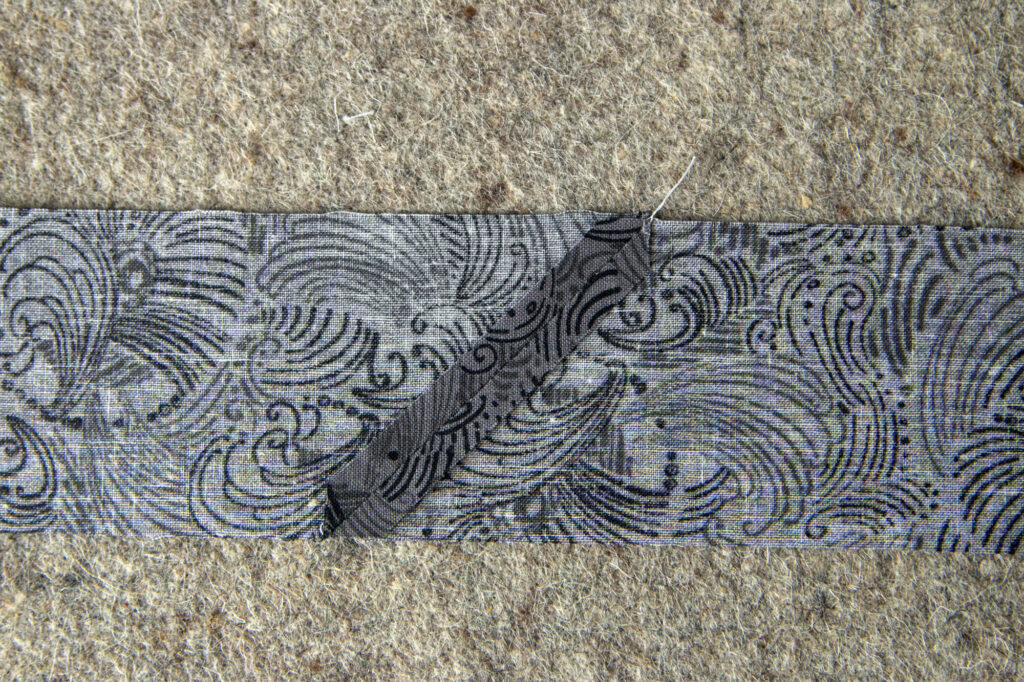
Press all the seams open as shown above. Pressing open helps reduce bulk in the binding!
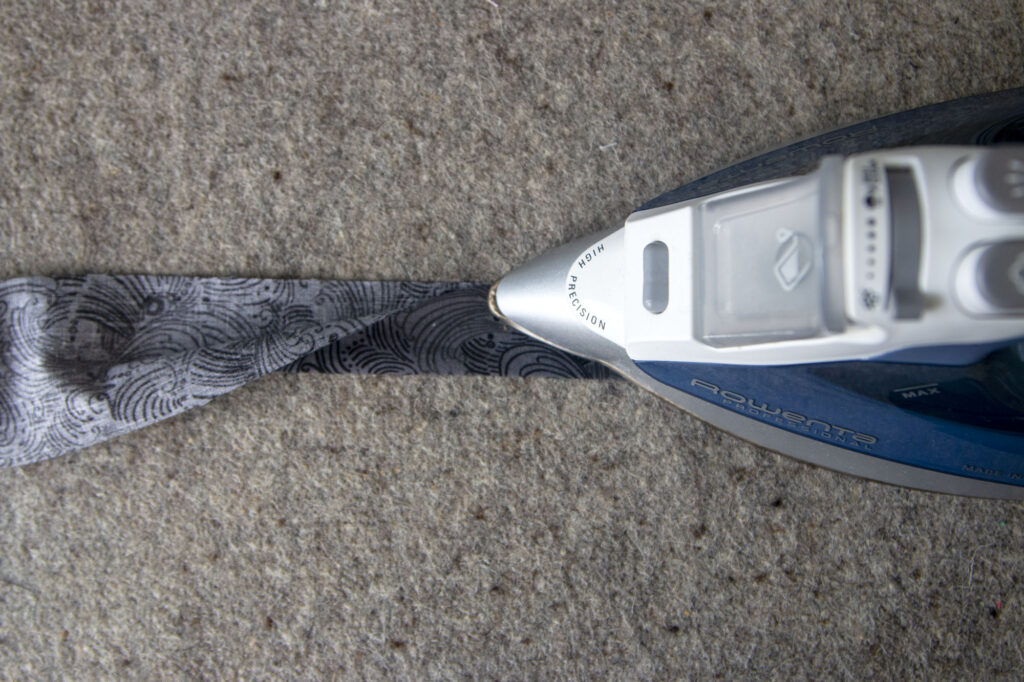
Now press the entire binding strip in half lengthwise, with wrong sides together. You have just made your own binding!
Attach the Binding to the Quilt Front
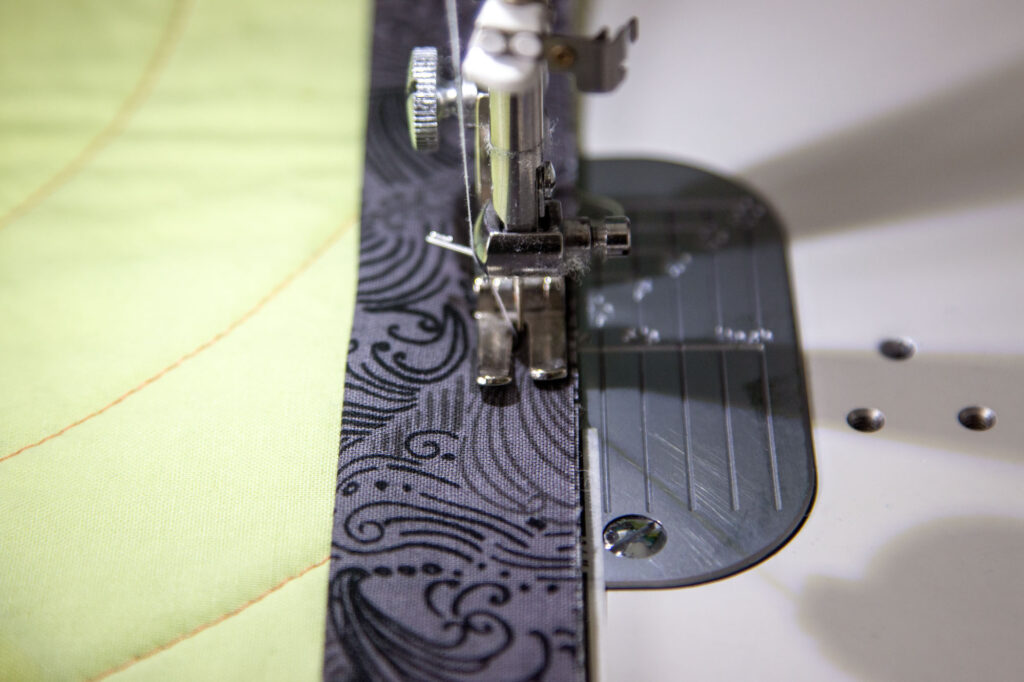
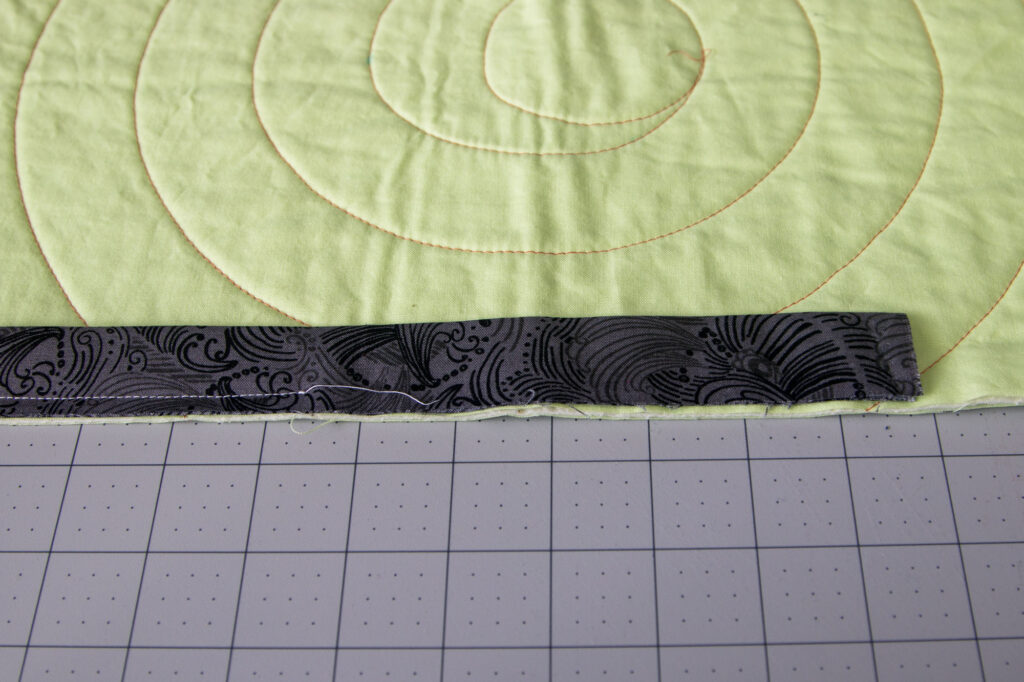
Align the raw edges of your binding strips with the raw edge of the quilt top. Leave a tail of at least 5-10″, and stitch the binding to the quilt top using a 1/4″ seam. Backstitch at the start to secure.
Note 4: I tend to use a slightly generous 1/4″ here, as opposed to the “scant” 1/4″ seam that is often called for in piecing. Scant or generous doesn’t really matter as long as you’re close. That said, be careful not to use TOO generous of a seam (such as 3/8″) or you will run into trouble in later steps.
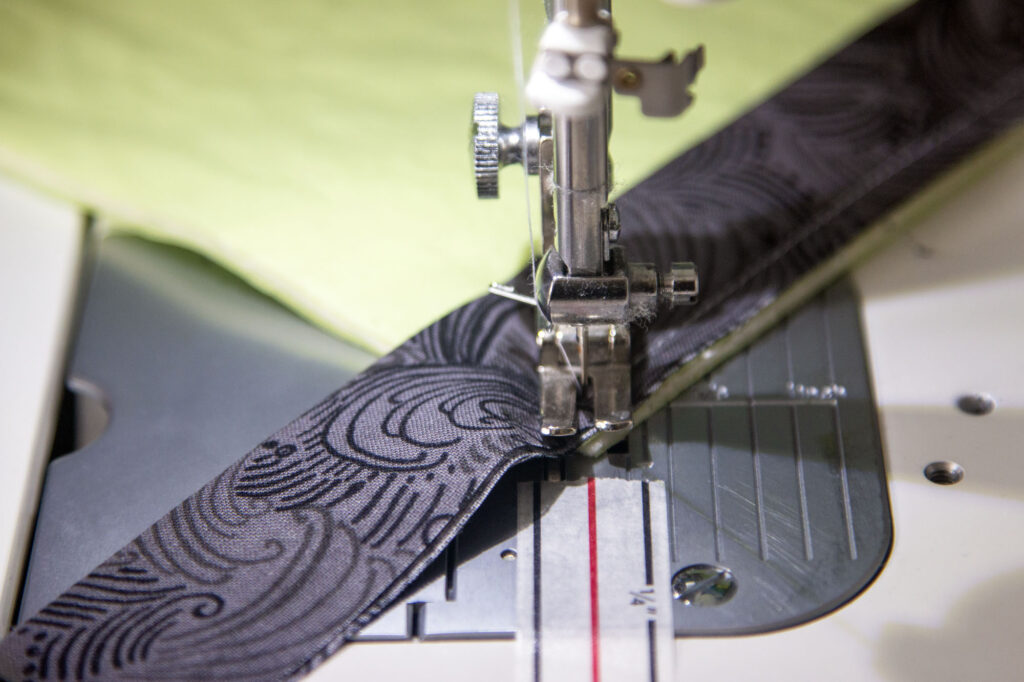
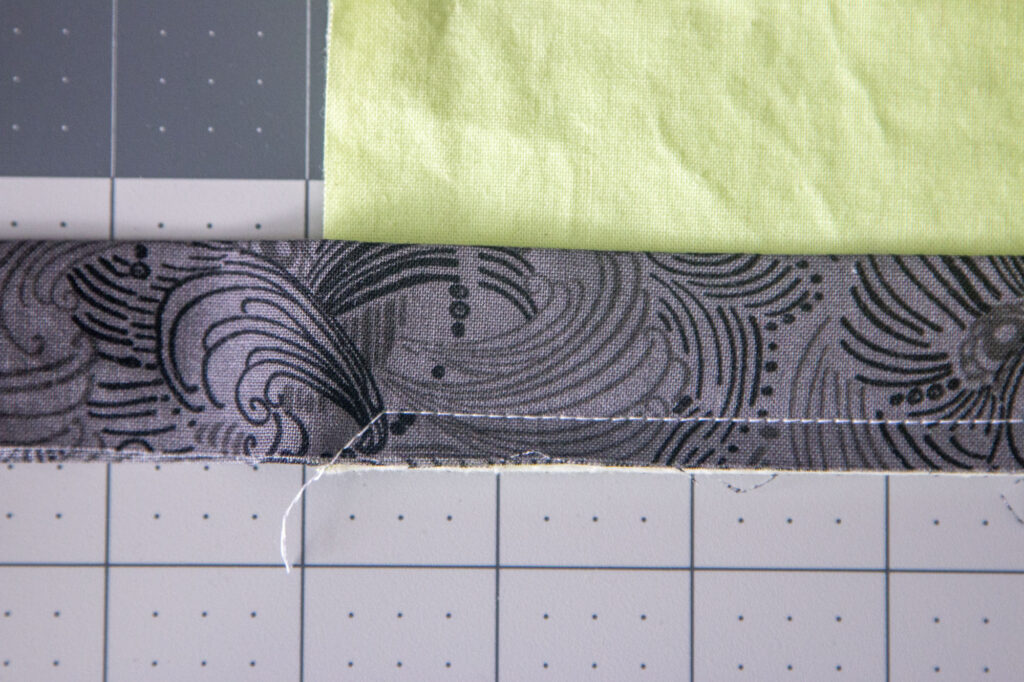
As you approach the corner of the quilt top, stop 1/4″ from the edge. With your sewing machine needle down, turn the quilt 45 degrees and sew straight off the corner of the quilt as shown above.
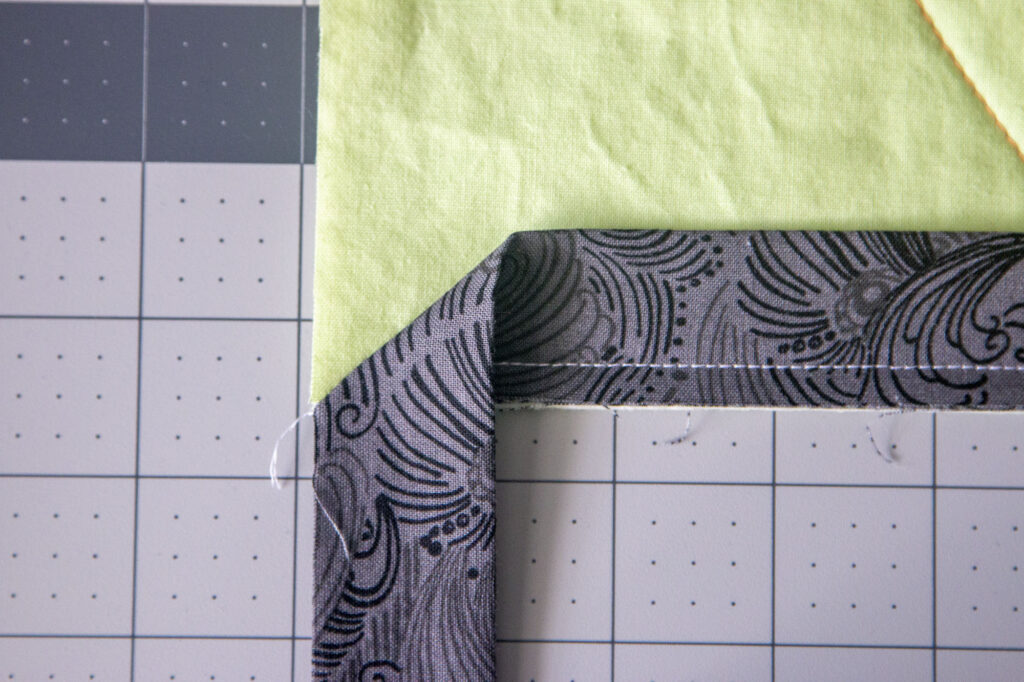
Fold the binding strip down as shown, using the stitch lines you just sewed off the corner to guide this fold.
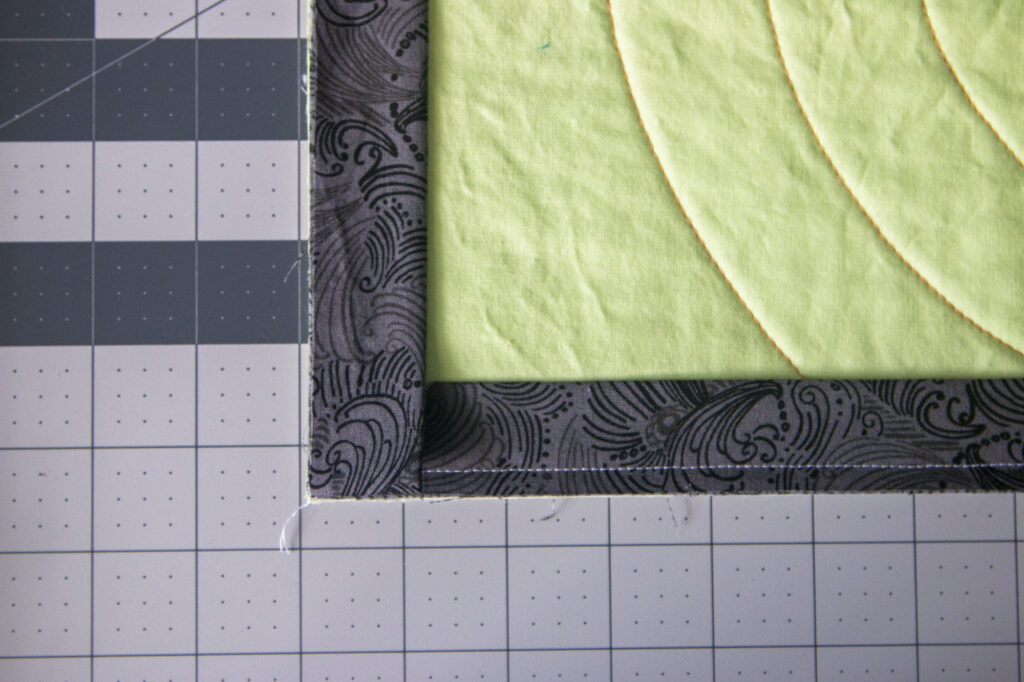
Now fold the strip back up, with the folded edge aligned with the bottom of the quilt. There will be a little triangle flap of fabric in the middle.
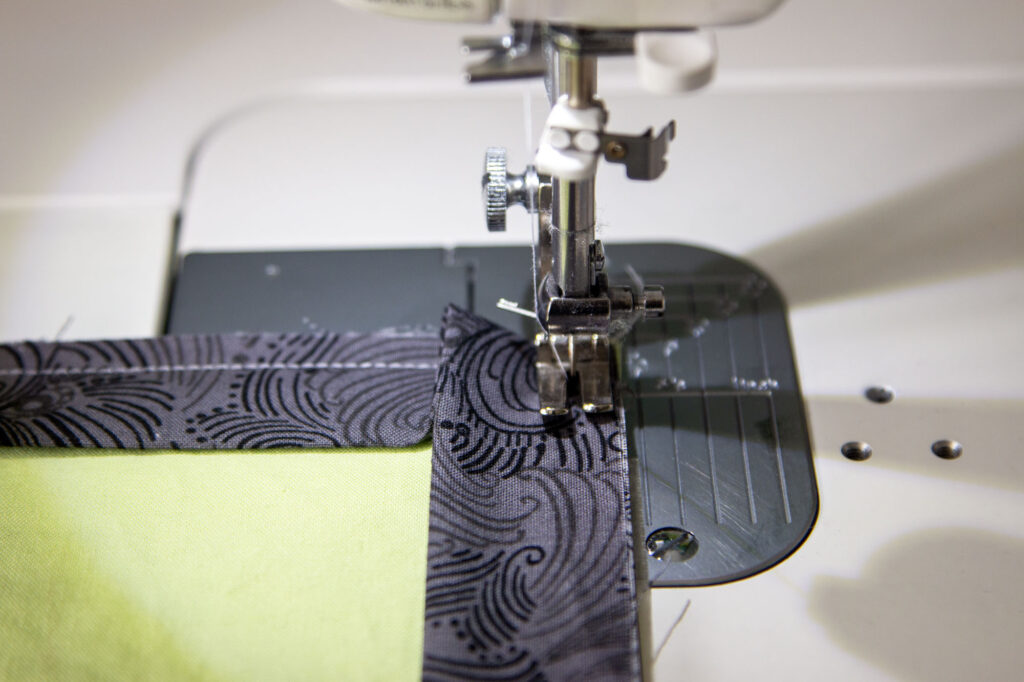
Start stitching again with a 1/4″ seam. There’s no need to start 1/4″ in from the side — you can start stitching right at the edge. Backstitch when you start to secure.
Continue working your way around the quilt until you are almost back where you started. Stop ~10″ from where you started and backstitch to secure, leaving two loose ends.
Join the Loose Ends
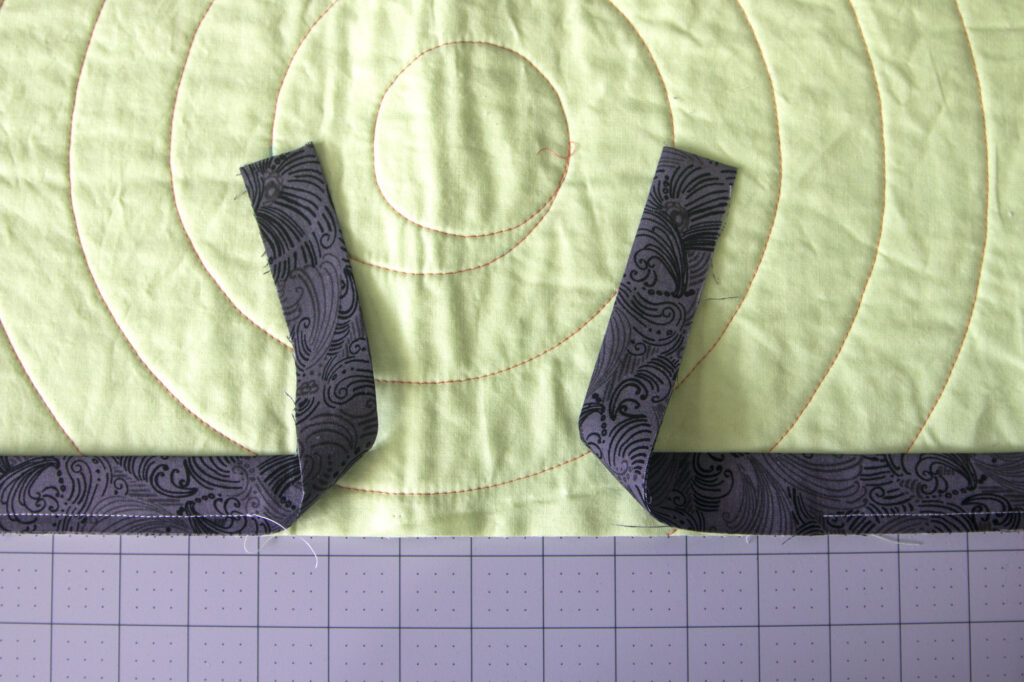
It’s time to join those two loose ends together! There are many different ways to do this, but I like this method that I learned several years ago from Me and My Sister Designs. I am describing this method below, but I highly recommend watching their video tutorial as well.
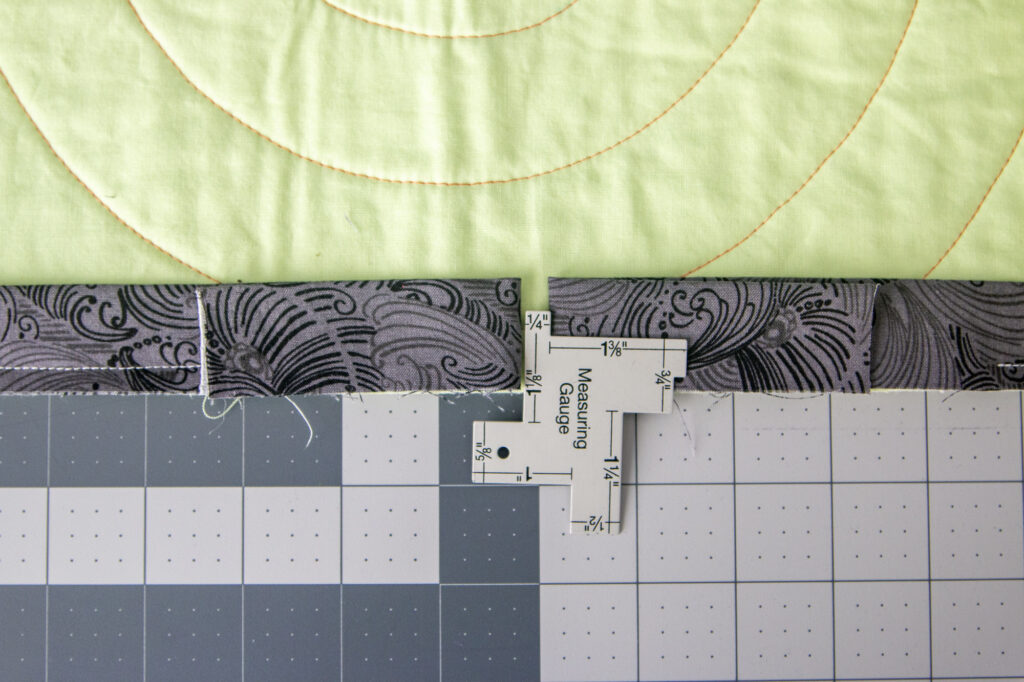
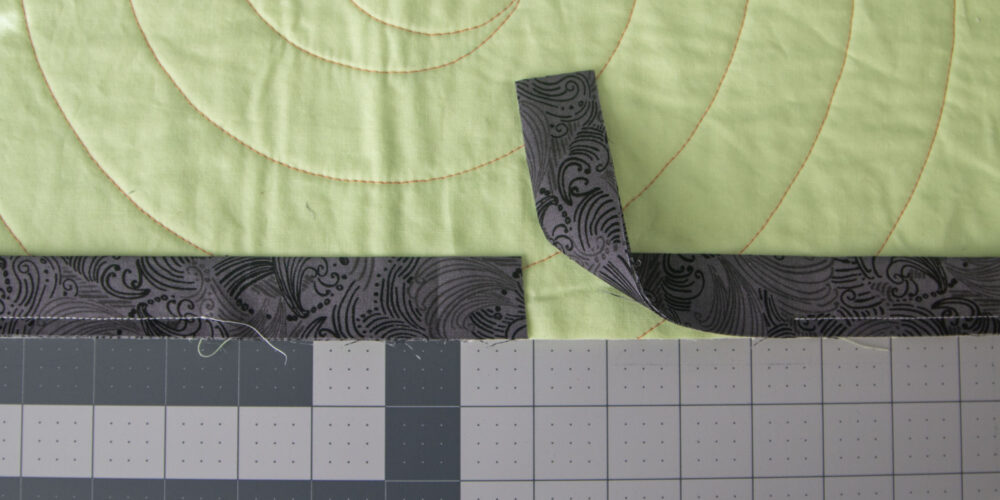
At approximately the middle of the gap you left along the side, fold back each loose end of the binding. Leave a 1/4″ gap between the two folded ends.

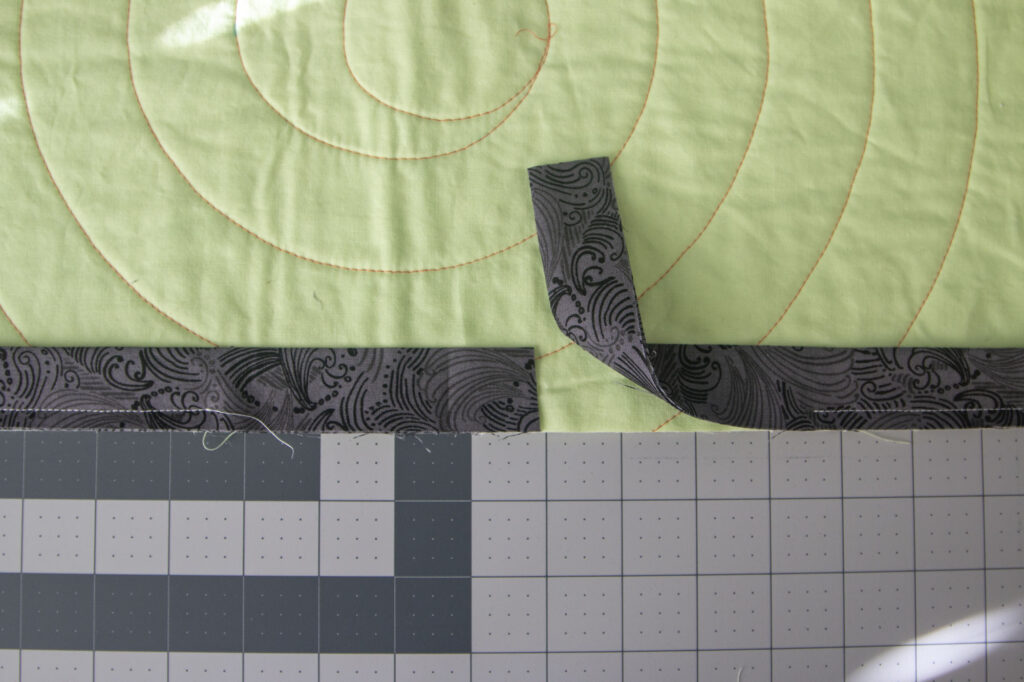
Cut each end 1-1/8″ from the folded end. This measurement is half the width of the binding, so if you are using a different binding width, adjust this number accordingly. For example, if you are using 2.5″ width strips, you would measure 1.25″ from the folded edge.
Make sure you are just cutting the binding end/top layer, and not the part of the binding that is underneath!
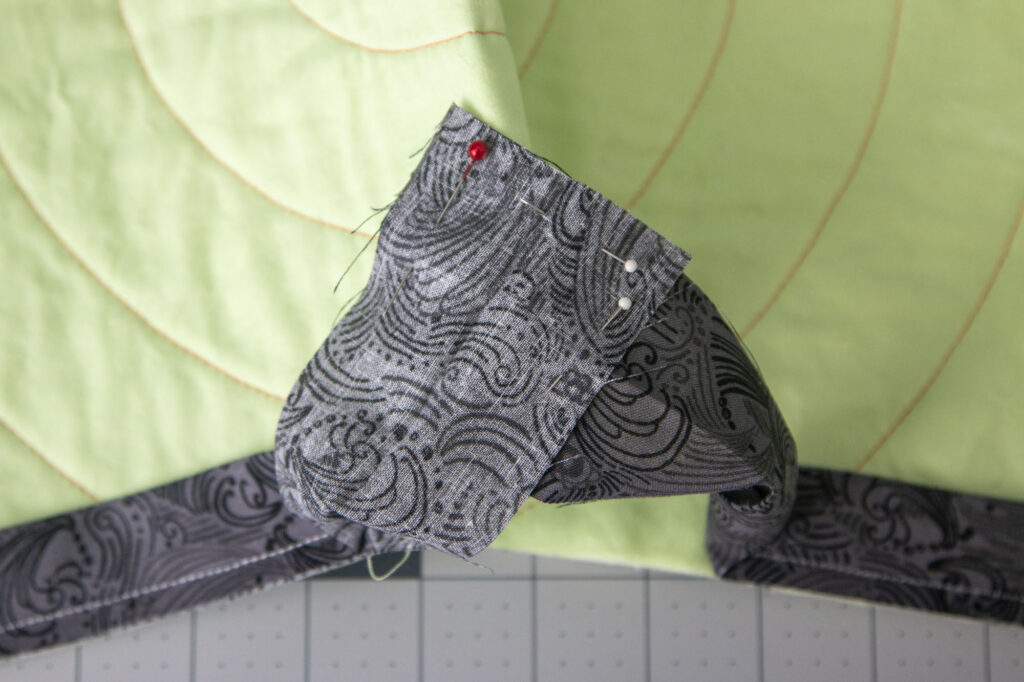
Now align the two loose ends as shown above, perpendicular to each other with right sides together, and pin together. This is the same way you aligned the fabric strips earlier when you made the binding. Make sure not to twist the binding ends!
Note 5: You will likely need to fold/smush the quilt to help bring the tails together. It can be tricky to keep the ends aligned while sewing, especially if you don’t leave long enough tails; I could have left longer tails in the photos above and made my life a little easier! If you’re having trouble, don’t hesitate to unpick a few stitches to get a longer binding tail to work with.
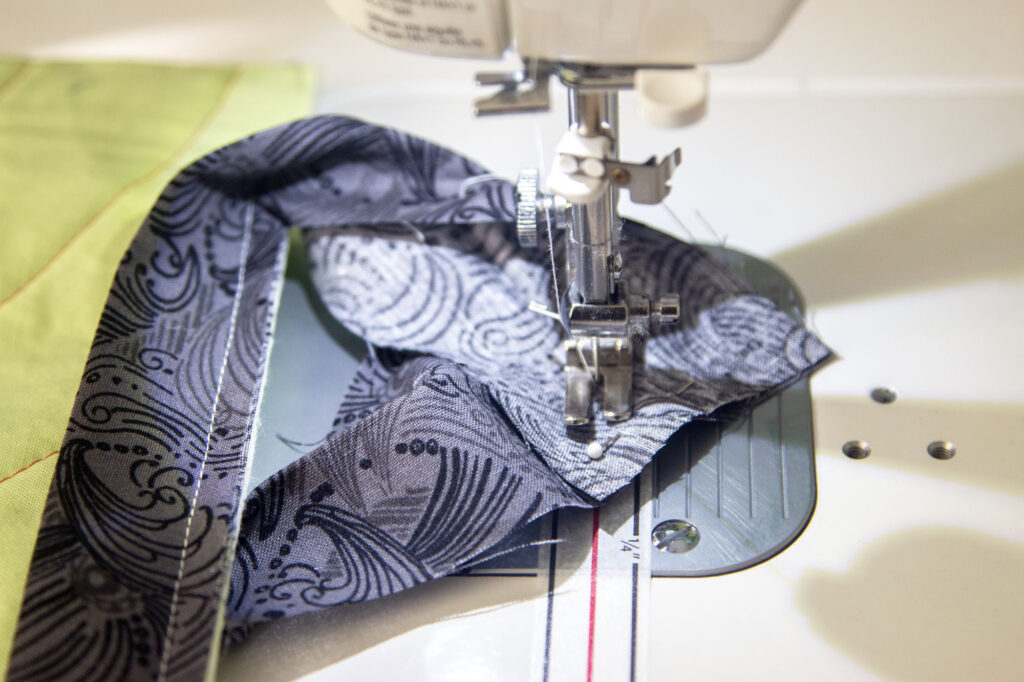
Stitch from corner to corner as you did earlier when joining strips together.
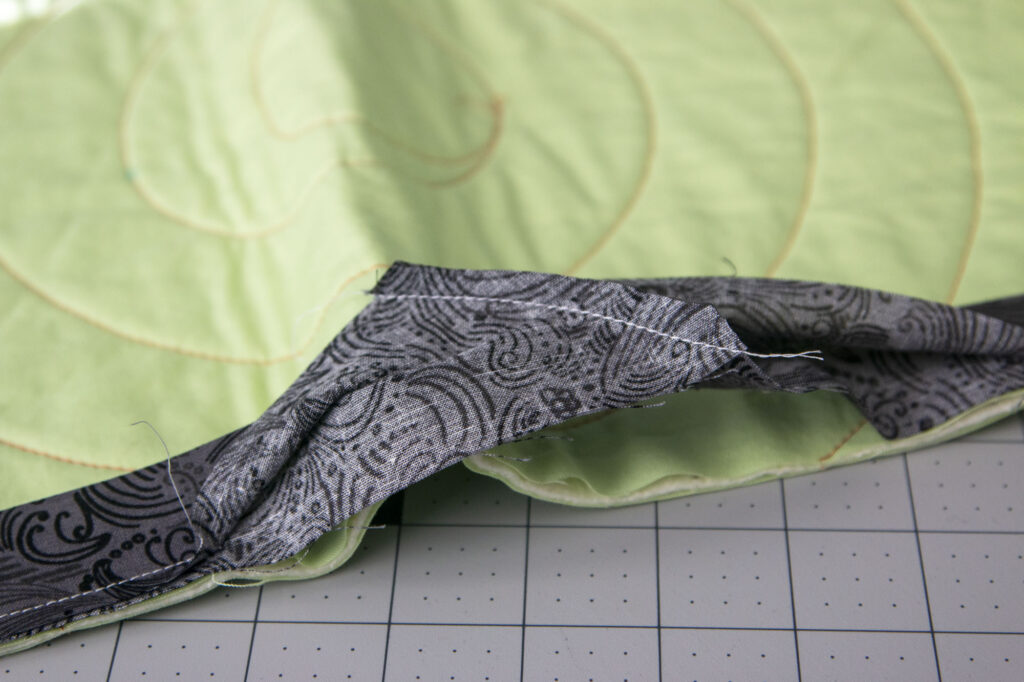
Make sure the binding isn’t twisted and that it lies smoothly along the edge of the quilt, then trim the excess fabric as you did before. Finger press the seam open.
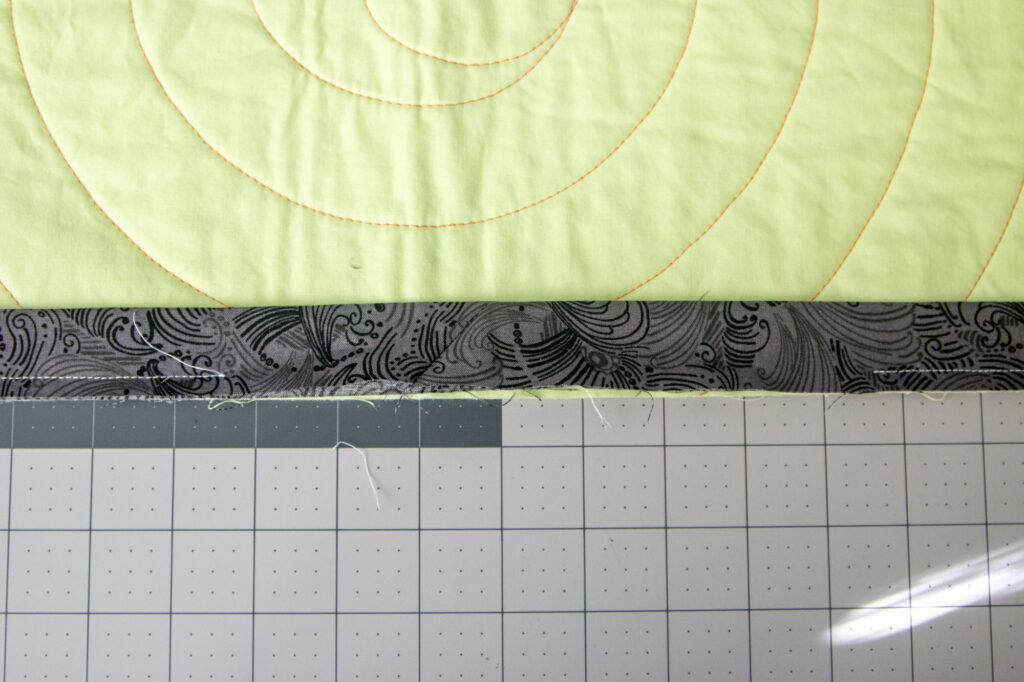
Line the raw edge up with the edge of the quilt. Stitch with the same 1/4″ seam to secure this final portion of the binding to the front of the quilt.
Finish the Binding
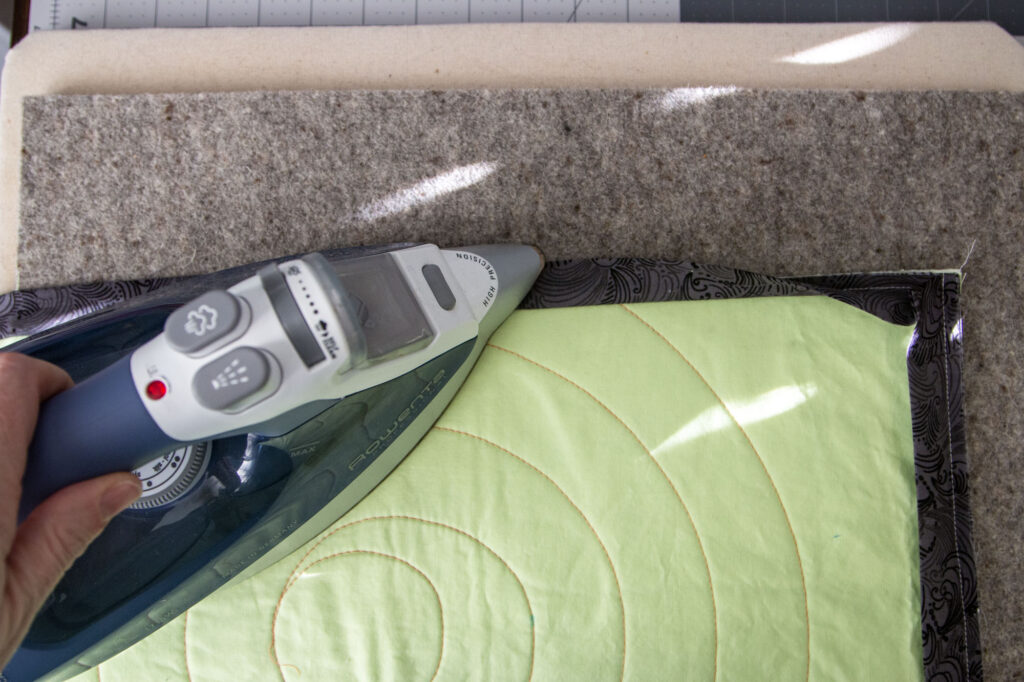
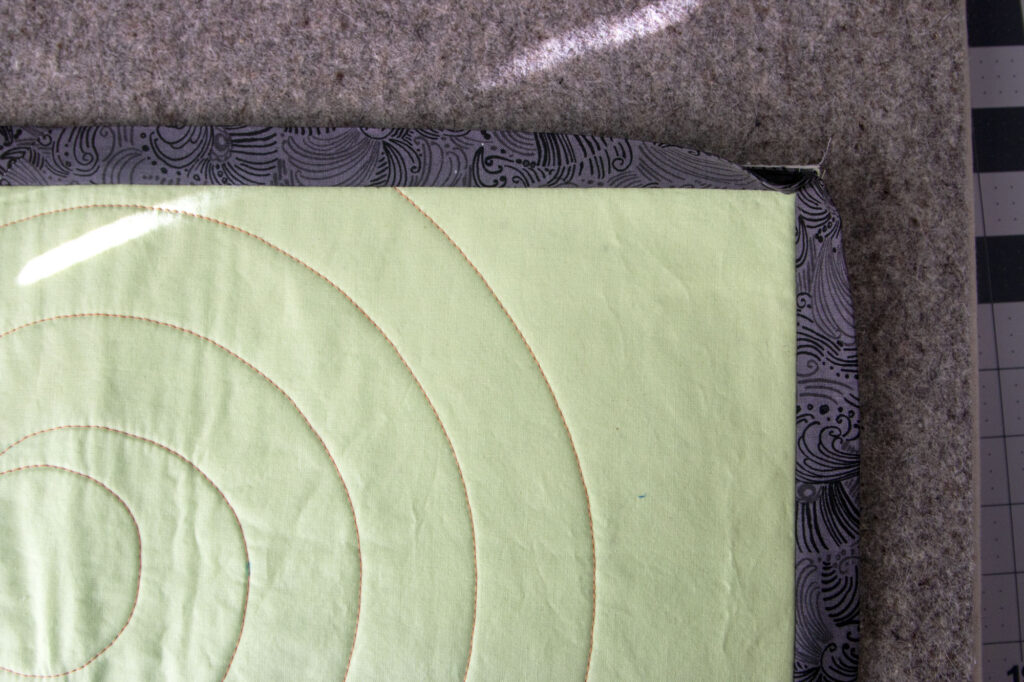
To finish the binding, start by flipping the binding towards the back of the quilt and pressing with a good hot iron. This will really help get a crisp finish! I press all sides, but don’t worry about the corners just yet.
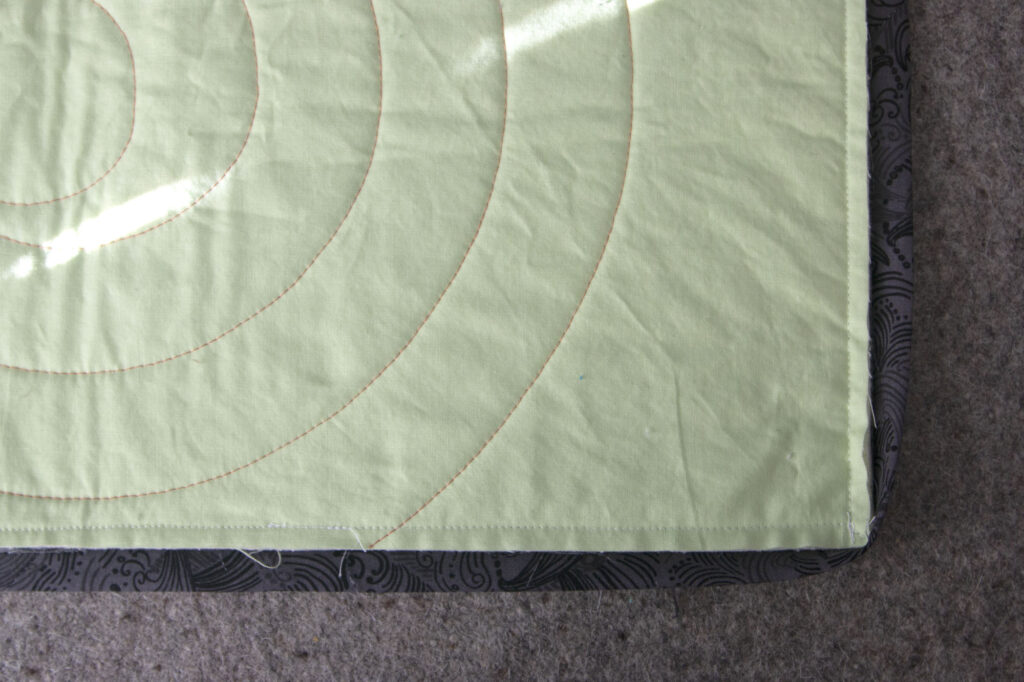
Now, flip the quilt over to the back. You can easily see the line of stitching around the edge that you did a moment ago to secure the binding to the front. I use this stitching line as a guide for the next step — basting the binding to the back with glue!
Note 6: If you want to finish the binding by hand instead of machine, this is the place to do it! Simply hand stitch the binding to the backing. When finishing binding by hand, I usually space my stitches ~1/4″ apart. I don’t glue baste, but just fold it over as I go along.
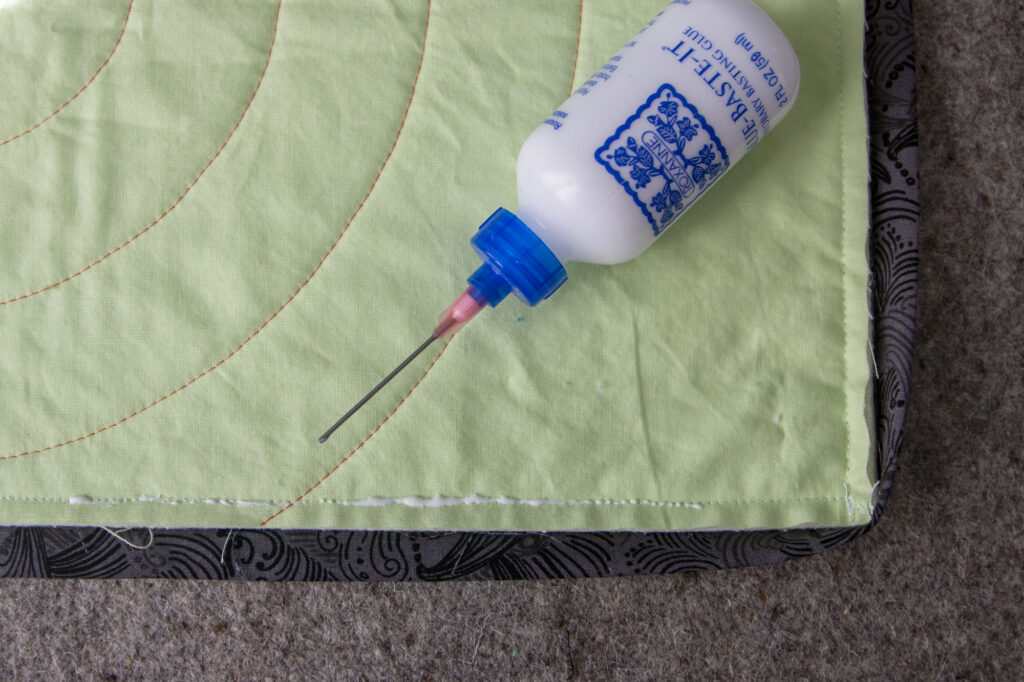
I began glue basting my binding a couple years ago and haven’t looked back since. It’s a great way to keep things super secure, and the glue washes out later on. For more info about the ways I use glue basting, check out this post.
I run the tip of my glue bottle along the stitching line, leaving small lines or beads of glue.
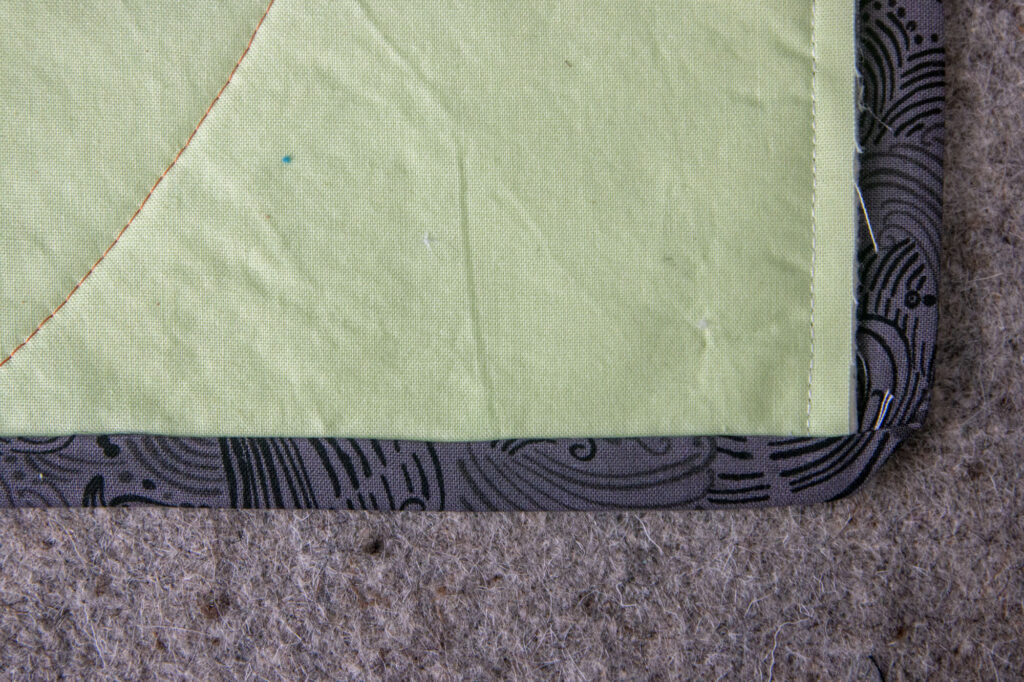
Then, wrap the binding around and press with a hot, DRY iron for a second or two to set the glue. It’s important to make sure the binding extends past the stitching line by just a bit, somewhere between 1/16″ to 1/8″. Voila! The binding is temporarily stuck to the back.
When you reach a corner, continue to fold the binding up as shown above, creating a diagonal folded edge. This will make your mitered corner.
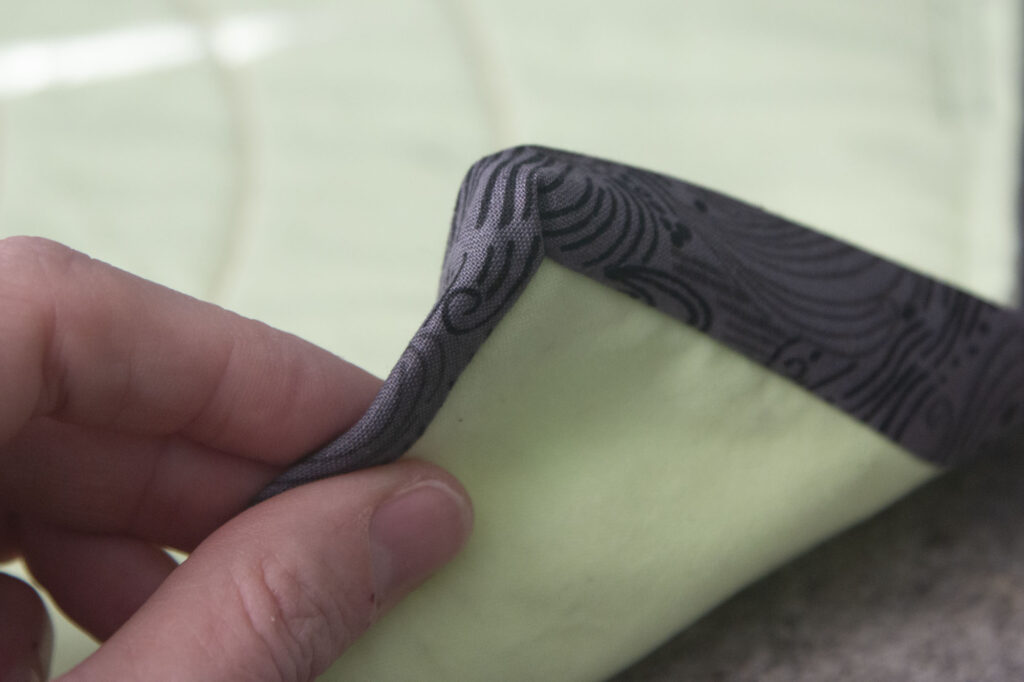
Note 7: Pay attention to the direction of the fold on the front and back of each mitered corner! You can reduce bulk by making sure that you fold the corner on the back in the opposite direction from the front. It was difficult to take a good photo of this, but in the photo above, you can see that the bulk on the front is on the lefthand side. So when I create the miter on the back, I will make sure the bulk is on the opposite (righthand) side.
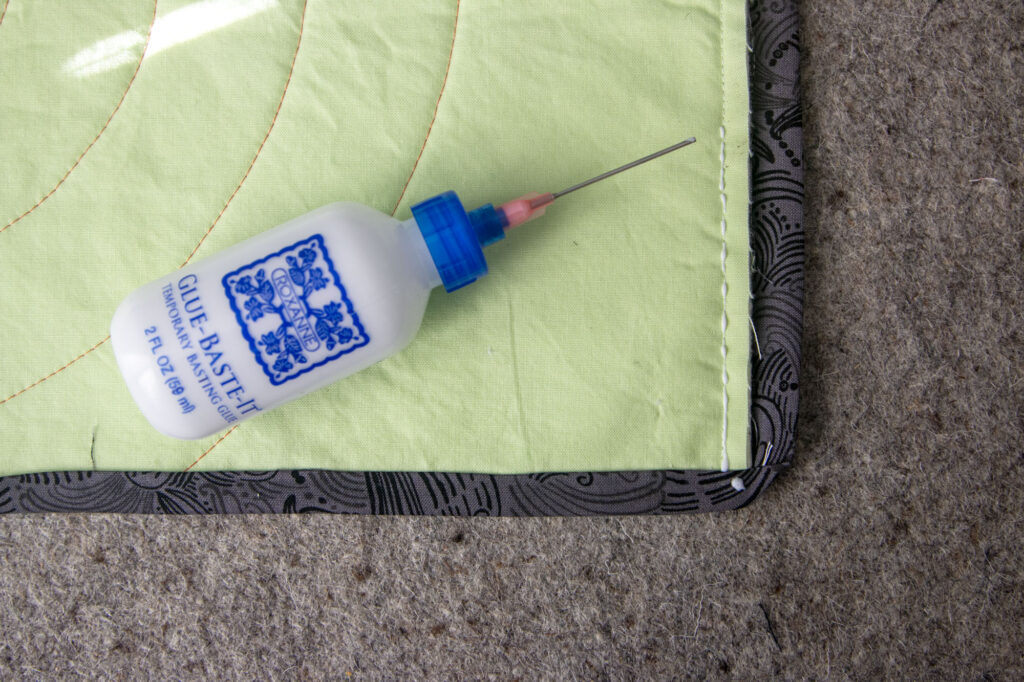
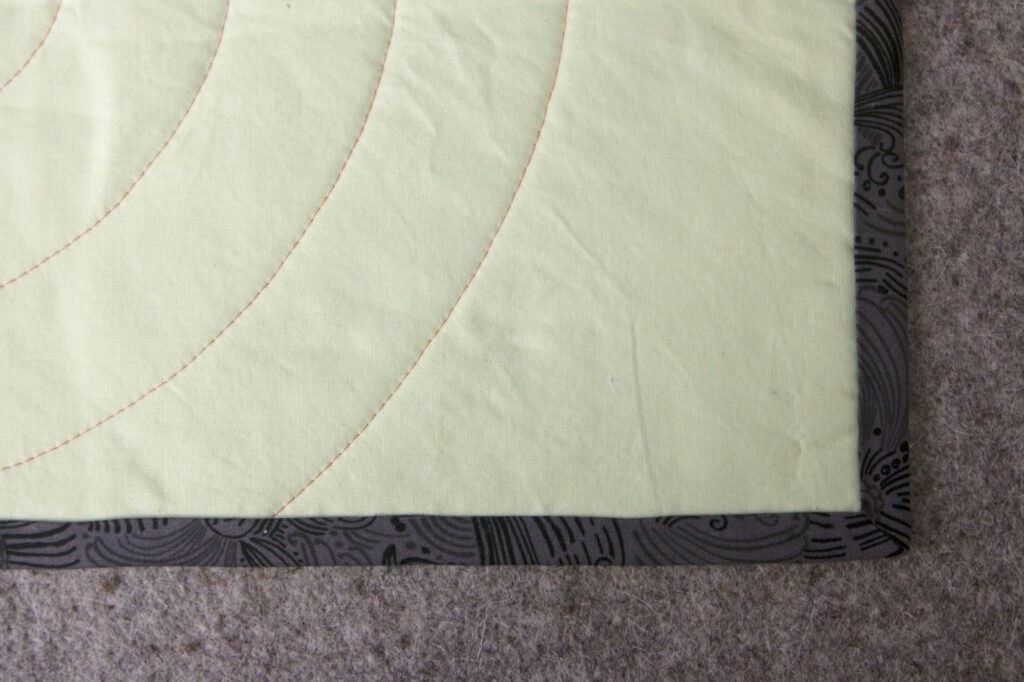
Turn the corner and continue glue basting the binding to the back of your quilt. The angle of the binding at the corner, once folded will make a nicer mitered corner.
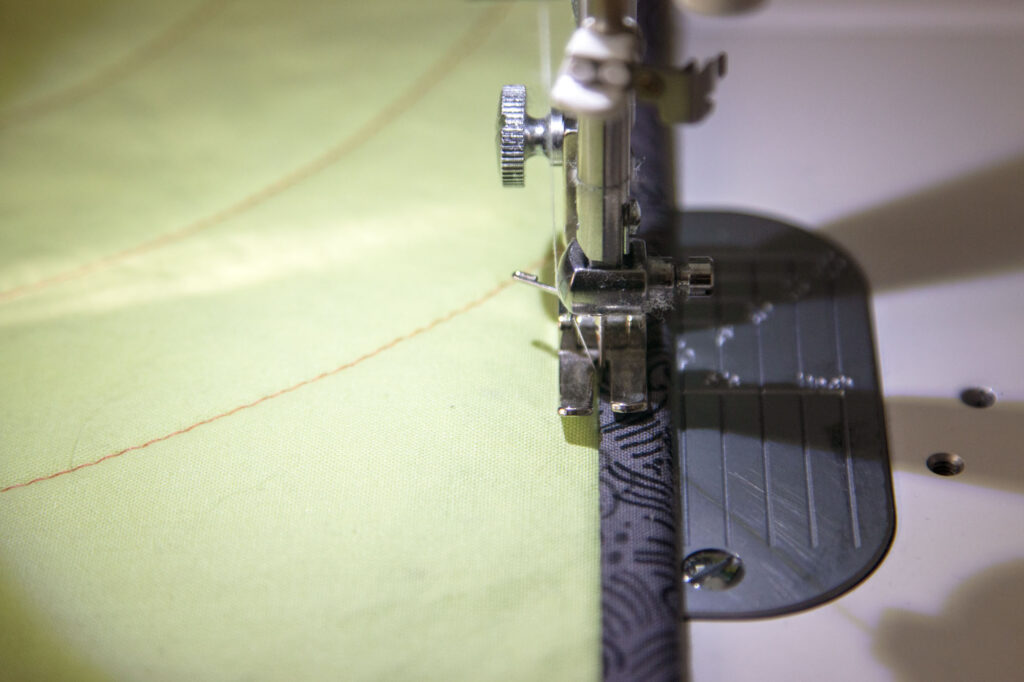
Once you have finished glue basting the binding around the entire perimeter of the back of the quilt, it’s time to flip back to the front! From the FRONT of the quilt, stitch in the ditch where the binding meets the quilt top. This thread will show on the binding on the back, so I usually pick a color that matches the binding fabric; however, you can use thread that matches the quilt top if you prefer.
Stitch in the ditch around the entire perimeter of the quilt, and you are done!
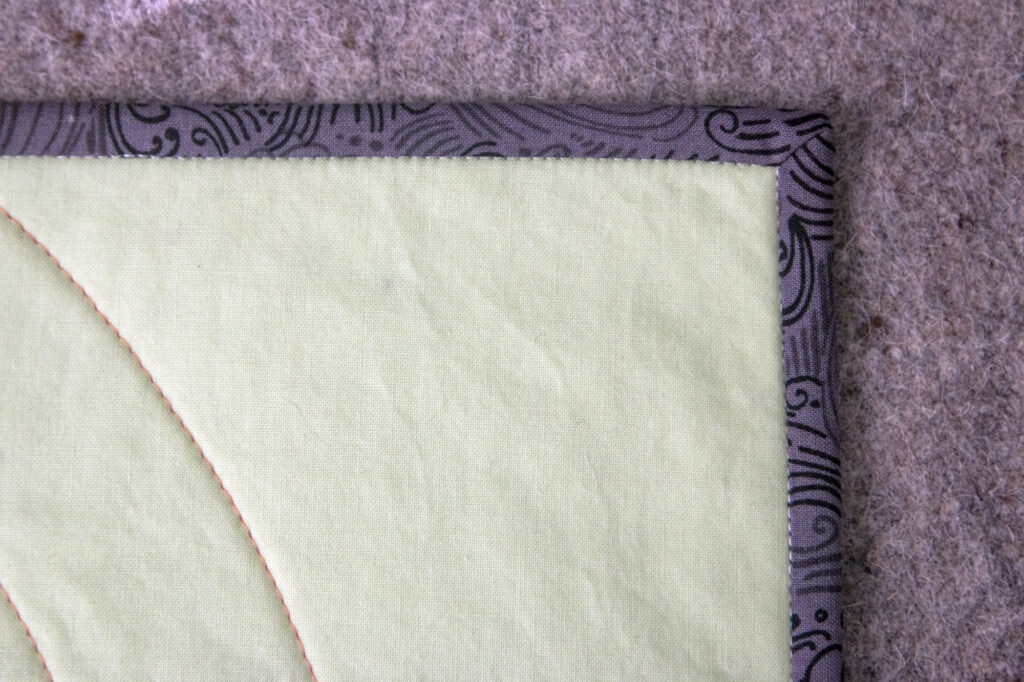
From the front, the stitch line is hard to see — especially when you use a thread that blends with the fabrics instead of white like I used here. This nice, clean look on the front is a major reason that I prefer this binding method!
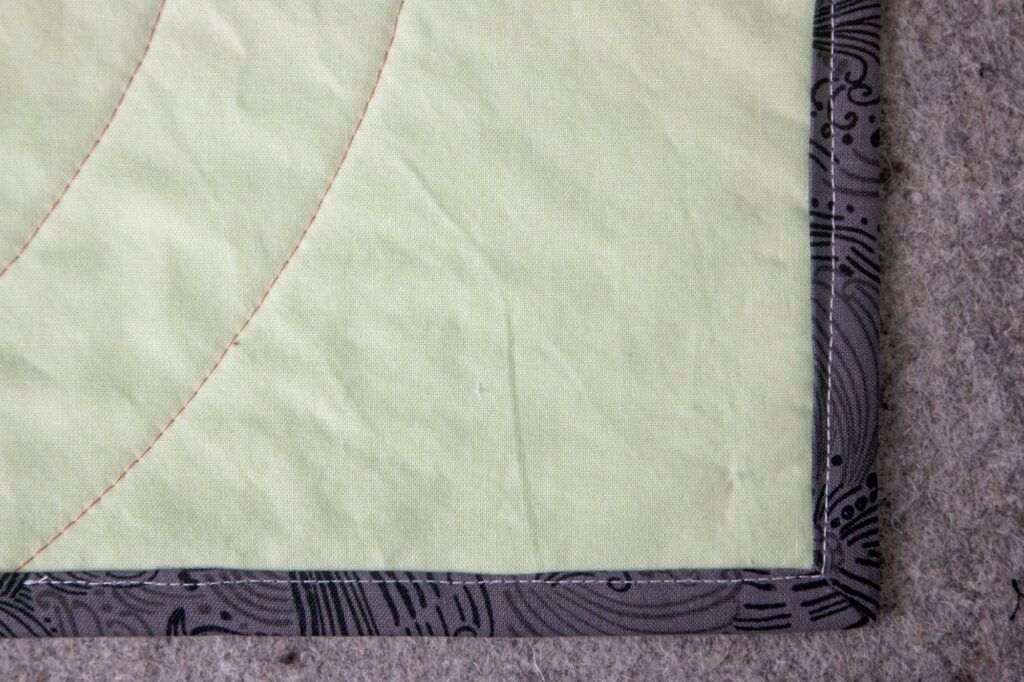
On the back, the stitch line will be visible on the binding. As you can see in my image above, it probably won’t be 100% perfect — your stitching line will probably wobble a bit, and not always be exactly the same distance from the edge of the binding. Being very meticulous during the glue basting process can help this. The more careful you are at keeping things even and straight, the better your result will be. I’ve had some quilts look better than the sample pictured above, and some that look worse. It all depends on how careful I am during the glue basting process.
But as long as you make sure that the binding always covers the stitching line as you baste, that will guarantee that your stitches will catch the binding on the back, and you won’t have to go back and fix gaps.
I hope this tutorial helps you! Enjoy!
