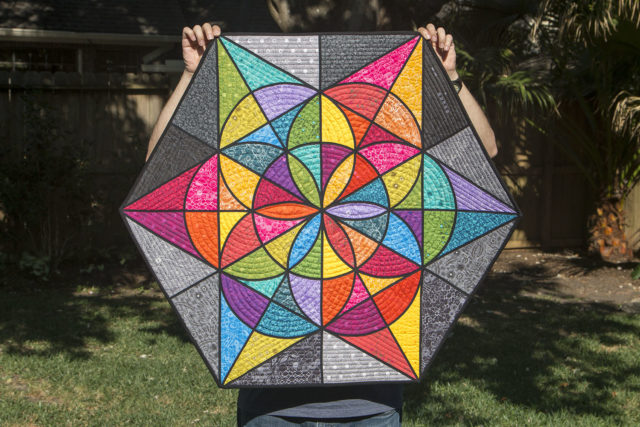
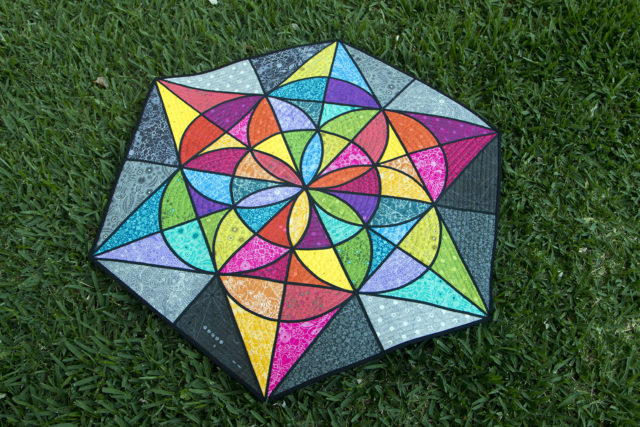
My guild held its Alison Glass challenge at our monthly meeting yesterday, so I can finally reveal what I was working on for the last couple weeks! This is my Geometry of Circles quilt and it just might be my very favorite thing I’ve ever done. I’m so stinkin’ excited about it so the rest of this post will basically be an overshare of my design inspiration and process. You’ve been warned!
Since making my pentagon star mini last year, I’ve been wanting to play around with more “sacred geometry” motifs. This design is called the “seed of life” and I’ve seen it pop up several times. I was most directly inspired by the shapes and color palette of James Wyper, but also by this series of animations that played on Sesame Street way back when I was a kid. (Does anyone else remember these? I was so excited to find them online! And it was funny to realize that as a kid, I certainly didn’t appreciate the fact that the music for those Sesame Street shorts was written by famous composer Philip Glass.)
I really wanted to make this design, but I knew that piecing would be difficult, to say the least. It could definitely be done, but I knew I wouldn’t be able to get the accuracy I would want for a design like this — so I decided to go another route! I’ve admired the work of Sue Bleiweiss for several years now as I’ve seen her pieces pop up at Quilt Festival and QuiltCon. She makes art quilts that involve a lot of layering and a lot of fusible web. I came across her book at Half Price Books a year or so ago, and this finally seemed like the perfect opportunity to try out her techniques!
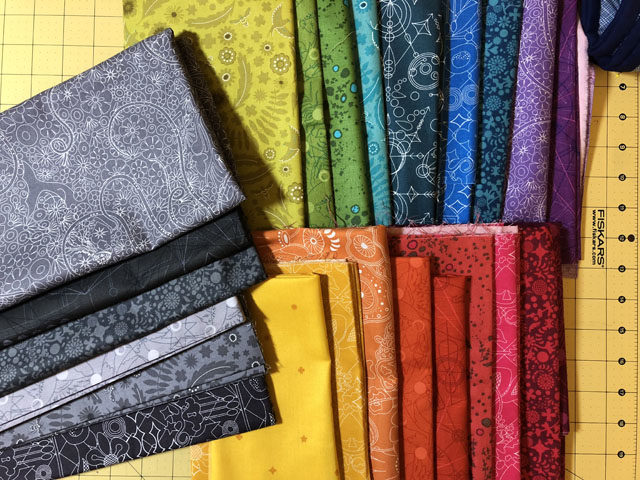
First up was fabric selection, obviously. I used all Alison Glass prints since that was the theme of our guild challenge, and fortunately I have quite a stash of her collections. I chose 8 warm and 8 cool colors, plus 6 shades of gray to use around the edges. Instead of doing everything up front, I did my cutting as I went along so that I could audition different fabrics as I built the design piece by piece.
I drew up my pattern in Illustrator so I could quickly and easily resize it to fit the challenge constraints. We were supposed to stick to 32-40″ per side but since mine is shaped like a hexagon instead of a square or rectangle, I interpreted that to mean that the overall shape should fit within a 40×40″ square, and that’s what I did. There were 13 different pieces, and I printed out templates for each one on freezer paper.
If you look back at the first photo carefully, you’ll notice that there are six diamonds that alternate between warm and cool colors, so I usually worked cutting groups of three pieces at a time — first the warm, then the cool. I would cut out fabric large enough for each template, and apply Mistyfuse to the back of each piece of fabric. This was my first time working with Mistyfuse, which is a very, very lightweight fusible that doesn’t add any bulk to the fabric. It’s SO lightweight, in fact, that it was a bit tricky to get used to — and using a teflon pressing sheet is an absolute must. (I may have accidentally fused bits of web to my iron a time or two.)
Once I had the fusible safely attached, I’d iron my freezer paper template onto one of the pieces, and use that to cut three at a time. It was slow going at first, but as I started fitting pieces together on my cutting mat, I started to get excited.
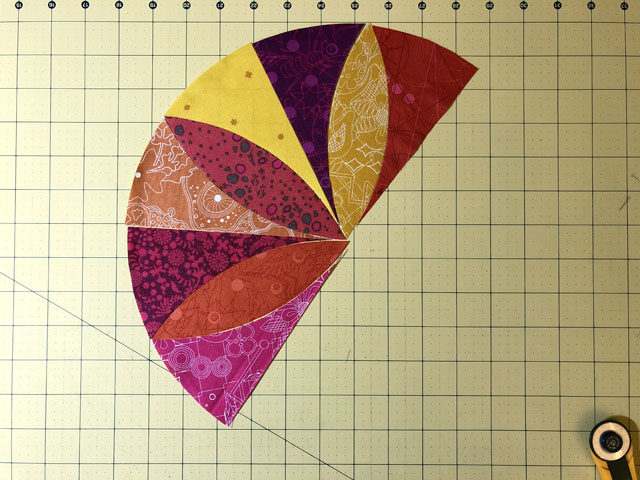
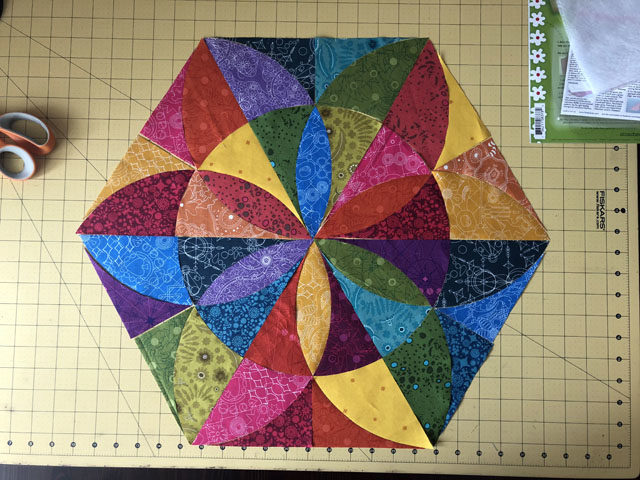
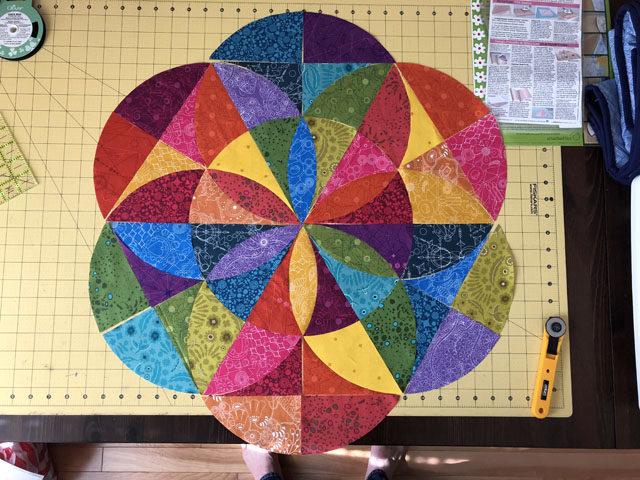
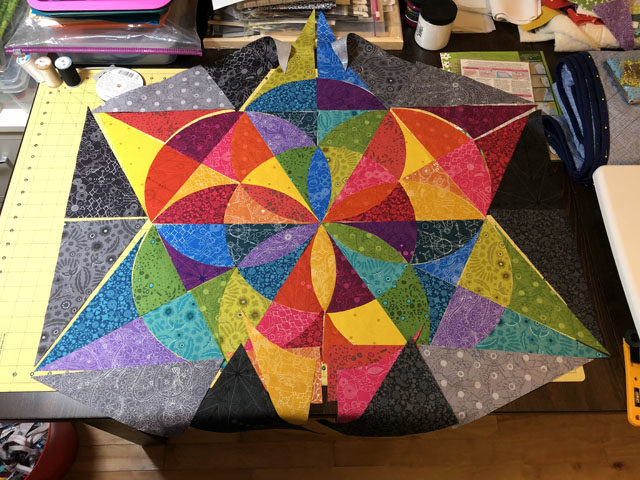
Whew! I finally had all my pieces cut out and it was time to really get to work. I used white muslin as my base since I already had some in my stash — and I knew the color wouldn’t matter since it would all be covered up in the end. After creasing it in both directions to mark the center, I took a deep breath and started fusing my pieces onto the base. Because I’d been so careful my cutting, the pieces came together really well without any additional marking. It was like putting together a fun puzzle!
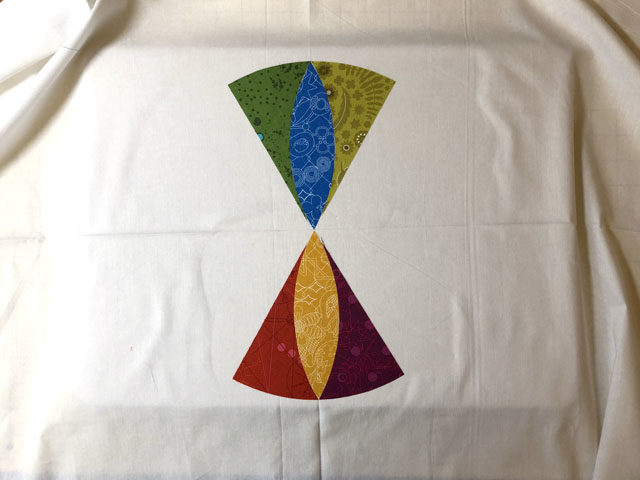
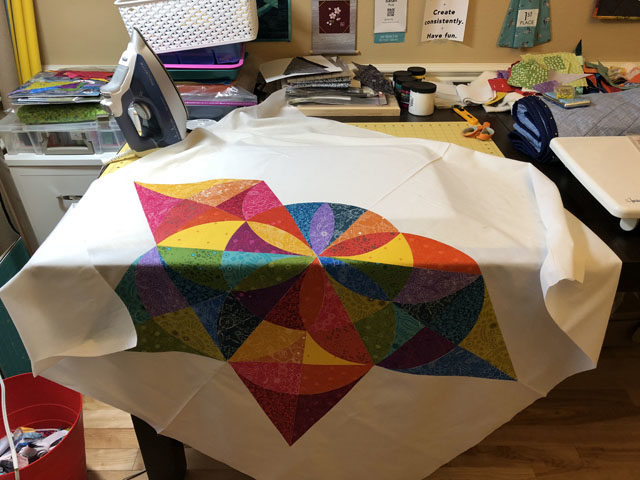
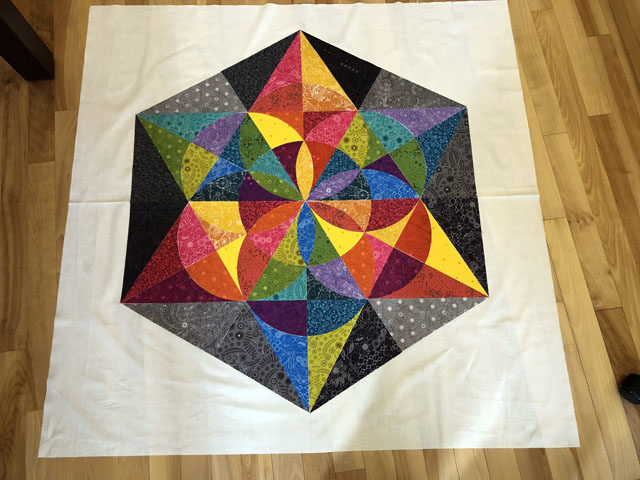
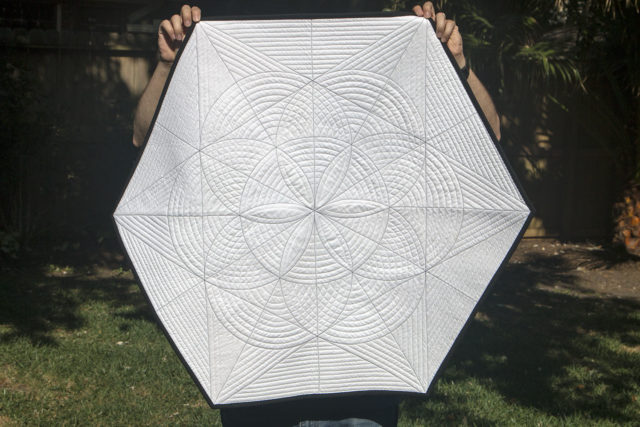
With all the pieces fused down for the top…it was time for quilting! Bleiweiss recommends sandwiching a piece of felt between two pieces of muslin, but I didn’t have felt so I just used regular quilt batting. This worked just fine, of course, and I think the argument for felt is simply that it adds some body and stiffness to an art piece that regular batting doesn’t. I used invisible thread on top and my usual gray Aurifil 50 wt in the bobbin. I used the same white muslin as my backing because when I started, I had planned to cover the back with a “false” backing at the end like Bleiweiss does.
But as I went along, the quilting started to look so cool on the back that I just couldn’t cover it — so I just left it! I wouldn’t usually pick muslin as a backing, but oh well!
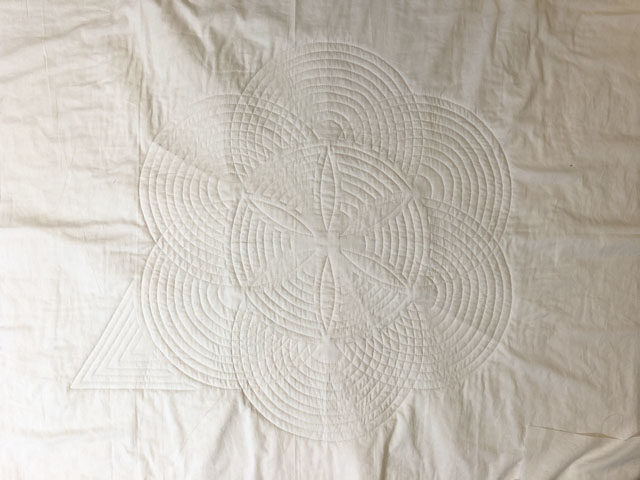
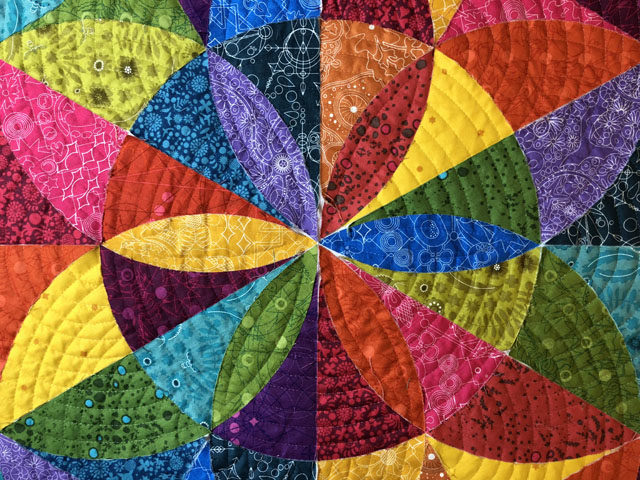
The quilting was all done with my walking foot, and it took an hour here and there over several days to get it all done. There were also some sections that I ripped out and redid because I bobbled a bit too much for my taste, and because I wanted it to be as awesome as I could get! Once that was done, it was finally time to clean things up by outlining each section with black bias tape. You can certainly make this yourself, but I took the easier route and bought fusible 1/4″ black bias tape and have zero regrets about that. The store-bought bias tape saved me a ton of time, and was higher quality than I would have been able to make on my own (especially at a mere 1/4″ width). I used my tiny iron to apply it and even managed to avoid burning myself so it was a success all around. (Ha!)
I had to think carefully about which piece should go down when to make sure my ends all got nicely covered up, and it worked out just as I’d hoped. Although the bias tape was fused, I also sewed each piece down with a line of stitching as I went along.
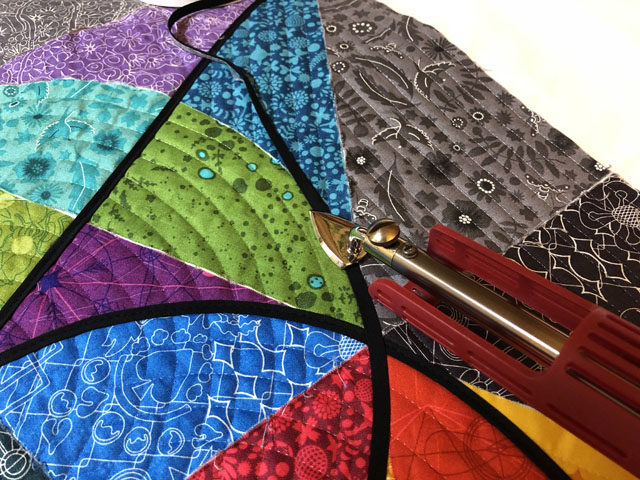
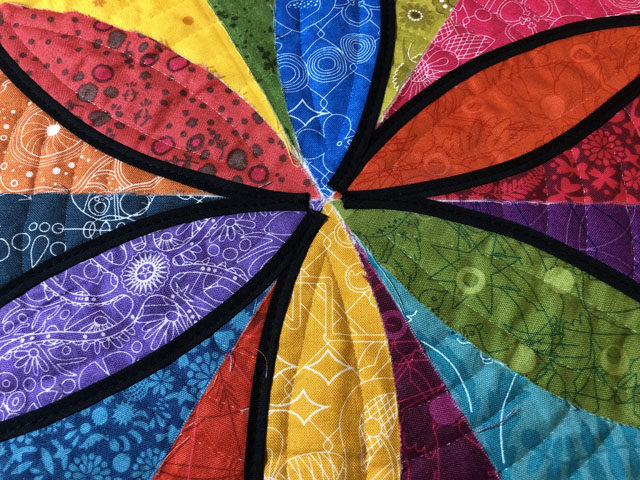
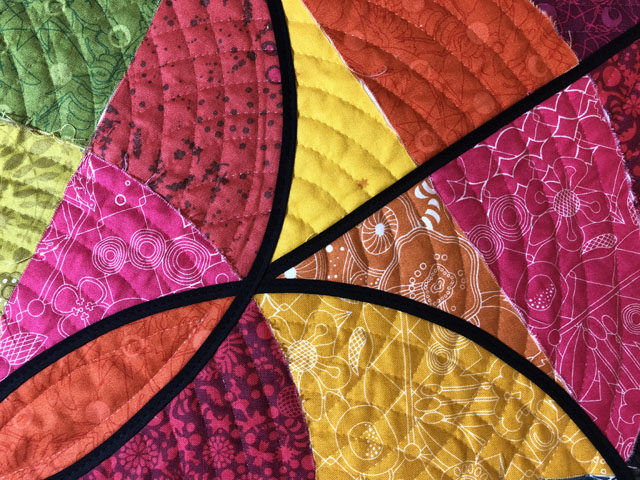
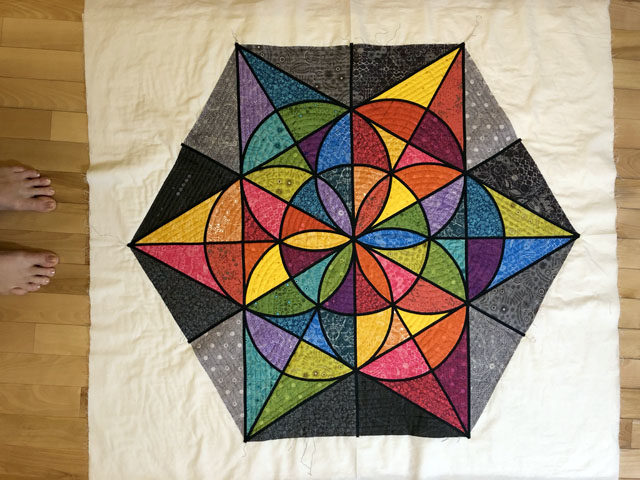
Ahhh! It was so close to being done! From here I made my own solid black binding that I machine stitched to the front and hand stitched to the back. I finished it on Friday morning and our guild meeting was Sunday afternoon so I even had a couple days to spare — ha! There were six entries in the challenge and after voting by both guild members and several people who were in the shop yesterday, I was excited to win 2nd place.
I can’t wait to hang this up in my house and enjoy it…and I can 99% guarantee there will be more geometric designs like this in my future.


 #saroy1sec #1secondev


This is stunning, Sarah! I’m so glad you get to keep it, too. There is no way the quilting could be covered up on the back; I’m glad you decided to let it show. I definitely look forward to seeing where you continue to evolve as you make more of these designs.
Thanks Yvonne! When I first thought about the quilting, it would have looked pretty messy on the back and covering up might have been warranted, but then as I got into it I realized that it wouldn’t look bad after all if I was careful. And in the end I like it so much that I think it’d be a great whole cloth quilt design!
You got second for that? You were robbed. Also, I still can’t believe you were able to quilt that so precisely with a walking foot. I love it. I also think it could look very cool in different color combinations. You should consider writing up the pattern.
I’ll have to think about writing the pattern — believe it or not, I actually hadn’t considered that. Since I relied on another person’s technique, I wonder what the “rules” are on writing a pattern? I did make several modifications though. Hmm.
This is the most beautiful quilt I have ever seen!!!
Thank you Martha!
I think this is my favorite thing you’ve ever done, too! I love the stained glass effect.