
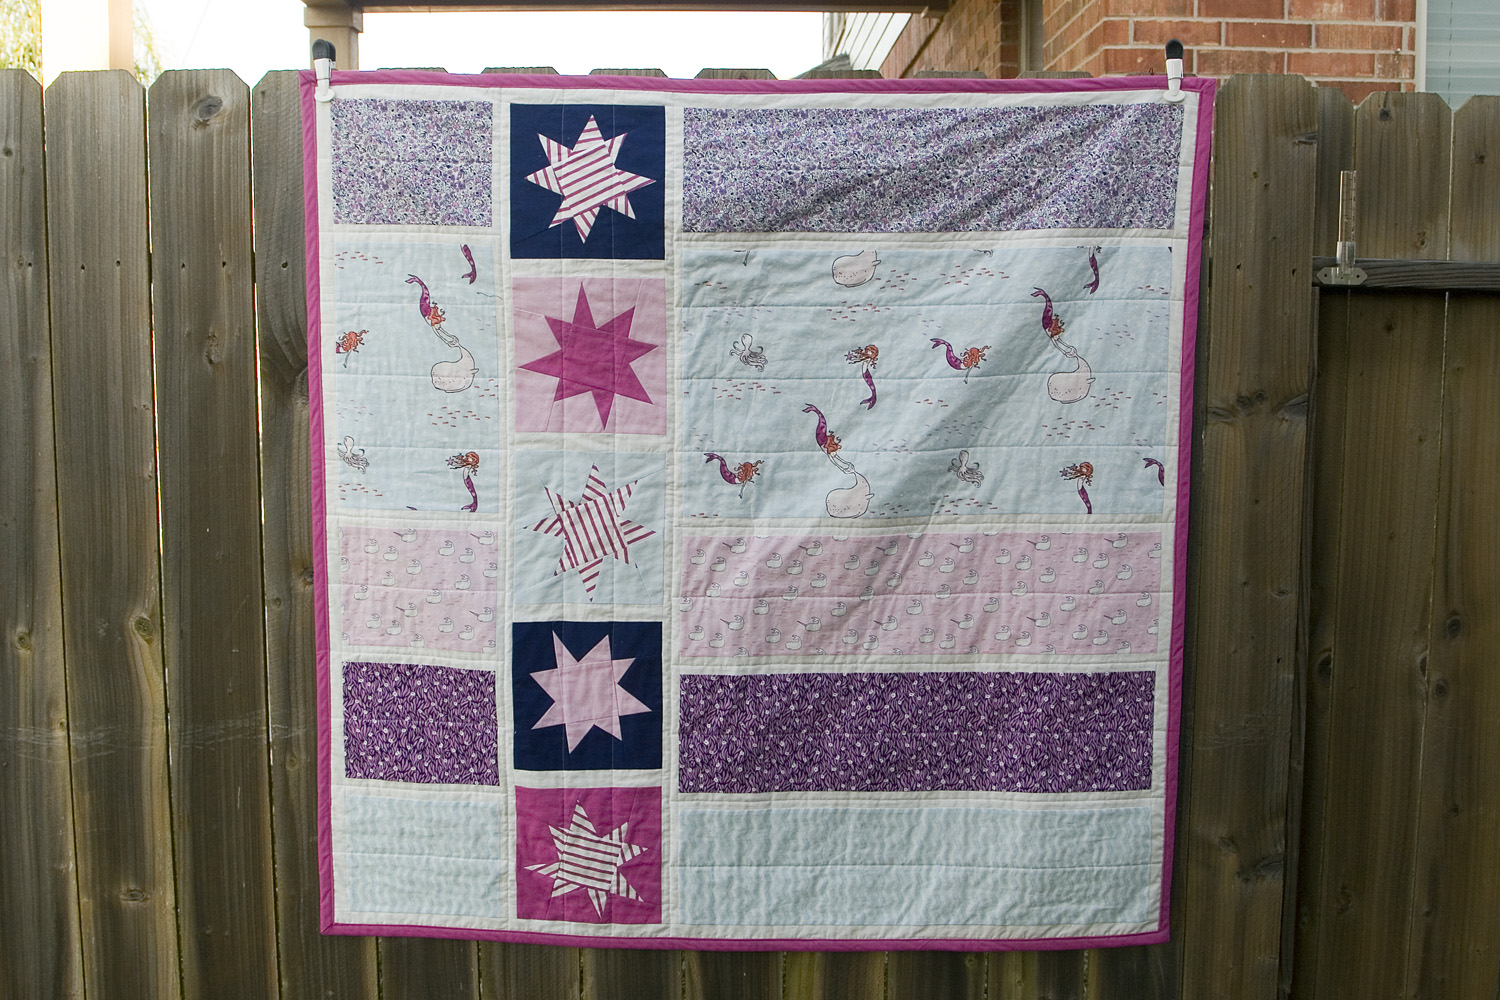
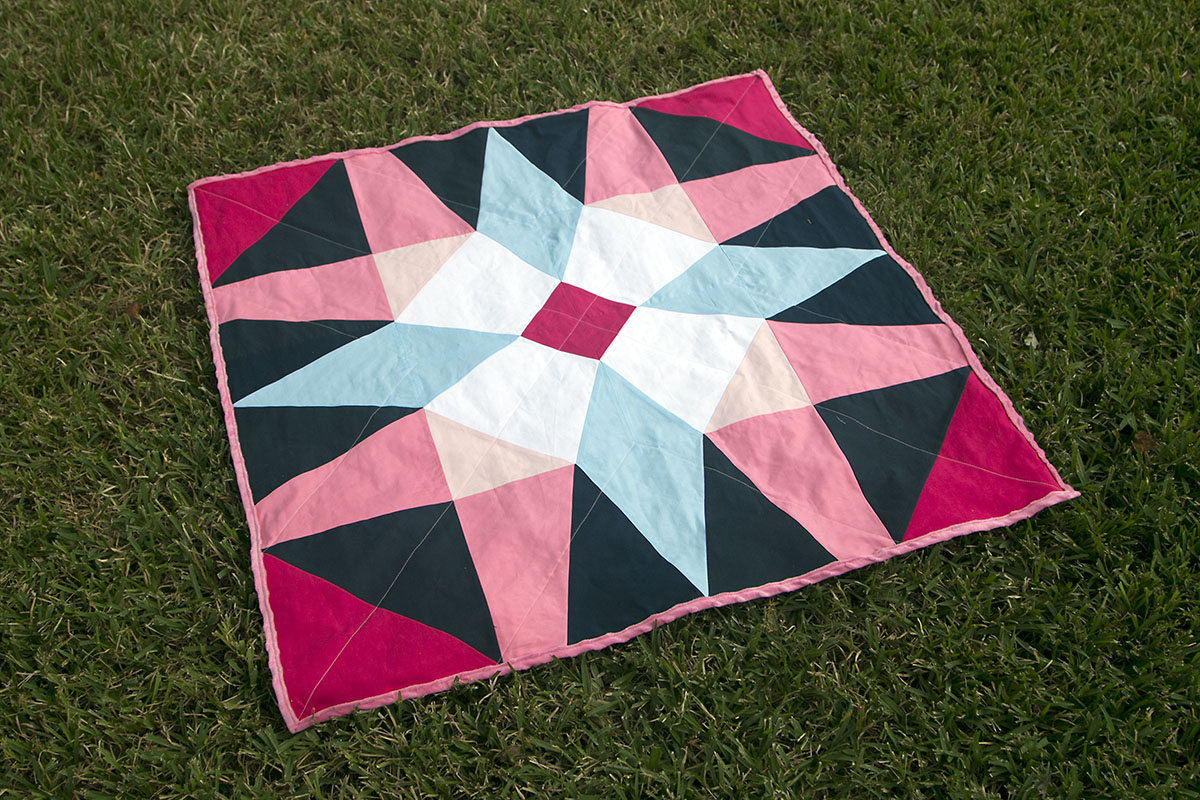
Last week I finished a quilt for Erin’s baby girl, who is due early next month. I am so happy with how it turned out! When I heard that they were using a nautical theme for the nursery I immediately thought of Sarah Jane’s Out to Sea fabric collection, which I had admired when it first came out in 2012. And when I heard mention of pink and navy as colors, I knew it was meant to be. For the layout, I drew inspiration from several other places — this colorblock quilt, this wonky star quilt (using the same fabric collection), and this wonky star block tutorial.

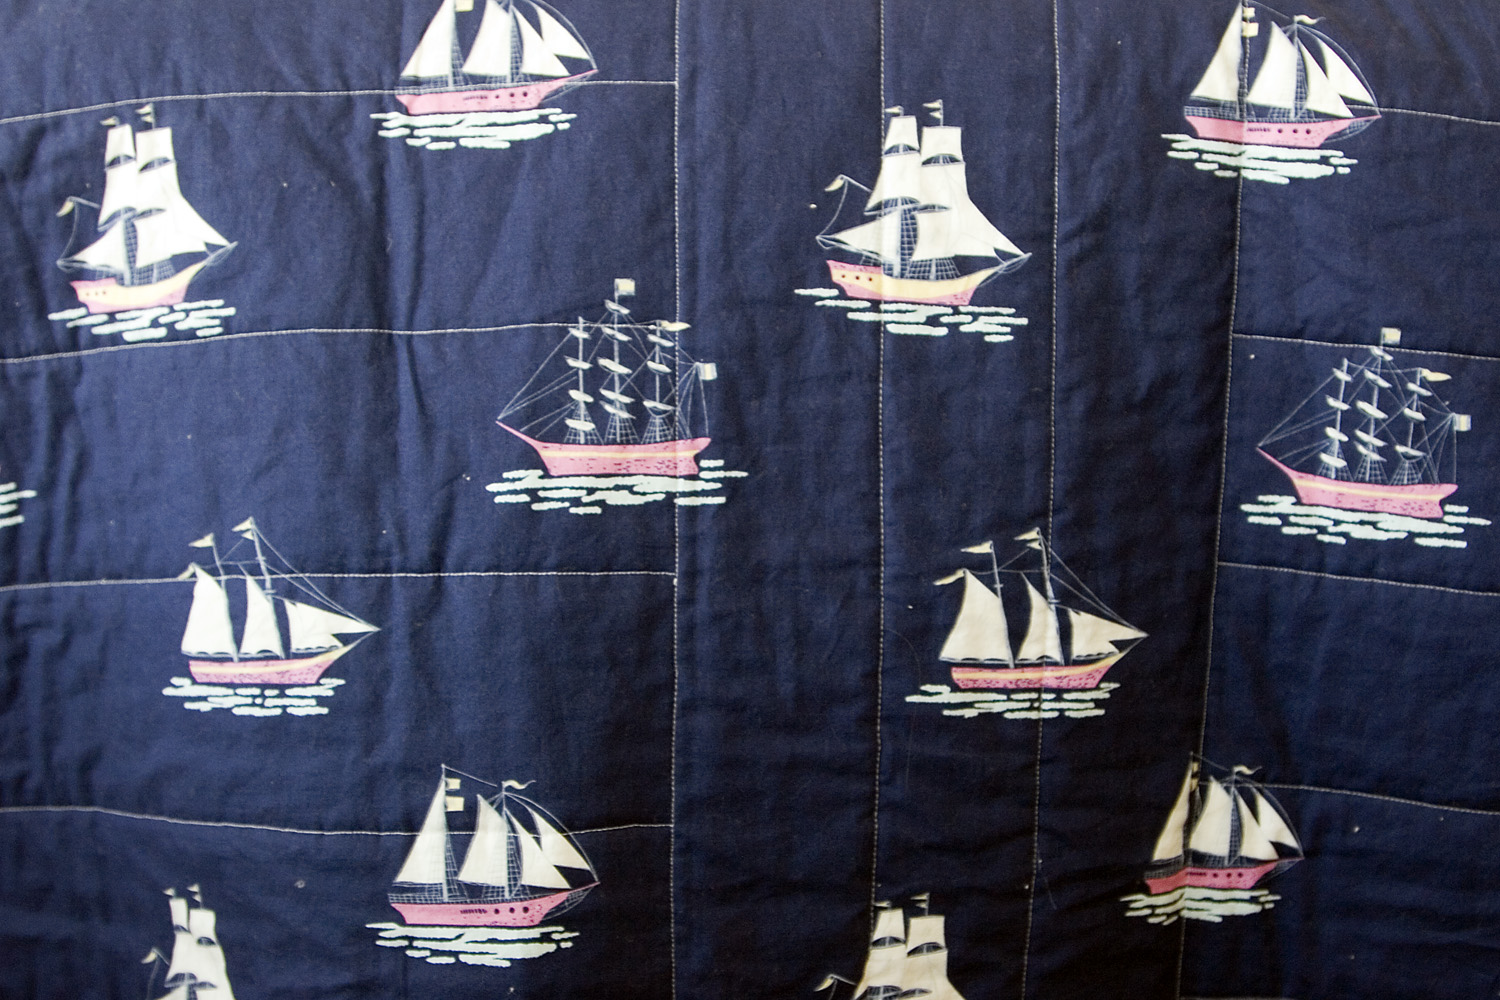
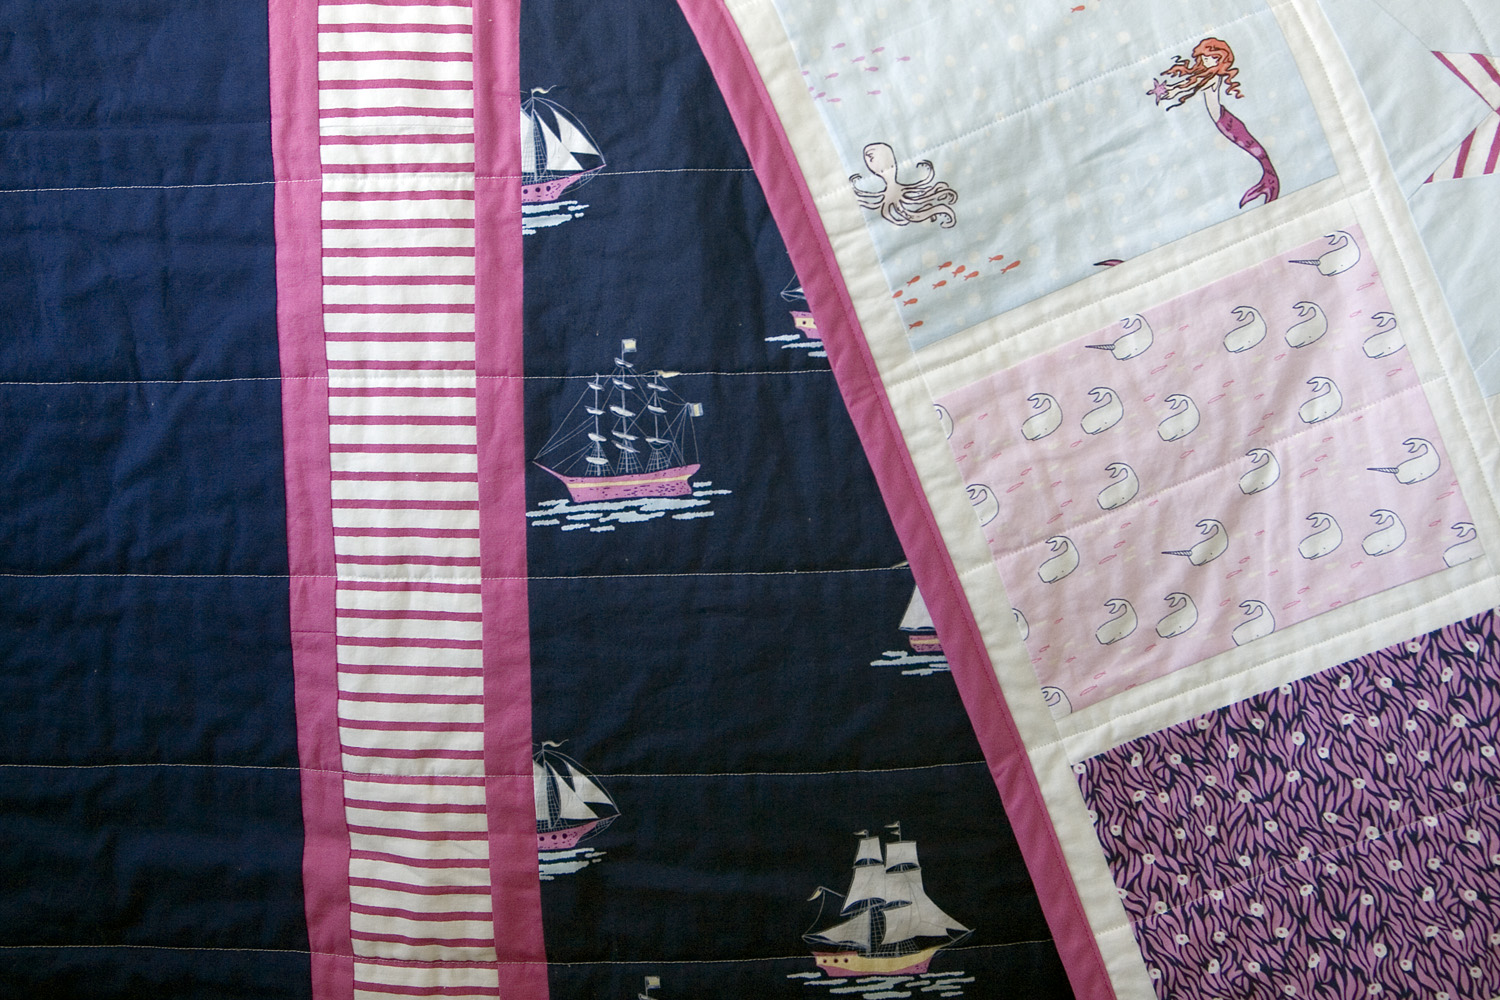
This is also the first time I’ve ever done a pieced back, instead of just using a single fabric pattern for the whole thing. I like it! It’s a neat way to add some interest to the back while not making it as complicated as the front, and in this case I like the contrast between the dark back and light front.

My illustration of the final layout
I imported small photos of each fabric into Illustrator and started playing around with shapes and layouts until I got something I was happy with. The final size of this quilt is ~48″ x 48″ so once I had my drawing to scale, I was able to figure out how much of each fabric I needed to order. The final count was:
- 1/4 yard for each of the 4 big stripes on the front
- 1/2 yard of the light blue with whales and mermaids
- 1/4 yard of the pink stripe
- 1.5 yards of the navy blue ship pattern
- 1/2 yard of the solid pink (which I used primarily for binding)
- 1/2 yard of the solid navy
- 1/4 yard of solid light pink and light blue
Whew! It was a lot of different fabrics, but the end result is totally worth it.

The most time-consuming part of piecing the front were the wonky stars, but even with all the pieces that went into that, they came together pretty quickly. It definitely helped that I didn’t have to be exact, since the whole idea of a wonky star is that they’re not perfect. I finished piecing the entire front and back while Jose’s mom was in town a couple weeks ago, so with her around to keep an eye on Emma, I was able to do all of that in only a few days.
Once she left though, I still had to baste it, baste it and bind it. Once the piecing is finished I always feel like the rest will go quickly, but of course those three things take a lot of work too. Basting wasn’t a big deal — thanks to my trusty basting spray, which I discovered back when I was making the zig zag star quilt for Erin’s first baby! I got all the quilting done in a weekend since I used a pretty simple pattern of horizontal and vertical lines. I tested a few different thread color options on some scrap fabric because I was worried white thread on the back would be too bright, but in the end, I decided to just go with it and it looks just fine.
I also decided to try using my walking foot again now that I have a new sewing machine — but unfortunately, I had the same issues with it that I’ve had in the past! The whole idea of a walking foot is that it’s supposed to help feed the quilt through the machine because it has feet that pull on the top layer of fabric along with the feed dogs on the sewing machine itself. But I have always had issues keeping the stitch length consistent using a walking foot. I suspect it has something to do with the weight of the quilt, and that perhaps I’m not supporting all of the excess fabric properly as I feed it through the machine? Or maybe it’s just a cheap foot and I need to buy a higher quality one? Still, I find that I get much better results just using my standard machine foot so I eventually switched back to that.
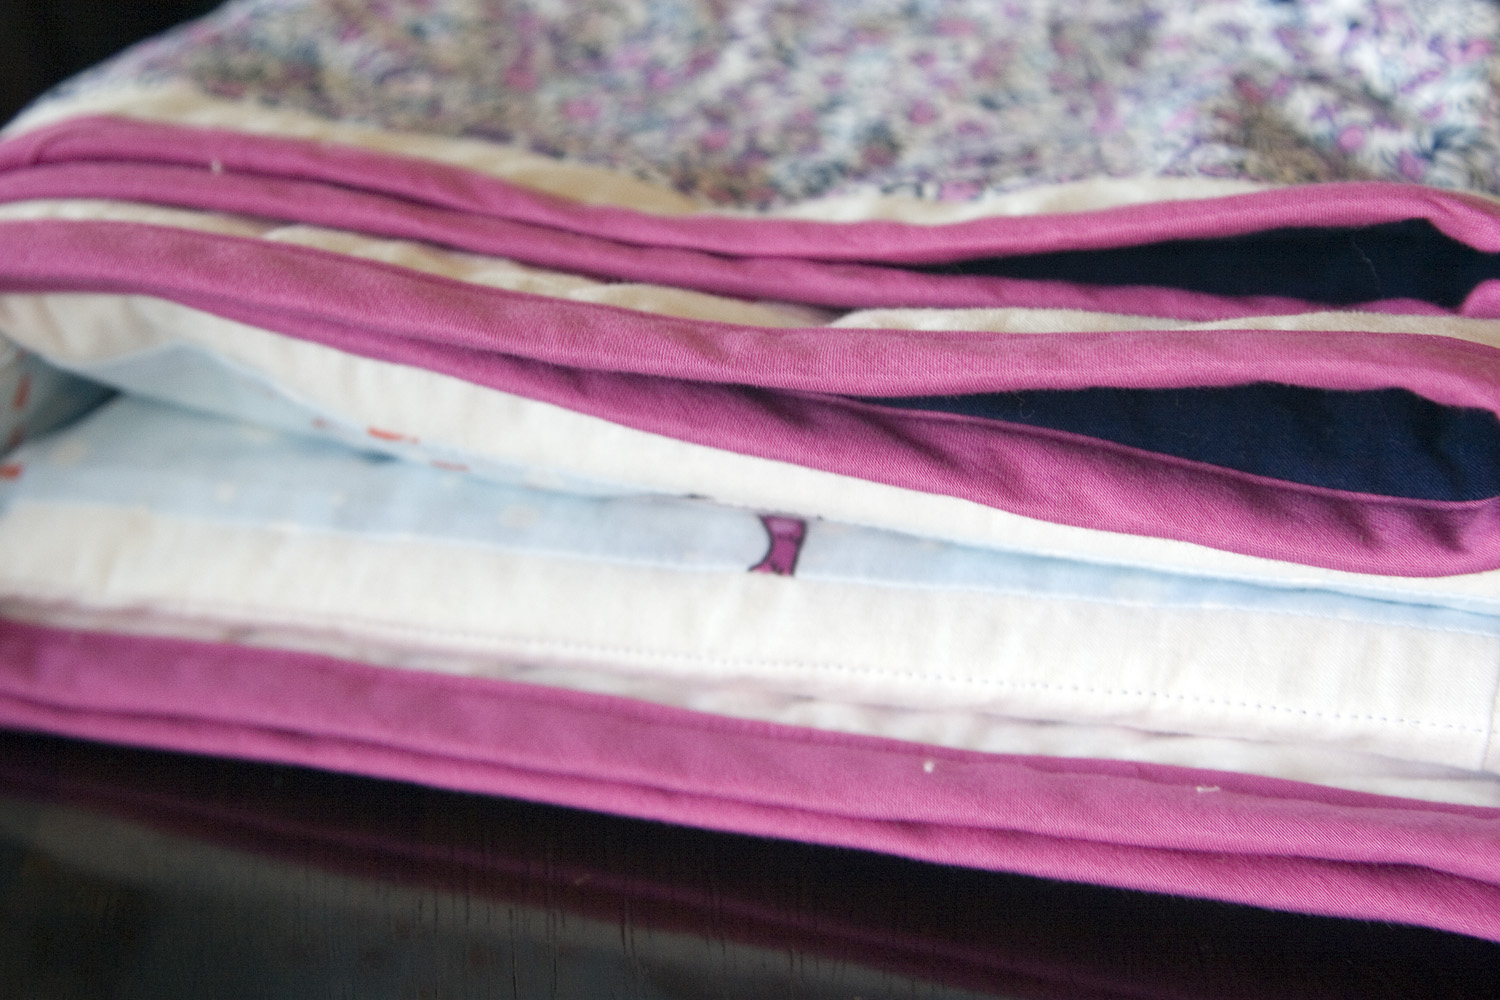
Binding proved to be my nemesis, as usual. I suppose it would be perfect if I hand stitched the binding like traditional quilters do, but who’s got time for that? So I machine stitch the binding, and end up with a somewhat less than perfect result. Still, I’m happy to report that each time I bind a quilt it does get a little bit easier. This time, after reading several more unsatisfying tutorials and then spending some time pondering it myself, I may have stumbled upon a new method that fits my requirements. I tried it out this time with good results — I only had to fix three areas, which believe it or not is an improvement from previous binding attempts!
I really love this one and wouldn’t change a thing about the fabrics or patterns. This is the first time I’ve used fabrics from a single collection and it’s so nice to see how well they all work together (which of course is the whole idea behind a collection in the first place). I can’t wait to make another quilt!


 #saroy1sec #1secondev


Thanks again Sarah, I am so obsessed with it!!!
Your quilts get more amazingly awesome with each one!
Love this! I think it maybe my favorite of yours so far.
Thanks Becca & Jen! I really love this one too. It gives the triangle quilt I made for Emma a run for its money in terms of which one I’d call my favorite.
I love the wonky stars and the sailing ships on the back! Sorry to hear your problems with the walking foot and the binding. I hope that you’ve since had better luck. However, I’m sure this is already a treasured item for its little owner!